
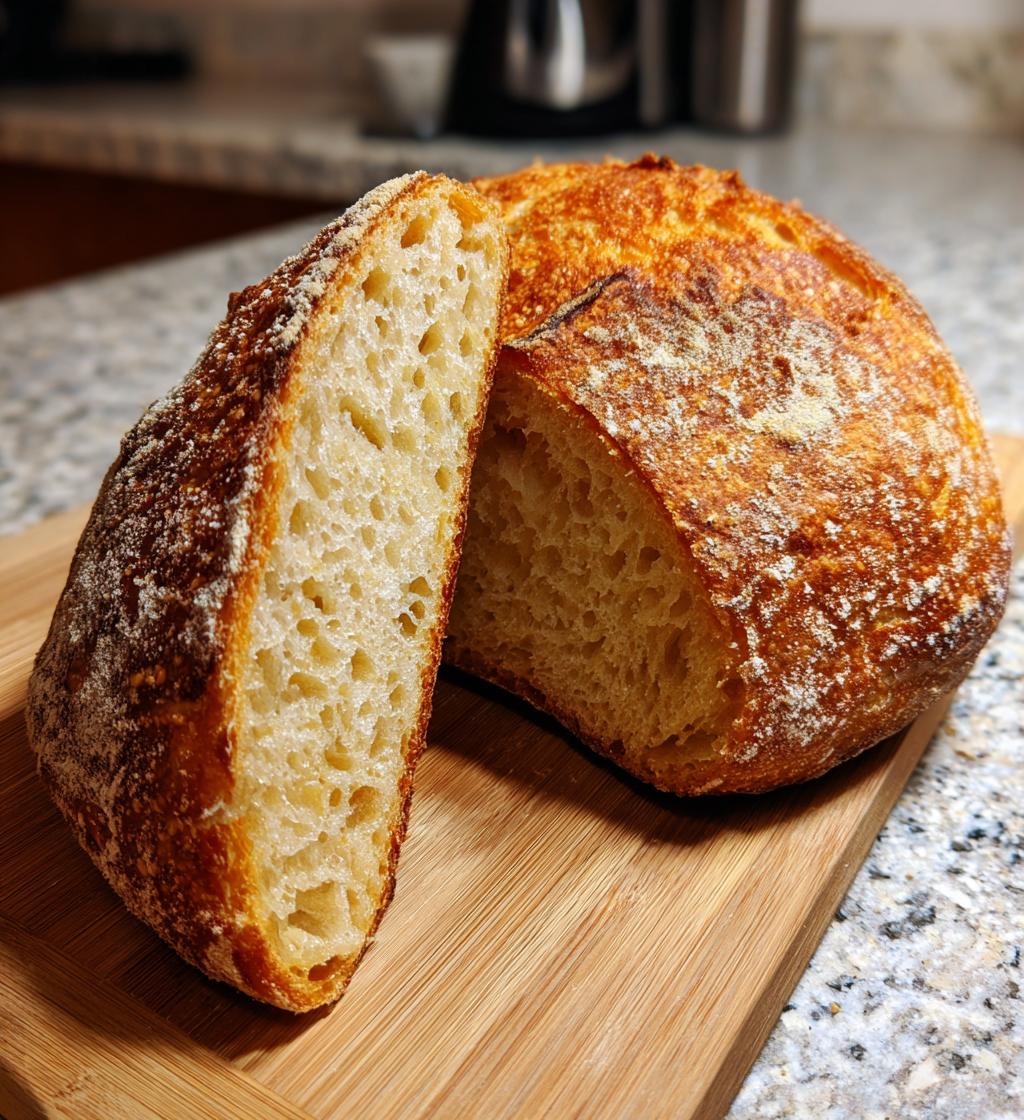
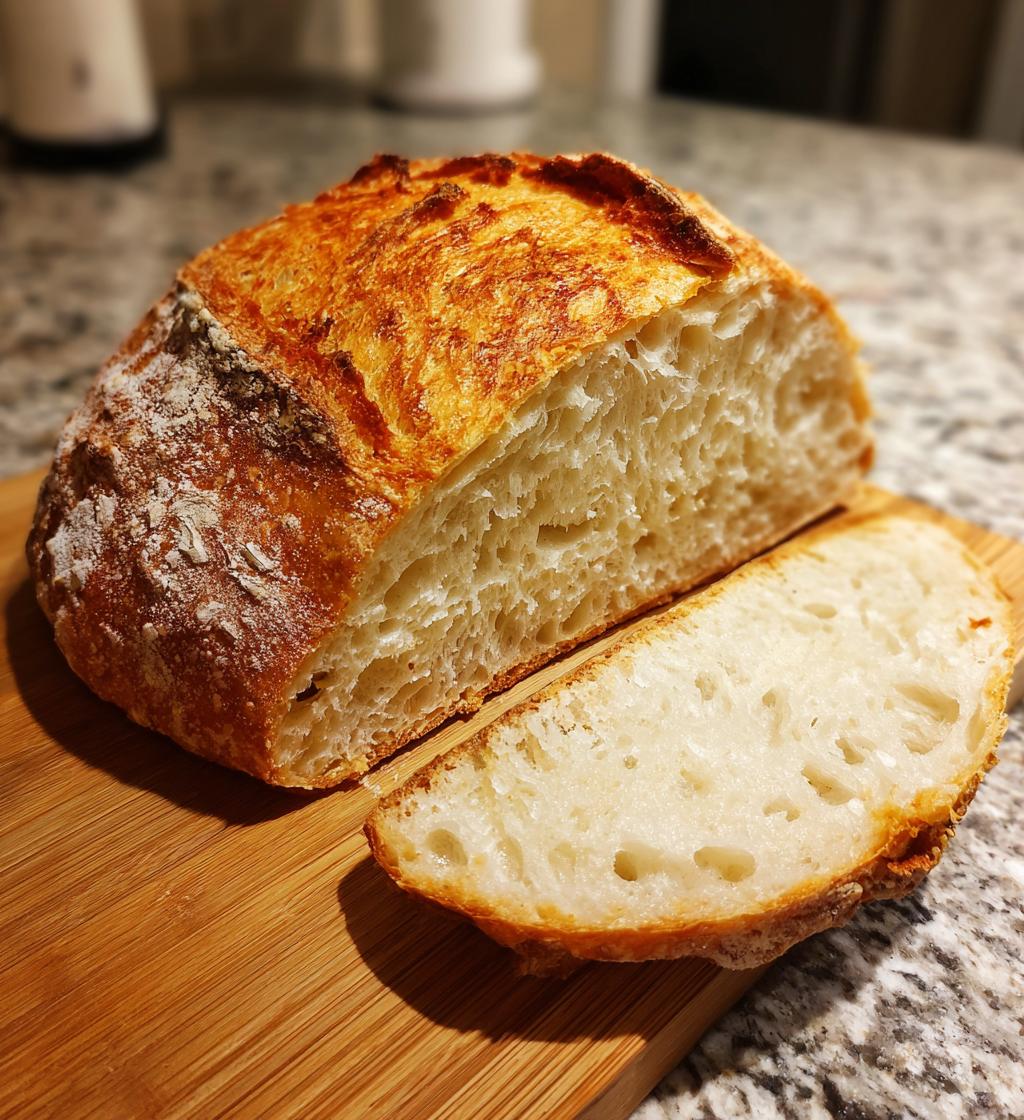
Oh, let me tell you about my love for *sourdough bread*! There’s something magical about the process of making it at home—the way the dough transforms and the delightful aroma that fills your kitchen as it bakes. This bread is all about that crispy crust and chewy interior, which, trust me, is absolute perfection when you take that first warm slice. I remember the first time I pulled a loaf out of the oven, the steam swirling around me, and I just couldn’t wait to slather it with some butter. Yum!
Making sourdough is a bit of a journey, but it’s so rewarding! You get to nurture your own sourdough starter, which is like a pet that you feed and care for. The best part? The flavor! It’s tangy and complex, and each loaf you make will be a little different, depending on your environment and how you care for your starter. So, if you’re looking to embark on this delicious adventure with me, grab your apron and let’s dive into the world of homemade sourdough bread!
Ingredients for Sourdough Bread
Getting the ingredients right is crucial for making the best sourdough bread, so let’s be precise! Here’s what you’ll need:
- 500g bread flour: This is the star of the show! Bread flour has a higher protein content, which helps develop that lovely gluten structure, giving your bread its chewy goodness.
- 350ml water: The lifeblood of your dough! Make sure it’s at room temperature—too hot and it can kill your starter, too cold and it won’t activate properly.
- 100g sourdough starter: This is what gives your bread that signature tangy flavor. If you’re nurturing your own starter, make sure it’s bubbly and active before using it!
- 10g salt: Don’t skip the salt! It not only enhances the flavor but also strengthens the gluten structure. Just remember, too much can be overpowering, so be precise!
Trust me, using a kitchen scale for these measurements will make a world of difference! Accurate measurements lead to a perfect loaf every time. Now, let’s get ready to mix it all together and create some magic!
How to Prepare Sourdough Bread
Now, let’s get into the fun part—making your own sourdough bread! I promise, each step brings you closer to that beautiful loaf you’ve been dreaming about. Just follow along, and don’t worry if it feels a bit overwhelming at first; it gets easier with practice!
Mixing the Dough
First things first, grab a large mixing bowl and combine your 500g bread flour and 350ml water. I like to use a wooden spoon or my hands to mix them together until you’ve got a shaggy dough. The goal here is to make sure everything is well combined without any dry flour left. It’s a bit messy, but isn’t that part of the joy of baking? Don’t forget to channel your inner baker and have fun with it!
Adding Starter and Salt
Next up, we’re going to add in the 100g sourdough starter and the 10g salt. This step is super important because the starter is what gives your bread that signature tang and depth of flavor. And the salt? Well, it’s essential for flavor enhancement and it also strengthens the gluten—so it’s a key player in the game! Mix everything together until it forms a cohesive dough. You might need to get your hands in there to really combine it well!
Kneading the Dough
Time to knead! This is where the magic happens. Turn the dough out onto a lightly floured surface and knead it for about 10 minutes. I like to fold it over and push down with the palms of my hands, then turn it a quarter turn and repeat. You’ll know it’s ready when it’s smooth and elastic. Trust me, this step is crucial for developing that lovely gluten structure—just think of all that chewiness waiting for you!
Rising and Folding
Now comes the exciting part—let it rise! Place your dough in a lightly greased bowl and cover it with a damp cloth. Let it rise for *4 hours*, but here’s the fun twist: every hour, give it a gentle fold. This means grabbing one side of the dough, stretching it up, and folding it over itself, like a little dough hug! This technique helps build strength and structure in your bread.
Shaping and Resting
After your dough has risen beautifully, it’s time to shape it! Gently turn it out onto a floured surface and form it into a round or oval shape—whatever floats your boat! Don’t be too rough; you don’t want to deflate all that lovely air you’ve created. Once shaped, let it rest for about *30 minutes*. This resting period is crucial because it allows the gluten to relax, making it easier to bake later on.
Preheating and Baking
Okay, let’s get that oven roaring! Preheat it to *230°C (450°F)*. While it’s warming up, I like to prepare my baking vessel—whether it’s a Dutch oven or a baking stone, make sure it’s nice and hot. Once your oven is ready, carefully place your dough inside and bake for *30-35 minutes* until it’s gloriously golden brown. You can check for doneness by tapping the bottom of the loaf; it should sound hollow. Oh, the smell will be heavenly, and you’ll know you’ve created something truly special!
Tips for Success with Sourdough Bread
Making sourdough bread is such a rewarding adventure, but a few tips can really help you nail it every time! Here are some of my go-to suggestions that I swear by:
- Use a kitchen scale: I can’t stress this enough! Weighing your ingredients ensures accuracy, which is key for consistent results. It’s so much better than guessing with cups—trust me, your bread will thank you!
- Adjust water based on humidity: The amount of water you need can vary depending on the weather. If it’s a humid day, you might need a little less water, while a dry day may require a tad more. Keep an eye on the dough’s consistency; it should be tacky but not overly wet.
- Be patient with your starter: If your sourdough starter isn’t bubbling away like it should, give it a little more time or feed it again. A happy, active starter is crucial for that lovely tang and rise!
- Practice makes perfect: Don’t be discouraged if your first loaf doesn’t turn out exactly as you hoped. Each bake will teach you something new, and soon you’ll be a sourdough pro! Keep experimenting with timings and techniques.
- Let it cool before slicing: I know it’s tempting to dive right in, but letting your loaf cool for at least 30 minutes after baking will help the texture set. If you cut into it too soon, you might end up with a gummy interior!
With these tips, you’ll be well on your way to creating the most delightful sourdough bread. Remember, the journey is just as delightful as the destination, so enjoy every moment of it!
Nutritional Information
Now, let’s talk about the nutritional side of our delicious sourdough bread! While it’s all about that incredible flavor and texture, it’s also nice to know what’s going into our bellies. Here’s the estimated nutritional breakdown per slice:
- Calories: 150
- Fat: 1g
- Saturated Fat: 0g
- Unsaturated Fat: 0g
- Trans Fat: 0g
- Carbohydrates: 30g
- Fiber: 2g
- Protein: 5g
- Sodium: 200mg
- Cholesterol: 0mg
- Sugar: 0g
Keep in mind that these values can vary a bit based on the specific ingredients you use and how big your slices are. But hey, knowing that your homemade sourdough is packed with wholesome goodness makes it all the more satisfying to enjoy! Happy baking and happy munching!
FAQ About Sourdough Bread
Got questions about making your own sourdough bread? Don’t worry, I’ve got you covered! Here are some of the most common questions I hear, along with my answers to help you on your sourdough journey:
How long does it take to make sourdough bread?
Making sourdough bread is a bit of a time commitment, but it’s totally worth it! The entire process, from mixing to baking, usually takes about *4-5 hours*, plus you’ll want to let it cool for at least 30 minutes before slicing. But don’t rush it; good things take time!
Why is my sourdough bread dense?
A dense loaf can be frustrating! It might be due to insufficient kneading, not enough fermentation time, or maybe your sourdough starter wasn’t active enough. Make sure you knead the dough well to develop gluten and give it plenty of time to rise. Patience is key here!
Can I use all-purpose flour instead of bread flour?
You can, but using all-purpose flour may result in a softer loaf with a different texture. Bread flour has more protein, which helps create that lovely chewy crust and structure. If you do use all-purpose flour, consider adding a bit of vital wheat gluten to boost that protein content!
How do I store sourdough bread?
To keep your bread fresh, store it in a paper bag at room temperature. Avoid plastic bags, as they can trap moisture and make the crust soft. If you want to keep it for longer, slice it and freeze the pieces in an airtight container. Just toast or thaw the slices when you’re ready to enjoy them!
What should I do if my sourdough starter isn’t bubbling?
If your starter isn’t bubbling like it should, it might need a little extra love! Make sure you’re feeding it regularly and keeping it at a warm room temperature. If it’s been a while since you last fed it, give it a good feeding and wait a bit longer. Sometimes it just needs a little encouragement!
Can I bake sourdough bread in a regular loaf pan?
Absolutely! While a Dutch oven gives you that beautiful crust, you can definitely use a regular loaf pan. Just keep an eye on the baking time, as it might need a little adjustment. Don’t forget to preheat the pan if you can—adding a bit of steam can really help with that crust!
How do I know when my bread is done baking?
One of my favorite parts! You can tell your bread is done when it’s a gorgeous golden brown and sounds hollow when tapped on the bottom. If you have a thermometer, the internal temperature should be around *90°C (190°F)*. Trust your senses; the smell alone is usually a good indicator!
With these FAQs, I hope you feel more confident in your sourdough adventures! Don’t hesitate to reach out if you have more questions—baking is all about sharing knowledge and love in the kitchen!
Why You’ll Love Sourdough Bread
Oh, where do I even begin? Making sourdough bread is honestly one of the most fulfilling culinary experiences out there! First of all, the flavor is just out of this world. That delightful tang from the fermentation process? It’s like a symphony of taste in every bite! You can really tell the difference between homemade and store-bought—there’s an authenticity and depth that you just can’t replicate.
Now, let’s talk about the health benefits! Sourdough isn’t just delicious; it’s also easier to digest than conventional bread. The fermentation process breaks down gluten and phytic acid, making nutrients more bioavailable source. Plus, it’s got that wonderful complex flavor and texture, with a crispy crust and a chewy interior that keeps you coming back for more. You’re not just baking bread; you’re crafting something wholesome and nourishing!
And let’s not forget about the satisfaction of homemade baking! There’s something incredibly rewarding about nurturing your sourdough starter, watching it bubble and grow, and then transforming it into a beautiful loaf. The smell that fills your kitchen as it bakes? Pure bliss! Plus, every loaf you make is a little masterpiece, unique to your own baking style and environment. You’ll be proud to share your creation with family and friends, and trust me, they’ll be impressed!
So, whether you’re slathering it with butter, making a sandwich, or just enjoying it plain, sourdough bread will elevate your baking game and fill your home with warmth and love. It’s an adventure you won’t want to miss!
Print
Sourdough Bread: 4 Steps to Irresistible Warm Bliss
- Prep Time: 30 minutes
- Cook Time: 35 minutes
- Total Time: 4 hours 30 minutes
- Yield: 1 loaf 1x
- Category: Baking
- Method: Baking
- Cuisine: American
- Diet: Vegetarian
Description
Homemade sourdough bread with a crispy crust and chewy interior.
Ingredients
- 500g bread flour
- 350ml water
- 100g sourdough starter
- 10g salt
Instructions
- Mix the flour and water in a bowl.
- Add the sourdough starter and salt.
- Knead the dough for 10 minutes.
- Let it rise for 4 hours, folding every hour.
- Shape the dough and let it rest for 30 minutes.
- Preheat the oven to 230°C (450°F).
- Bake for 30-35 minutes until golden brown.
Notes
- Use a kitchen scale for accuracy.
- Adjust water based on humidity.
- Let the bread cool before slicing.
Nutrition
- Serving Size: 1 slice
- Calories: 150
- Sugar: 0g
- Sodium: 200mg
- Fat: 1g
- Saturated Fat: 0g
- Unsaturated Fat: 0g
- Trans Fat: 0g
- Carbohydrates: 30g
- Fiber: 2g
- Protein: 5g
- Cholesterol: 0mg
Keywords: sourdough bread, homemade bread, baking