
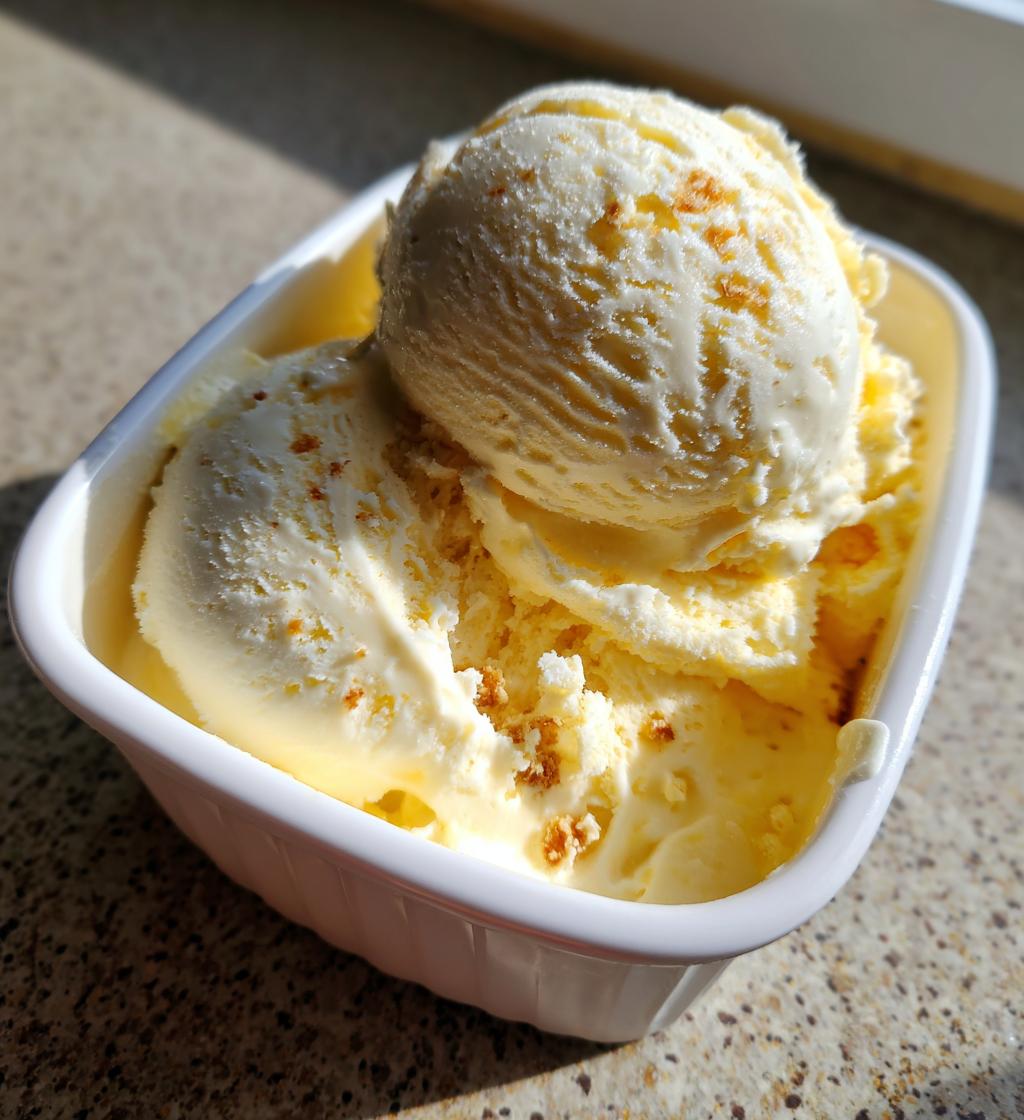
Oh my goodness, let me tell you about the joy of making homemade ice cream! There’s something utterly magical about whipping up your own no churn vanilla ice cream right in your kitchen. You don’t need an ice cream maker, and trust me, it’s so simple you’ll wonder why you didn’t try it sooner! Just a few ingredients come together to create a creamy, dreamy treat that’s perfect for those hot summer days or cozy nights on the couch. The best part? You can customize it any way you like! Picture yourself diving into a bowl of smooth, luscious vanilla ice cream, just bursting with flavor. It’s a scoop of happiness that’s easy to make and even easier to enjoy. So, grab your mixing bowls and let’s get started on this delightful journey to homemade ice cream bliss!
Ingredients List
- 2 cups heavy cream
- 1 cup sweetened condensed milk
- 1 tablespoon vanilla extract
- 1/2 cup milk
How to Prepare No Churn Vanilla Ice Cream
Alright, let’s dive into making this delightful no churn vanilla ice cream! I promise, it’s so easy that even if you’ve never made ice cream before, you’ll feel like a pro by the end. Just follow these simple steps, and you’ll have a delicious treat waiting for you in the freezer!
Step-by-Step Instructions
- First things first, grab a large mixing bowl and whip the heavy cream. You want to beat it until stiff peaks form—this gives your ice cream that luscious, creamy texture. Just imagine how fluffy it’ll be!
- While you whip that cream, take another bowl and mix together the sweetened condensed milk, vanilla extract, and milk. Give it a good stir until everything is well combined. This mixture is going to be the sweet base for your ice cream.
- Now, here’s the fun part! Gently fold the whipped cream into your condensed milk mixture. You want to be gentle here—think of it like a hug! This helps keep all that air in the cream, making your ice cream light and airy. No vigorous mixing here!
- Once it’s all combined, pour the mixture into a loaf pan. Make sure it’s nice and even on top—no one likes lumpy ice cream!
- Cover it up with some plastic wrap or a lid and pop it in the freezer. You’ll want to let it freeze for at least 6 hours or until it’s firm. I recommend making it the night before so it’s ready for you the next day!
And voila! You’re just a few simple steps away from indulging in your very own homemade no churn vanilla ice cream!
Why You’ll Love This Recipe
- Quick and Easy: You can whip up this no churn vanilla ice cream in just 15 minutes of active prep time! Seriously, it’s that simple.
- Super Creamy Texture: The combination of whipped cream and sweetened condensed milk creates an incredibly smooth and creamy ice cream that melts in your mouth.
- No Special Equipment Needed: No ice cream maker? No problem! This recipe is perfect for those of us who love to cook but don’t want to invest in fancy gadgets.
- Customizable: You can easily add your favorite mix-ins or flavors. Want to throw in some chocolate chips or fruit? Go for it! The world is your ice cream oyster.
- Perfect for Anytime: Whether it’s a hot summer day or a cozy movie night, this ice cream is a delightful treat that fits any occasion.
- Family-Friendly: It’s a fun project to make with kids! They’ll love helping out, and who doesn’t enjoy a sweet reward at the end?
Tips for Success
Now, let’s make sure your no churn vanilla ice cream turns out absolutely perfect! Here are some of my favorite tips to elevate your homemade ice cream game:
- Chill Your Bowls: For the best results, chill your mixing bowls and beaters before whipping the cream. A cold bowl helps the cream whip up faster and increases the volume, giving you that delightful texture we all love!
- Use Quality Ingredients: Since this recipe is so simple, the flavors really shine through. I always recommend using high-quality vanilla extract (or even homemade if you can!) for a richer, more aromatic flavor.
- Don’t Overmix: When folding the whipped cream into the condensed milk mixture, be gentle. Overmixing can deflate the air you just whipped into the cream, which means a less fluffy ice cream. Just fold until you see no more streaks—easy peasy!
- Experiment with Mix-Ins: Feel free to get creative! Add-ins like chocolate chips, crushed cookies, or swirls of fruit puree can take your ice cream to the next level. Just be sure to fold them in gently at the end!
- Let it Sit: After you take it out of the freezer, let your ice cream sit for about 5-10 minutes before scooping. This little trick helps soften it up just enough for the perfect scoop.
- Storage Secret: To avoid those pesky ice crystals, store your ice cream in an airtight container, and press a piece of parchment paper directly onto the surface before sealing. It really helps keep that creamy texture!
With these tips in your back pocket, you’re set for ice cream success! Get ready to impress your friends and family with this creamy, dreamy treat.
Variations
Now, let’s talk about how you can make this no churn vanilla ice cream even more exciting! The beauty of this recipe is its versatility—there are so many ways to customize it and make it your own. Here are some of my favorite variations that you’ll absolutely love:
- Chocolate Chip Delight: Add in a generous half-cup of chocolate chips during the folding stage. The sweet little morsels will melt slightly into the creamy mix and give you that perfect chocolatey bite!
- Fruity Freshness: Want to brighten things up? Fold in about a cup of fresh fruit like strawberries, blueberries, or peaches. You can even swirl in some fruit puree for an extra burst of flavor!
- Cookies and Cream: Crush up your favorite chocolate sandwich cookies and fold them in for a fun and nostalgic treat. Trust me, this one’s a crowd-pleaser!
- Nutty Indulgence: Add in a handful of chopped nuts like pecans or almonds for a delightful crunch. They add a lovely texture that complements the creaminess of the ice cream.
- Mint Chocolate Chip: For a refreshing twist, mix in a few drops of peppermint extract and some chocolate chips. It’s like a cool breeze in a bowl!
- Caramel Swirl: Drizzle some caramel sauce into the mixture before freezing for a decadent treat. Just swirl it in gently for beautiful ribbons of caramel throughout your ice cream!
- Spice it Up: Want something a little different? Try adding a pinch of cinnamon or nutmeg for a warm, cozy flavor that’s perfect for fall.
The options are truly endless, so don’t hesitate to let your creativity shine! Each variation brings its own unique flavor and charm, making your homemade no churn vanilla ice cream a delightful surprise each time. Enjoy experimenting!
Storage & Reheating Instructions
So, you’ve made your delicious no churn vanilla ice cream, and now you’re probably wondering how to keep it fresh and creamy for as long as possible. Let me share my best tips for storing your homemade treat! The key is to prevent those pesky ice crystals from forming, which can ruin that smooth texture we all love.
First off, when you’re ready to store your ice cream, make sure you transfer it to an airtight container. I like to use a shallow container rather than a deep one; this helps it freeze more evenly and makes scooping easier later on. Before sealing it, press a piece of parchment paper directly onto the surface of the ice cream. This little trick creates a barrier against the air, keeping your ice cream nice and creamy!
Now, pop that container in the freezer! Your no churn vanilla ice cream will stay fresh for about 2 weeks, but trust me, it’s so good it might not last that long! Just remember to let it sit out for about 5-10 minutes before you scoop it out. This helps soften it up just enough for that perfect scoop. No one wants to wrestle with a rock-hard block of ice cream, right?
And that’s it! With these simple storage tips, you can enjoy your homemade ice cream at its best for days to come. Happy scooping!
Nutritional Information
Now, let’s take a quick look at the estimated nutritional information for one serving of this delightful no churn vanilla ice cream. It’s always good to know what you’re indulging in, right? Here’s a breakdown:
- Serving Size: 1/2 cup
- Calories: 250
- Total Fat: 15g
- Saturated Fat: 10g
- Trans Fat: 0g
- Cholesterol: 60mg
- Sodium: 50mg
- Total Carbohydrates: 25g
- Dietary Fiber: 0g
- Sugars: 20g
- Protein: 3g
Keep in mind that these values are estimates and can vary based on the specific ingredients you use. Enjoy your homemade no churn vanilla ice cream guilt-free, knowing you’ve created something truly special!
FAQ Section
Got questions about making no churn vanilla ice cream? Don’t worry, I’ve got you covered! Here are some of the most frequently asked questions, along with my answers to help you out:
Can I use low-fat cream instead of heavy cream?
While you can use low-fat cream, I really recommend sticking with heavy cream for that rich, creamy texture. Trust me, it makes all the difference in achieving that luscious mouthfeel!
How long can I store my no churn vanilla ice cream?
You can keep your ice cream in the freezer for about 2 weeks. Just remember to store it in an airtight container to keep it fresh and creamy!
Can I use different flavors of extract?
Absolutely! You can switch things up by using almond extract, coconut extract, or even a splash of coffee extract for a fun twist. Just keep in mind that the flavor will change, so adjust to your taste!
What if my ice cream is too hard to scoop?
If your ice cream is rock solid, just let it sit out at room temperature for about 5-10 minutes before scooping. This will soften it up enough for that perfect scoop—no need to wrestle with a frozen block!
Can I make this recipe dairy-free?
Yes, you can! Substitute the heavy cream with a full-fat coconut cream and use a dairy-free condensed milk. You’ll still get that creamy texture, and it’ll be delicious!

No Churn Vanilla Ice Cream: 6 Simple Steps to Bliss
- Prep Time: 15 minutes
- Cook Time: 0 minutes
- Total Time: 6 hours 15 minutes
- Yield: 6 servings 1x
- Category: Dessert
- Method: No Churn
- Cuisine: American
- Diet: Vegetarian
Description
A simple recipe for making no churn vanilla ice cream at home.
Ingredients
- 2 cups heavy cream
- 1 cup sweetened condensed milk
- 1 tablespoon vanilla extract
- 1/2 cup milk
Instructions
- In a large bowl, whip the heavy cream until stiff peaks form.
- In another bowl, combine sweetened condensed milk, vanilla extract, and milk.
- Gently fold the whipped cream into the condensed milk mixture.
- Pour the mixture into a loaf pan.
- Cover and freeze for at least 6 hours or until firm.
Notes
- For a richer flavor, use homemade vanilla extract.
- Mix in chocolate chips or fruit for variety.
- Store in an airtight container to prevent ice crystals.
Nutrition
- Serving Size: 1/2 cup
- Calories: 250
- Sugar: 20g
- Sodium: 50mg
- Fat: 15g
- Saturated Fat: 10g
- Unsaturated Fat: 5g
- Trans Fat: 0g
- Carbohydrates: 25g
- Fiber: 0g
- Protein: 3g
- Cholesterol: 60mg
Keywords: no churn vanilla ice cream, homemade ice cream, easy ice cream recipe