

Are you looking for a delightful dessert that’s easy to make and sure to impress? Look no further than the Mini Cheesecake Bites Recipe. These little treats pack a big punch of flavor in a small package. Perfect for parties, gatherings, or just a sweet snack at home, mini cheesecakes are a crowd-pleaser.
What Makes Mini Cheesecake Bites Special?
Mini cheesecake bites are special for several reasons. First, their size makes them perfect for sharing. You can pop one in your mouth without the need for utensils. This makes them a fun and convenient dessert option. Second, they are incredibly versatile. You can customize them with various toppings, flavors, and crusts to suit any occasion or preference.
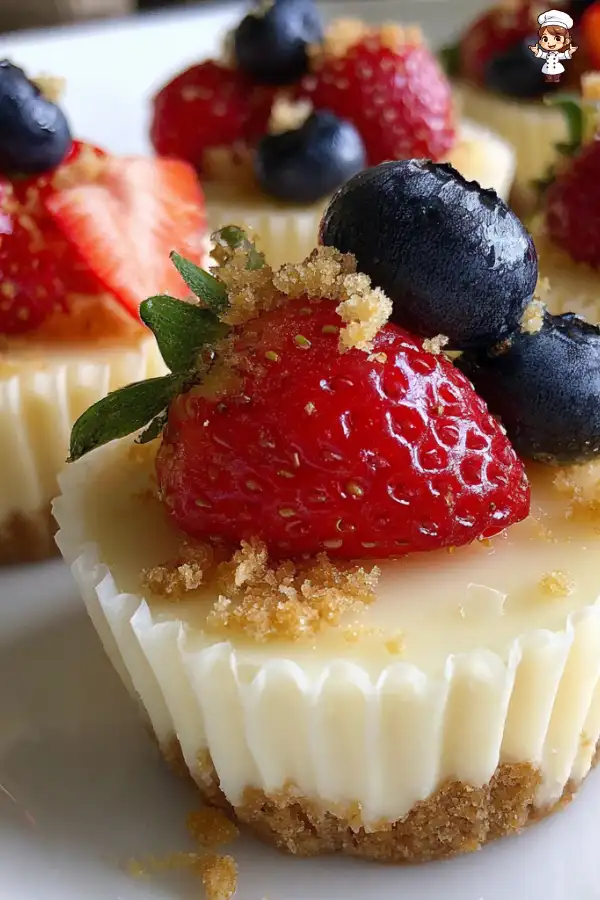
Moreover, the creamy texture of the cheesecake filling combined with the crunchy graham cracker crust creates a delightful contrast. Each bite offers a perfect balance of sweetness and tanginess, making them irresistible. Plus, they are easy to prepare, even for beginner bakers. With just a few simple ingredients, you can create a dessert that looks and tastes gourmet.
Whether you’re celebrating a birthday, hosting a holiday gathering, or simply treating yourself, these mini cheesecake bites are sure to be a hit. So, let’s dive into the ingredients and preparation steps to make your own delicious mini cheesecakes!
Ingredients for Mini Cheesecake Bites Recipe
To create the perfect Mini Cheesecake Bites Recipe, you’ll need a few key ingredients. Each component plays a vital role in achieving that creamy, dreamy texture and delightful flavor. Here’s what you’ll need:
- Cream cheese: 8 oz (softened) – This is the star of the show! It gives the cheesecake its rich and creamy texture.
- Granulated sugar: 1/3 cup – This sweetens the filling, balancing the tanginess of the cream cheese.
- Vanilla extract: 1 teaspoon – A splash of vanilla adds warmth and depth to the flavor.
- Sour cream: 1/4 cup – This ingredient enhances the creaminess and adds a slight tang.
- Egg: 1 large – The egg helps bind the filling together, giving it structure.
- Graham cracker crumbs: 1 cup (for crust) – These crumbs form the base of your mini cheesecakes, providing a crunchy texture.
- Unsalted butter: 4 tablespoons (melted) – This helps hold the crust together and adds richness.
- Fresh strawberries: 1 cup (sliced) – These berries make a beautiful and tasty topping.
- Fresh blueberries: 1 cup – Blueberries add a pop of color and flavor.
- Powdered sugar: for dusting (optional) – A light dusting adds a touch of sweetness and elegance.
- Paper liners: for mini muffin tin – These make for easy removal and cleanup.
Gathering these ingredients is the first step toward creating your delicious mini cheesecake bites. Each ingredient contributes to the overall taste and texture, ensuring that every bite is a delightful experience. Now that you have everything you need, let’s move on to the preparation steps!
Preparation of Mini Cheesecake Bites Recipe
Now that you have all your ingredients ready, it’s time to prepare your Mini Cheesecake Bites Recipe. Follow these simple steps to create your delicious mini cheesecakes. Each step is easy to follow, ensuring that you’ll have a delightful treat in no time!
Step 1: Preparing the Crust
First, let’s get started with the crust. In a medium bowl, combine the graham cracker crumbs and melted butter. Mix them together until the crumbs are evenly coated. This mixture should feel slightly damp but crumbly. Next, take about 1 tablespoon of this mixture and press it firmly into the bottom of each paper liner in your mini muffin tin. Make sure to pack it down well to create a sturdy base for your cheesecake bites.
Step 2: Making the Cheesecake Filling
Now, it’s time to make the creamy filling! In a large mixing bowl, beat the softened cream cheese with an electric mixer until it’s smooth and creamy. Gradually add the granulated sugar while continuing to mix. This helps to incorporate the sugar evenly. Then, add the vanilla extract and sour cream, mixing until everything is well combined. Finally, crack in the egg and mix just until it’s incorporated. Be careful not to overmix, as this can make the filling too airy.
Step 3: Assembling the Mini Cheesecake Bites
With your crust and filling ready, it’s time to assemble! Spoon the cheesecake filling over the crust in each paper liner. Fill them about 3/4 full, leaving a little space at the top. This allows the cheesecakes to rise slightly while baking without overflowing. Make sure each one looks even for a beautiful presentation!
Step 4: Baking the Mini Cheesecake Bites
Next, place the mini muffin tin in your preheated oven. Bake the mini cheesecakes for 15-18 minutes. You’ll know they’re done when the edges are set, but the centers still have a slight jiggle. This jiggle is important, as it means your cheesecakes will be creamy and not overcooked. Once baked, remove them from the oven and let them cool in the tin for about 10 minutes.
Step 5: Cooling and Serving
After cooling in the tin, carefully transfer the mini cheesecakes to a wire rack to cool completely. Once they are at room temperature, place them in the refrigerator for at least 2 hours. Chilling helps them firm up and enhances the flavors. When you’re ready to serve, top each cheesecake bite with fresh strawberries and blueberries. If you like, dust them with powdered sugar for an extra touch of sweetness. Now, you’re all set to enjoy your delightful mini cheesecake bites!
Tips for Perfect Mini Cheesecake Bites Recipe
Creating the perfect Mini Cheesecake Bites Recipe can be a breeze with a few helpful tips. Here are some common mistakes to avoid and storage tips to keep your mini cheesecakes fresh and delicious.
Common Mistakes to Avoid
Even the best bakers can make mistakes. Here are some common pitfalls to watch out for:
- Overmixing the Filling: Mixing too much can introduce air into the batter, making your cheesecakes puff up and crack. Mix just until combined for a smooth texture.
- Skipping the Cooling Step: Allowing the cheesecakes to cool in the tin is crucial. This helps them set properly and prevents them from collapsing.
- Not Using Room Temperature Ingredients: Cold cream cheese can lead to lumps in your filling. Make sure all your ingredients are at room temperature for a creamy consistency.
- Filling Too Full: Filling the liners to the brim can cause overflow during baking. Aim for about 3/4 full to allow for rising.
- Ignoring the Jiggle Test: The centers should be slightly jiggly when you take them out of the oven. This means they will set perfectly as they cool.
Storage Tips for Mini Cheesecake Bites
To keep your mini cheesecakes fresh and tasty, follow these storage tips:
- Refrigeration: Store your mini cheesecake bites in an airtight container in the refrigerator. They can last up to 5 days.
- Freezing: If you want to keep them longer, you can freeze the mini cheesecakes. Place them in a single layer on a baking sheet until frozen, then transfer to a freezer-safe container. They can last up to 2 months in the freezer.
- Thawing: To enjoy frozen mini cheesecakes, simply transfer them to the refrigerator for a few hours or overnight to thaw. Avoid using a microwave, as it can change the texture.
- Top Just Before Serving: If you plan to store them, wait to add fresh berries and powdered sugar until just before serving. This keeps the toppings fresh and vibrant.
By avoiding common mistakes and following these storage tips, you’ll ensure that your Mini Cheesecake Bites Recipe turns out perfectly every time. Now, let’s explore some fun variations to try!
Variation of Mini Cheesecake Bites Recipe
Once you’ve mastered the classic Mini Cheesecake Bites Recipe, it’s time to get creative! There are countless ways to add your personal touch to these delightful treats. Here are some flavor variations and gluten-free options to consider.
Flavor Variations to Try
Why stick to just one flavor when you can explore many? Here are some fun ideas to spice up your mini cheesecakes:
- Chocolate Mini Cheesecakes: Add 1/4 cup of cocoa powder to the filling for a rich chocolate flavor. You can also fold in mini chocolate chips for extra sweetness.
- Fruit Swirl: Before baking, swirl in some fruit puree, like raspberry or mango, into the filling. This adds a beautiful color and fruity taste.
- Peanut Butter Cheesecakes: Mix in 1/4 cup of creamy peanut butter into the filling for a nutty twist. Top with crushed peanuts for added crunch.
- Lemon Zest: Add the zest of one lemon and a tablespoon of lemon juice to the filling for a refreshing citrus flavor. This is perfect for summer gatherings!
- Caramel Drizzle: After chilling, drizzle caramel sauce over the top of each cheesecake bite for a sweet and sticky finish.
These variations not only enhance the flavor but also make your mini cheesecakes visually appealing. Feel free to mix and match these ideas to create your own unique combinations!
Gluten-Free Options for Mini Cheesecake Bites
If you or your guests are following a gluten-free diet, you can still enjoy these delicious mini cheesecakes. Here’s how to make them gluten-free:
- Gluten-Free Crust: Substitute regular graham cracker crumbs with gluten-free graham cracker crumbs or crushed gluten-free cookies. Almond flour can also be a great alternative for a nutty flavor.
- Check Ingredients: Ensure that all other ingredients, like baking powder and vanilla extract, are labeled gluten-free. Most brands are, but it’s always good to double-check.
- Experiment with Flours: You can use almond flour or coconut flour in place of traditional flour for a different texture and flavor.
By making these simple adjustments, everyone can enjoy your Mini Cheesecake Bites Recipe without worry. Now that you have some variations and gluten-free options, let’s move on to some frequently asked questions!
FAQs about Mini Cheesecake Bites Recipe
How long do Mini Cheesecake Bites last?
Mini cheesecake bites are best enjoyed fresh, but they can last in the refrigerator for up to 5 days. To keep them tasting great, store them in an airtight container. This helps maintain their creamy texture and flavor. If you want to enjoy them later, consider freezing them for longer storage.
Can I freeze Mini Cheesecake Bites?
Yes, you can freeze mini cheesecake bites! To do this, place them in a single layer on a baking sheet until they are frozen solid. Then, transfer them to a freezer-safe container. They can last up to 2 months in the freezer. When you’re ready to enjoy them, simply thaw them in the refrigerator for a few hours or overnight. Avoid using the microwave, as it can change their texture.
What can I use instead of cream cheese in the Mini Cheesecake Bites Recipe?
If you’re looking for alternatives to cream cheese, there are a few options. You can use mascarpone cheese for a similar creamy texture. Another option is to use Greek yogurt, which adds a tangy flavor. For a dairy-free version, try using cashew cream or a vegan cream cheese substitute. Just keep in mind that these alternatives may slightly change the flavor and texture of your mini cheesecakes.
How do I know when Mini Cheesecake Bites are done baking?
To check if your mini cheesecake bites are done, look for the edges to be set while the centers should still have a slight jiggle. This jiggle is a good sign that they will firm up as they cool. If the centers are completely firm, they may be overbaked, leading to a drier texture. Remember, they will continue to cook a bit while cooling, so it’s okay if they’re not fully set when you take them out of the oven.
With these FAQs answered, you’re now well-equipped to make and enjoy your Mini Cheesecake Bites Recipe. Whether you’re sharing them at a gathering or enjoying them at home, these delightful treats are sure to bring smiles all around!
Print
Mini Cheesecake Bites Recipe
- Prep Time: 20 minutes
- Cook Time: 18 minutes
- Total Time: 2 hours 38 minutes
- Yield: 24 mini cheesecakes
- Category: Dessert
- Method: Baking
- Cuisine: American
- Diet: Vegetarian
Description
Mini Cheesecake Bites are delightful, easy-to-make desserts that are perfect for sharing at parties or enjoying at home. They combine a creamy cheesecake filling with a crunchy graham cracker crust, making them a crowd-pleaser.
Ingredients
- Cream cheese: 8 oz (softened)
- Granulated sugar: 1/3 cup
- Vanilla extract: 1 teaspoon
- Sour cream: 1/4 cup
- Egg: 1 large
- Graham cracker crumbs: 1 cup (for crust)
- Unsalted butter: 4 tablespoons (melted)
- Fresh strawberries: 1 cup (sliced)
- Fresh blueberries: 1 cup
- Powdered sugar: for dusting (optional)
- Paper liners: for mini muffin tin
Instructions
- Prepare the crust by mixing graham cracker crumbs and melted butter, then press into the bottom of each paper liner in a mini muffin tin.
- Make the cheesecake filling by beating softened cream cheese, adding sugar, vanilla extract, sour cream, and egg until smooth.
- Spoon the cheesecake filling over the crust in each paper liner, filling them about 3/4 full.
- Bake in a preheated oven for 15-18 minutes until the edges are set and the centers have a slight jiggle.
- Cool in the tin for 10 minutes, then transfer to a wire rack to cool completely before refrigerating for at least 2 hours.
- Top with fresh strawberries and blueberries before serving, and dust with powdered sugar if desired.
Notes
- Store in an airtight container in the refrigerator for up to 5 days.
- Freeze for up to 2 months; thaw in the refrigerator.
- Wait to add toppings until just before serving for freshness.
Nutrition
- Serving Size: 1 mini cheesecake
- Calories: 120
- Sugar: 8g
- Sodium: 90mg
- Fat: 8g
- Saturated Fat: 5g
- Unsaturated Fat: 2g
- Trans Fat: 0g
- Carbohydrates: 10g
- Fiber: 0g
- Protein: 2g
- Cholesterol: 30mg
Keywords: Mini Cheesecake Bites, Cheesecake, Dessert, Easy Recipe, Party Treats