
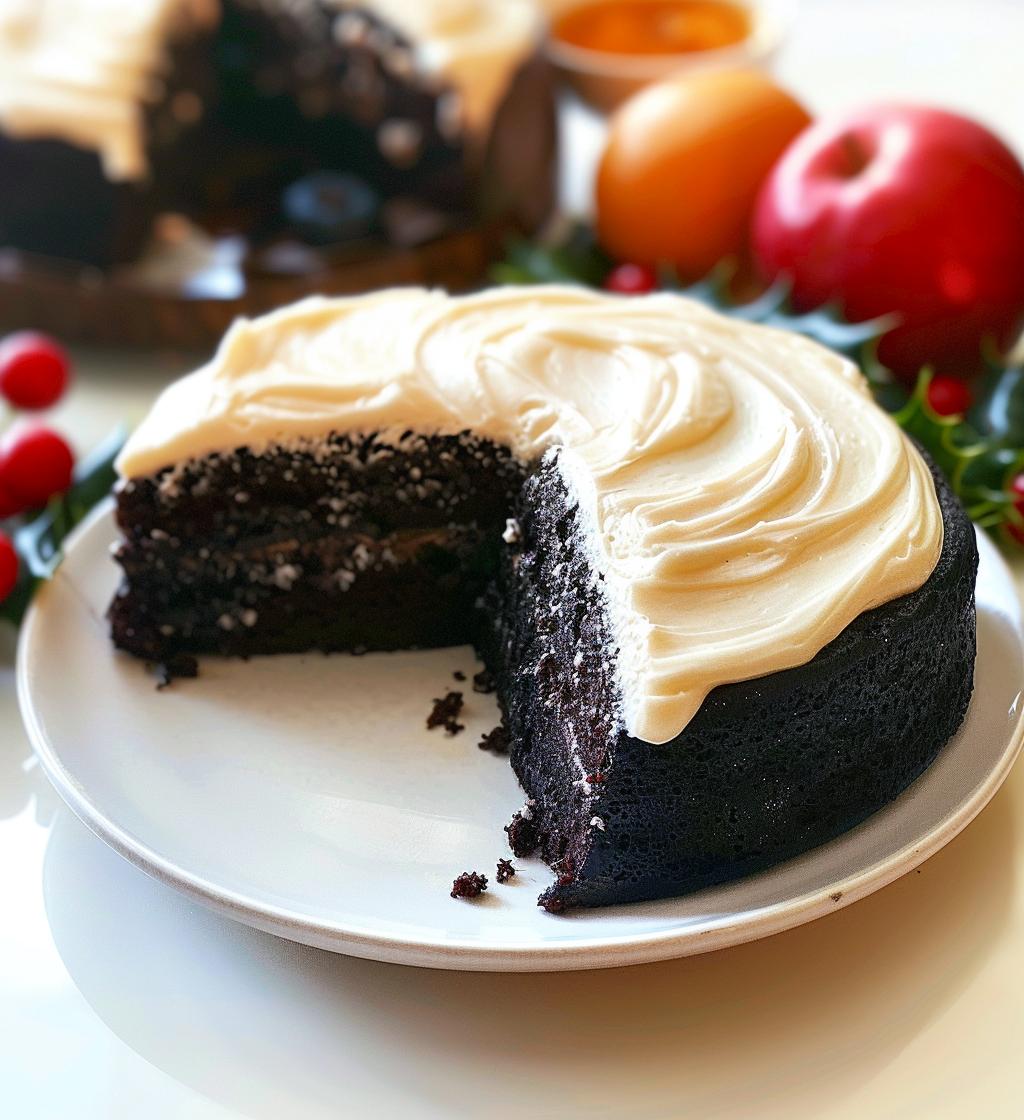
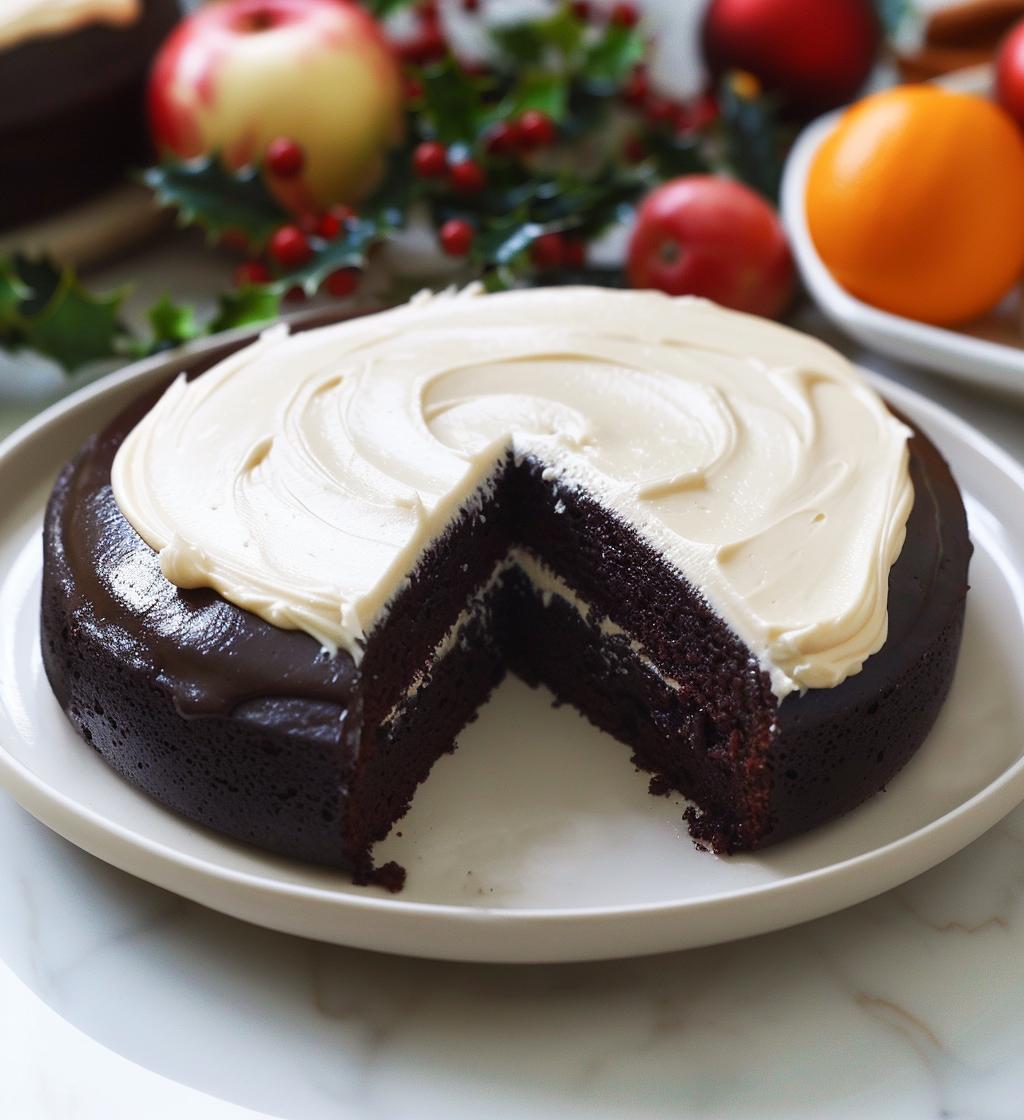
Ah, the holiday season! It’s that magical time of year when family and friends gather, and the air is filled with laughter, joy, and the irresistible aroma of baked goods. One of my absolute favorite traditions is creating a stunning holiday dessert table that brings everyone together. Picture it: a colorful array of desserts that not only taste heavenly but also look like a winter wonderland! Today, I’m sharing a delightful recipe that’s perfect for this festive occasion. It’s a rich, chocolatey cake topped with creamy frosting that’ll have everyone coming back for seconds. Let’s dive in and make some sweet memories!
Ingredients
- 2 cups all-purpose flour: This is the base of our cake, contributing to its structure and texture.
- 1 cup granulated sugar: Sweetness is key! This sugar helps our cake rise and gives it that delightful sweetness.
- 1 cup unsalted butter: Make sure it’s softened to room temperature for easy creaming. It adds richness and moisture.
- 4 large eggs: These are essential for binding and giving the cake its lovely, airy texture.
- 1 cup milk: Whole milk works best for a moist cake, but you can use whatever you have on hand.
- 2 teaspoons baking powder: This is our leavening agent, helping the cake rise beautifully.
- 1 teaspoon vanilla extract: Don’t skimp on this! It adds a warm, comforting flavor that makes everything taste better.
- 1/2 cup cocoa powder: This is what makes our cake rich and chocolatey. Use unsweetened for the best results.
- 1 cup powdered sugar: This will sweeten our frosting to perfection, giving it that smooth finish.
- 1/4 cup cream cheese: This adds a wonderful tangy flavor to our frosting and makes it creamy!
How to Prepare Instructions
Prepping the Batter
Let’s kick things off! Start by preheating your oven to 350°F (175°C). This ensures our cake bakes evenly. In a large mixing bowl, combine the flour, baking powder, and cocoa powder. Give it a good whisk to blend everything together. Now, in another bowl, cream the softened butter and granulated sugar until it’s light and fluffy. This step is crucial—it incorporates air into the batter, giving your cake that delightful rise. Add your eggs one at a time, mixing well after each addition. Trust me, this makes a world of difference in texture! Finally, stir in the vanilla extract and gradually add the dry ingredients and milk, alternating between them. Mix until it’s just combined; we don’t want to overmix here, so stop when the batter is smooth.
Baking the Cake
Now that our batter is ready, it’s time for it to shine! Pour the batter into a greased baking pan, making sure it’s spread evenly. Pop it in the preheated oven and set a timer for 30 to 35 minutes. You’ll know it’s done when a toothpick inserted into the center comes out clean. Keep an eye on it; every oven is a little different, and you don’t want to overbake! When it’s ready, let it cool in the pan for about 10 minutes before transferring it to a wire rack. This cooling step helps maintain that moist texture we all love.
Making the Frosting
While the cake cools, let’s whip up our frosting! In a medium bowl, beat the cream cheese until it’s smooth—this is where the creamy goodness happens. Then, gradually add the powdered sugar, mixing until everything is well incorporated. The texture should be velvety and spreadable, perfect for frosting our cake. If it feels too thick, you can add a splash of milk to loosen it up a bit.
Decorating and Serving
Now for the fun part—decorating! Once your cake has cooled completely, spread that luscious frosting all over the top. For an extra festive touch, consider adding seasonal fruits like berries or slices of citrus. They not only look beautiful but also add a refreshing contrast to the rich cake. When serving, slice it into generous pieces and enjoy the compliments! This cake is sure to steal the spotlight on your holiday dessert table!
Why You’ll Love This Recipe
- Quick and Easy: This recipe comes together in just under an hour, making it perfect for those busy holiday days when you’ve got a million things to juggle.
- Perfect for Gatherings: With 12 generous servings, this cake is a crowd-pleaser. It’s a fantastic centerpiece for your holiday dessert table, inviting everyone to indulge!
- Decadent Flavor: The rich chocolate flavor combined with creamy frosting creates a delightful experience that will have your guests raving.
- Customizable: Dress it up with seasonal fruits or get creative with toppings for a personal touch that reflects your festive spirit.
- Make-Ahead Friendly: You can bake this cake a day in advance, allowing the flavors to meld beautifully while you focus on other holiday preparations.
- Kid-Approved: Kids adore chocolate cake, making this a surefire hit for family gatherings. Plus, they’ll love helping you decorate!
- Memorable Moments: Baking and sharing this cake can create sweet memories that you and your loved ones will cherish for years to come.
Nutritional Information
Here’s a quick look at the estimated nutritional data for each slice of this scrumptious chocolate cake. Keep in mind that these values can vary based on specific ingredients and portion sizes, but it gives you a good idea of what to expect!
- Serving Size: 1 slice
- Calories: 250
- Sugar: 20g
- Fat: 12g
- Saturated Fat: 7g
- Unsaturated Fat: 3g
- Trans Fat: 0g
- Carbohydrates: 32g
- Fiber: 2g
- Protein: 3g
- Cholesterol: 40mg
- Sodium: 150mg
This cake is not only delicious but also a treat you can feel good about sharing during the holidays! Enjoy every bite while knowing it brings joy to your holiday dessert table.
Tips for Success
Here are my top tips to ensure your chocolate cake turns out spectacular every time! Trust me, these little nuggets of wisdom can make a big difference.
- Measure Accurately: Baking is a science, so make sure to measure your ingredients precisely. Too much flour can lead to a dry cake, while too little can make it dense. I always use a kitchen scale for the best results.
- Room Temperature Ingredients: Let your butter, eggs, and milk sit out for a bit before you start. Room temperature ingredients blend more easily and create a smoother batter. Plus, it helps the cake rise better!
- Don’t Overmix: When adding your dry ingredients to the wet, mix just until combined. Overmixing can develop gluten, leading to a tougher cake. You want it to be light and fluffy, so be gentle!
- Keep an Eye on the Oven: Every oven is a little different, so check your cake a few minutes before the timer goes off. If it’s browning too quickly, you can tent it with aluminum foil to avoid burning.
- Cooling is Key: Allow the cake to cool in the pan for about 10 minutes before transferring it to a wire rack. This helps it set properly and keeps it from breaking apart.
- Frost When Cool: Make sure your cake is completely cool before frosting. If it’s even slightly warm, the frosting will melt, and nobody wants a soupy mess!
- Get Creative with Decorations: Don’t shy away from embellishing your cake! Seasonal fruits, sprinkles, or even a dusting of cocoa powder can elevate your dessert and make it look extra festive!
- Trust Your Instincts: If something feels off or if you have a question, don’t hesitate to adjust. Baking should be enjoyable, so trust your instincts and enjoy the process!
By following these tips, you’ll set yourself up for success and create a cake that’s not just tasty, but a showstopper on your holiday dessert table. Happy baking!
Variations
One of the best things about this chocolate cake is how versatile it is! You can easily switch things up to create new flavors or add fun toppings that will dazzle your guests on your holiday dessert table. Here are some of my favorite variations to consider:
- Mint Chocolate: Add a teaspoon of peppermint extract to the batter for a refreshing twist. Top with crushed mint candies for a festive crunch.
- Spiced Pumpkin: Substitute half the cocoa powder with pumpkin puree and add a teaspoon of cinnamon and nutmeg to the batter. It’s a delightful autumn-inspired treat!
- Mocha Delight: Mix in a tablespoon of instant coffee granules with the dry ingredients for a rich mocha flavor. Pair it with a coffee-flavored frosting for an extra kick!
- Nutty Chocolate: Fold in a cup of chopped nuts—like walnuts or pecans—into the batter for added texture and flavor. You could even sprinkle some on top of the frosting for a nice finish.
- Berry Bliss: Add a layer of mixed berries between the cake layers if you choose to make it a layered cake. It adds a pop of color and a burst of freshness!
- Coconut Frosting: Replace the cream cheese frosting with coconut whipped cream by whipping heavy cream and folding in some shredded coconut. It’s light and oh-so-delicious!
- Chocolate Ganache: For a more decadent treat, pour warm chocolate ganache over the frosted cake. It creates an irresistible, shiny finish that’s sure to impress!
Feel free to mix and match these ideas! The important thing is to make it your own and enjoy the process. Each variation brings something unique to the table, ensuring that your holiday dessert table stays exciting and delicious!
Storage & Reheating Instructions
Now, let’s talk about how to keep that delicious chocolate cake fresh for as long as possible! If you happen to have any leftovers (which, let’s be honest, is a rare occurrence), here’s how to store them properly. First, make sure the cake has completely cooled down before wrapping it up. I like to use plastic wrap or aluminum foil to keep it nice and airtight. This prevents it from drying out and helps maintain that moist texture we all love.
Store the wrapped cake in the refrigerator, where it’ll last for about 4 to 5 days. Just be sure to check for any signs of moisture build-up inside the wrap—if you notice any, it’s best to remove the wrap for a bit to avoid sogginess. If you’d like to keep it longer, you can freeze it! Slice the cake into individual pieces, wrap each slice tightly in plastic wrap, and then place them in a freezer-safe bag. This way, you can enjoy a slice whenever you crave a sweet treat.
When you’re ready to indulge again, simply take a slice out of the freezer and let it thaw in the refrigerator for a couple of hours. If you’re in a hurry, you can also let it sit out at room temperature for about 30 minutes. No need to reheat it; the cake is delightful served as is, especially with that creamy frosting. Just make sure to enjoy it within a couple of months for the best flavor and quality. Happy storing, and may your holiday dessert table always be full of sweet delights!
FAQs
Can I use a different type of flour?
Absolutely! You can substitute all-purpose flour with whole wheat flour for a nuttier flavor, or even gluten-free flour if you need a gluten-free option. Just keep in mind that the texture might change a bit.
How do I know when the cake is done?
Great question! You’ll know it’s done when a toothpick inserted in the center comes out clean or with just a few crumbs. If it comes out wet, give it a few more minutes in the oven.
Can I make this cake in advance?
Yes! This cake is perfect for making ahead of time. You can bake it a day or two in advance and store it in the fridge. Just frost it closer to serving time for the best presentation.
What if I don’t have cream cheese?
No worries! You can replace the cream cheese in the frosting with regular butter or even a whipped topping for a lighter option. It’ll still taste delicious on your holiday dessert table!
How should I store leftovers?
Store any leftover cake in an airtight container in the refrigerator for up to 5 days. If you want to keep it longer, freeze individual slices wrapped tightly in plastic wrap. You’ll have a tasty treat ready whenever you want!