
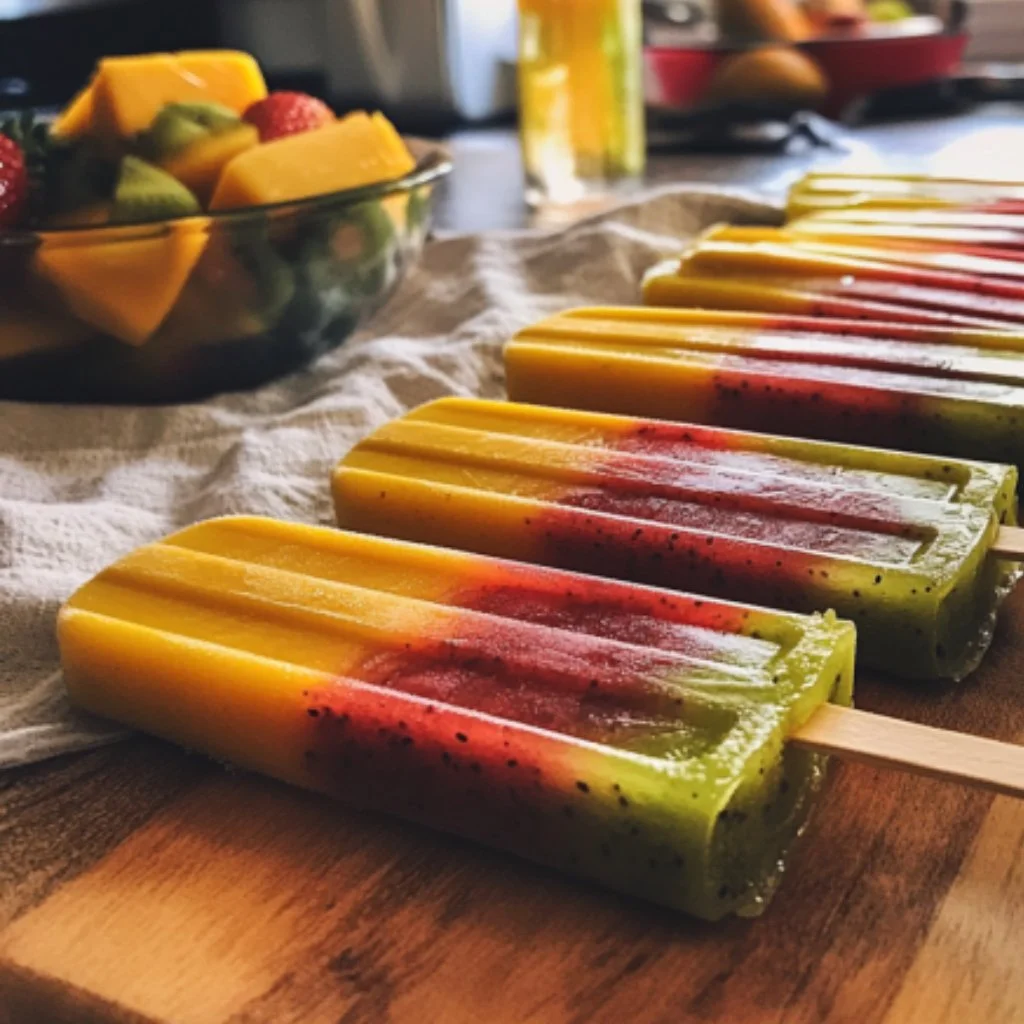
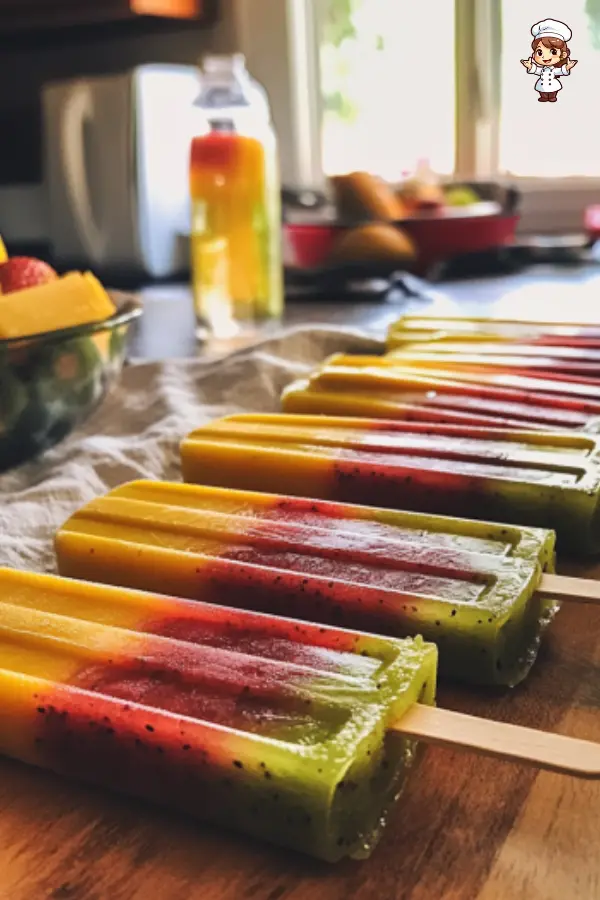
As the sun shines brighter and the temperatures rise, nothing does more for our spirits than a cold and fruity treat. Enter fruit popsicles! These delightful frozen snacks are packed with flavor, color, and nutrition. Whether you are lounging by the pool, enjoying a picnic, or simply trying to cool off on a hot day, fruit popsicles can bring a smile to your face. They are easy to make, healthy, and you can customize them in many ways. In this article, we’ll explore everything you need to know about making delicious fruit popsicles at home.
Ingredients for Fruit Popsicles
When it comes to making fruit popsicles, the ingredients are simple and fresh. You will be blending juicy fruits with a little bit of sweetness and zest. Here’s what you need:
List of Ingredients with Measurements
- 2 1/2 cups strawberries, quartered
- 2 tablespoons lemon juice
- 1 tablespoon honey
- Pinch of salt
- 2 1/4 cups mango, chopped
- 1/4 cup orange juice
- 1 tablespoon honey
- Pinch of salt
- 2 1/4 cups kiwi, chopped
- 2 tablespoons lemon juice
- 1 tablespoon honey
- Pinch of salt
Optional Ingredient Substitutions
If you don’t have some of the main ingredients on hand or want to try different flavors, there are several substitutions you can consider. For example, you can swap strawberries with raspberries or blueberries. Instead of mango, peaches or papayas work beautifully. If you want to replace honey, maple syrup or agave nectar can be a good choice, especially for vegans. Feel free to experiment with the citrus juices too; lime juice or even coconut water can add an exciting twist to your popsicles.
How to Make Fruit Popsicles
Making fruit popsicles at home is fun and straightforward. You will be blending fruits into a puree, pouring it into molds, and then freezing. Let’s break down the process step by step.
Step 1: Blend the Fruit
Start by preparing your fruit. Wash the strawberries and quarter them. Peel and chop the mangoes. For the kiwis, peel and chop them as well. Then, in a blender, add the quartered strawberries along with two tablespoons of lemon juice, one tablespoon of honey, and a pinch of salt. Blend until the mixture is smooth. This will give you a luscious strawberry puree.
Step 2: Prepare the Mango Mixture
Next, it’s time to prepare the mango. In the clean blender, add the chopped mango, a quarter cup of orange juice, one tablespoon of honey, and a pinch of salt. Again, blend until smooth. This vibrant mixture will be both sweet and tangy.
Step 3: Make Kiwi Puree
Now, it’s time for the last flavor! Add the chopped kiwi into the blender. Pour in two tablespoons of lemon juice, one tablespoon of honey, and a pinch of salt. Blend these ingredients until they turn into a smooth, green puree.
Step 4: Fill the Molds
Once you have all three fruit purees ready, it’s time to fill the popsicle molds. Begin by scooping some strawberry puree into each mold, filling it about a third of the way. Next, add the mango puree, filling another third. Finally, top it off with the kiwi puree. Make sure to leave a little space at the top of each mold. Cap each mold with the tops and make sure they are secure.
Step 5: Freeze the Popsicles
Place the filled molds in the freezer. It is best to freeze them for at least four hours to ensure they become solid. If you’re making them overnight, that works too! The longer you freeze them, the firmer they will get.
Step 6: Unmold and Enjoy!
When you are ready to enjoy your popsicles, it’s time to unmold them. Hold each mold under hot water for about five seconds to loosen the popsicles. Then, gently pull the popsicles out. If they don’t come out easily, you may need to run the molds under hot water a bit longer.
How to Serve Fruit Popsicles
Now that you have your delicious fruit popsicles, presenting them in the best way can make them even more enjoyable.
Best Ways to Serve Fruit Popsicles
You can serve these popsicles right out of the mold or place them on a plate. If you want to make them look stunning, you can serve them with a sprinkle of shredded coconut on top or a fresh mint sprig for a pop of color.
Serving Suggestions or Pairings
Fruit popsicles are delightful on their own. However, you can pair them with other snacks like yogurt or granola for an afternoon treat. They also go well with some fresh fruit salad on the side. If you enjoy a bit of crunch, serving them with homemade granola bars can be a hit, especially for kids.
How to Store Fruit Popsicles
Making fruit popsicles means you can enjoy tasty treats for days or weeks ahead. It’s important to store them properly to maintain their quality.
Proper Storage Methods
You can keep your popsicles in the molds until you are ready to serve them. Alternatively, if you enjoy popsicles regularly, it’s best to unmold them for storage. Wrap each popsicle individually in parchment paper, plastic wrap, or wax paper. Then, place them in a resealable freezer-safe bag or airtight container. This will help prevent freezer burn and keep them fresh.
Tips for Reheating or Freezing
While you’re not technically reheating popsicles, if you find them too hard to bite into, let them sit at room temperature for about 5 minutes before trying to eat them. This will soften them slightly. Remember to consume or store them correctly to extend their shelf life. They are best enjoyed within six weeks but can last for up to three months in the freezer.
Tips to Make Fruit Popsicles
Even though making fruit popsicles is easy, there are some tips and tricks to ensure they are perfect every time.
Common Mistakes to Avoid
One common mistake is overfilling the molds. Leave some space at the top, as the mixture will expand while freezing. Also, avoid using very watery fruits, as they can lead to icy pops that don’t have a nice texture. Lastly, make sure to blend the fruits well to create a smooth consistency; lumps can affect how well they freeze.
Helpful Tips for Better Results
To enhance flavor, you can add herbs like mint or basil directly into the fruit puree. If you want a creamier texture, mix in a bit of yogurt or coconut milk into the fruit puree before freezing. The flavor combinations are endless; feel free to play around with your favorite fruits and juices.
Variation of Fruit Popsicles
While the recipe provided is delicious on its own, variations can make it even more exciting!
Suggested Variations or Twists on the Recipe
You can try different fruit combinations such as berry blends, using blueberries, raspberries, and blackberries for a mixed berry popsicle. If you love tropical flavors, consider using pineapple and coconut milk for a refreshing island-inspired treat. You can also create layers by alternating different flavors in each popsicle.
Adjustments for Dietary Preferences
If you’re looking for vegan options, ensure that you use agave syrup or maple syrup instead of honey. For those who want a lower-sugar option, consider using stevia or other low-calorie sweeteners. Remember, you can also add vegetables like spinach or kale into your fruit blends for added nutrition without compromising flavor.
FAQs
Making fruit popsicles is simple, but you may still have questions. Here are some common FAQs to help you.
What Can I Do If the Dish Isn’t Turning Out Right?
If your popsicles are too icy, it’s likely that you used fruits with high water content or didn’t incorporate enough sweetener. You can add a bit of natural sweetener next time or mix in yogurt for a creamier texture. If they are too hard to get out of the molds, running them under warm water can help.
Can I Make This Ahead of Time?
Absolutely! Fruit popsicles are perfect for meal prep. You can make a big batch, store them properly, and have refreshing treats ready to go. Just remember to consume them within six weeks for the best taste.
What Can I Substitute for Ingredients?
Feel free to mix and match fruits according to your preferences. Many fruits work well in this recipe. For juices, orange juice can be replaced with apple or pineapple juice, and if you are avoiding honey, any other natural sweeteners would be a great alternative.
In summary, fruit popsicles are not only a treat but also a fun activity to do at home, especially with family and friends. With just a few basic ingredients and some creativity, you can make countless variations to enjoy all summer long. So grab your fruits, a blender, and your popsicle molds, and start creating your own fruity masterpieces today!
Print
Fruit Popsicles
- Prep Time: 15 minutes
- Cook Time: 0 minutes
- Total Time: 4 hours 15 minutes (includes freezing time)
- Yield: 8–10 popsicles 1x
- Category: Dessert, Snack
- Method: Freezing, Blending
- Cuisine: International
- Diet: Vegan
Description
Delicious and healthy homemade fruit popsicles made with fresh strawberries, mango, kiwi, natural sweeteners, and citrus juices. A refreshing frozen treat perfect for hot days.
Ingredients
- 2 1/2 cups strawberries, quartered
- 2 tablespoons lemon juice
- 1 tablespoon honey
- Pinch of salt
- 2 1/4 cups mango, chopped
- 1/4 cup orange juice
- 1 tablespoon honey
- Pinch of salt
- 2 1/4 cups kiwi, chopped
- 2 tablespoons lemon juice
- 1 tablespoon honey
- Pinch of salt
Instructions
- Wash and quarter the strawberries.
- Peel and chop the mangoes.
- Peel and chop the kiwis.
- In a blender, combine strawberries, lemon juice, honey, and salt; blend until smooth.
- Clean blender and combine mango, orange juice, honey, and salt; blend until smooth.
- Clean blender and combine kiwi, lemon juice, honey, and salt; blend until smooth.
- Fill popsicle molds one-third full with strawberry puree.
- Add mango puree to fill the next third of each mold.
- Top each mold with kiwi puree, leaving some space at the top.
- Secure the mold lids and freeze for at least 4 hours or overnight.
- To unmold, run molds under warm water for 5 seconds and gently pull out the popsicles.
Notes
- Do not overfill molds as the mixture expands when freezing.
- Use fresh, non-watery fruits for better texture.
- Blend fruit well for smooth consistency to avoid lumps.
- Optional: add herbs like mint or basil for extra flavor.
- For creamier popsicles, mix in yogurt or coconut milk before freezing.
- Store popsicles wrapped individually in parchment or plastic wrap to prevent freezer burn.
- Consume within six weeks for best taste; can last up to three months frozen.
Nutrition
- Serving Size: 1 popsicle
- Calories: 70
- Sugar: 12g
- Sodium: 15mg
- Fat: 0.2g
- Saturated Fat: 0g
- Unsaturated Fat: 0g
- Trans Fat: 0g
- Carbohydrates: 18g
- Fiber: 2g
- Protein: 0.5g
- Cholesterol: 0mg
Keywords: fruit popsicles, homemade popsicles, healthy frozen treats, easy fruit popsicles recipe, refreshing summer snacks