
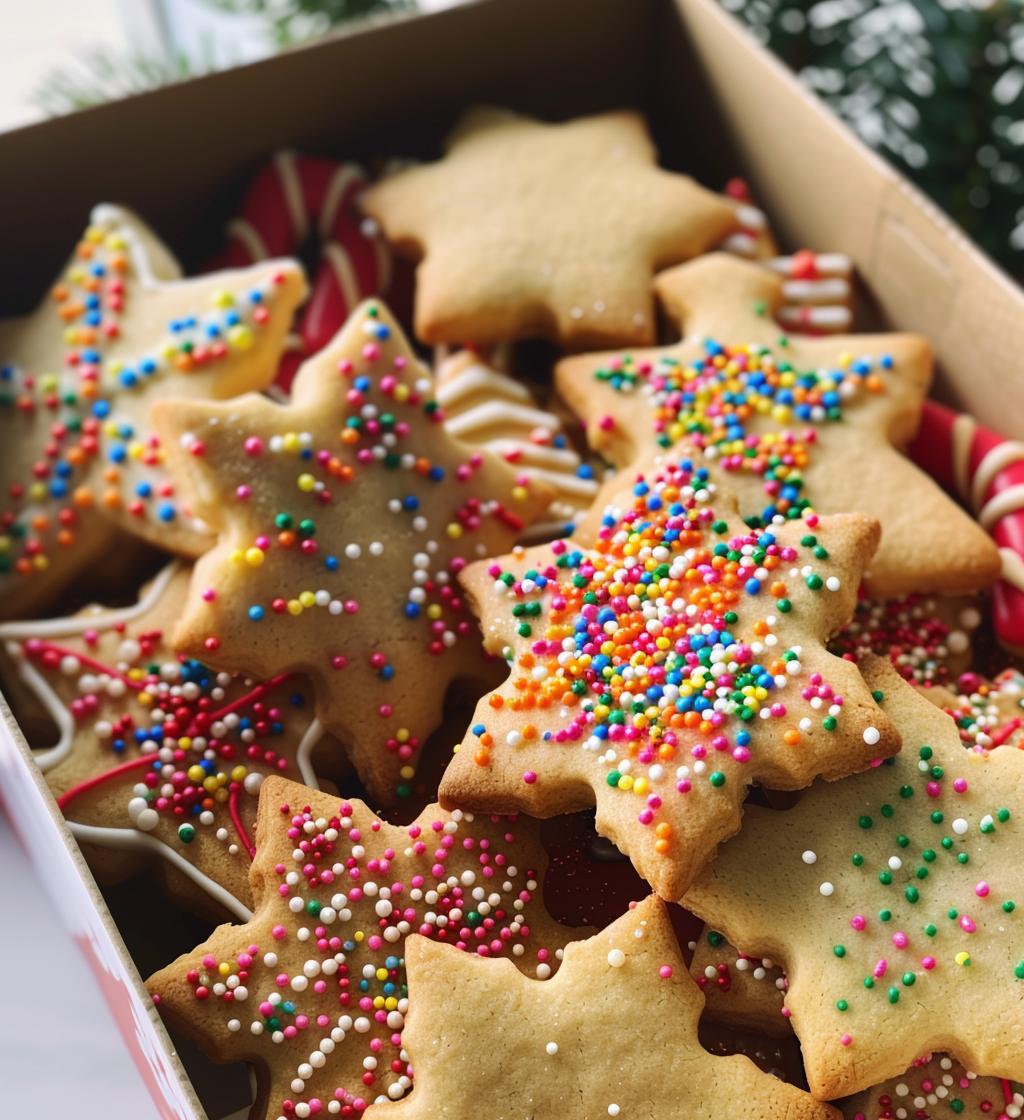
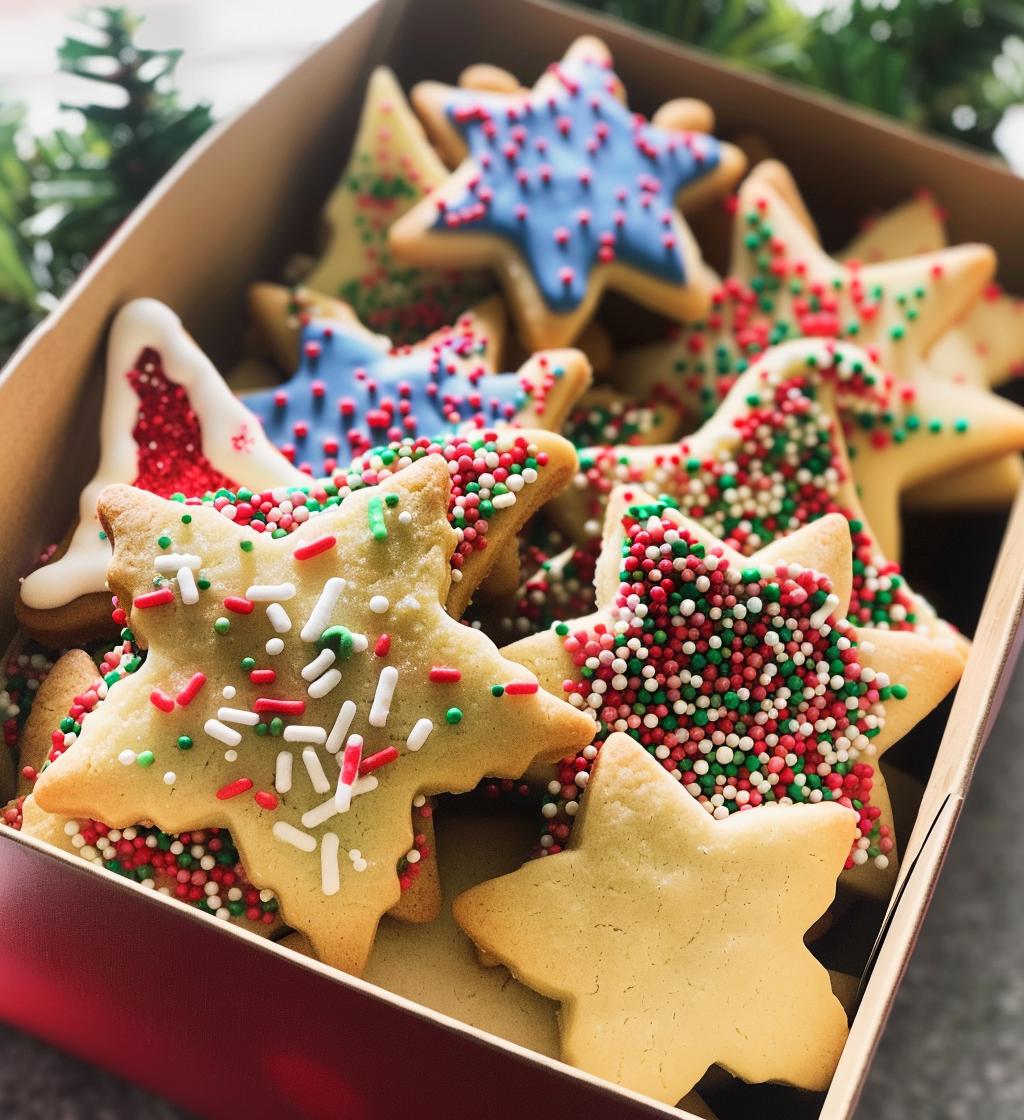
Ah, the joy of holiday baking! Every year, I look forward to gathering in the kitchen with my family, flour flying everywhere, laughter ringing out, and the smell of butter and sugar wafting through the air. One of my favorite traditions is creating a Christmas cookie box. It’s not just about the cookies; it’s about the memories we make together. Each cookie shape tells a story, from snowflakes to candy canes, and decorating them with colorful sprinkles feels like a celebration of joy and creativity. Trust me, there’s something truly special about sharing a beautifully wrapped box of homemade cookies with friends and family. It’s a sweet way to spread the holiday cheer!
Ingredients List
Here’s what you’ll need to whip up your festive Christmas cookie box. Each ingredient plays a vital role in creating those delicious little delights!
- 2 cups all-purpose flour: This is the foundation of your cookie dough, giving it structure and a lovely texture.
- 1 cup unsalted butter, softened: Make sure your butter is at room temperature for easy creaming. It adds richness and helps create that melt-in-your-mouth experience.
- 1 cup granulated sugar: This sweetener is key for that classic cookie taste and helps achieve a nice, tender crumb.
- 1/2 cup powdered sugar: This adds a touch of sweetness and helps create a softer texture; it’s like magic!
- 1 large egg: The egg binds everything together and adds moisture, making the cookies wonderfully chewy.
- 1 tsp vanilla extract: Trust me, this adds a warm, inviting flavor that makes your cookies taste like the holidays.
- 1/2 tsp baking powder: This helps your cookies rise a bit and gives them that perfect, soft texture.
- 1/4 tsp salt: Just a pinch enhances all the sweet flavors and balances everything out.
- Decorative sprinkles: These are for the fun! Add them on top before baking to make your cookies pop with color and festivity.
How to Prepare Instructions
Now that you have all your ingredients ready, let’s get baking! Follow these simple steps to create your delightful Christmas cookie box:
- First things first, preheat your oven to 350°F (175°C). This way, your cookies will bake perfectly once we’re ready to pop them in!
- In a large mixing bowl, cream together the softened butter, granulated sugar, and powdered sugar. You want to mix until it’s light and fluffy—about 2-3 minutes. Trust me, this step is key for a tender cookie!
- Next, crack in that large egg and pour in the vanilla extract. Mix everything together until it’s well combined. The batter should look smooth and delicious!
- In another bowl, whisk together the all-purpose flour, baking powder, and salt. This helps ensure even distribution of the baking powder and salt throughout the cookie dough.
- Gradually add the dry ingredients to the wet mixture, mixing until a dough starts to form. Don’t overmix; a few floury bits are okay!
- Now comes the fun part! Roll out your dough on a lightly floured surface to about 1/4 inch thick. Use cookie cutters to cut out your desired shapes. I love making stars and trees!
- Place the cut cookies on a baking sheet lined with parchment paper. Make sure to leave a little space between them, as they will spread slightly while baking.
- Before baking, sprinkle those colorful decorative sprinkles on top of your cookies. They’ll add a festive touch that’s sure to impress!
- Bake in the preheated oven for 10-12 minutes, or until the edges are lightly golden. Keep an eye on them; ovens can vary!
- Once baked, remove the cookies from the oven and let them cool on the baking sheet for about 5 minutes. Then, transfer them to a wire rack to cool completely before placing them in your cookie box.
And there you have it! The process is simple, and the smell of freshly baked cookies will fill your home with holiday spirit. Enjoy your baking adventure!
Why You’ll Love This Recipe
There are so many reasons to fall in love with this Christmas cookie box recipe! First off, the preparation time is super quick, making it easy to whip up a batch even on those busy holiday days. You can have the dough mixed and cookies baking in no time!
Another fantastic aspect is the ability to customize your cookies with various shapes. Whether you’re feeling like making classic gingerbread men or whimsical snowflakes, the options are endless! Each cookie can reflect your personality or the holiday spirit.
And let’s not forget how perfect these cookies are for gifting! A beautifully arranged cookie box makes for a heartfelt present that friends and family are sure to appreciate. It’s a sweet gesture that spreads joy and love during the holiday season.
Lastly, creating a Christmas cookie box instantly fills your home with a festive atmosphere. The delightful smell of baking cookies wafting through the air is a comforting reminder of the season, evoking nostalgia and cheer. Trust me, there’s nothing quite like it!
Tips for Success
To make your Christmas cookie box truly shine, I’ve got some pro tips that’ll help you achieve cookie perfection!
- Chill Your Dough: If you notice that your dough is too soft to handle, don’t hesitate to pop it in the fridge for about 30 minutes. Chilling helps the butter firm up, making it easier to roll out and cut into shapes.
- Use Parchment Paper: Line your baking sheets with parchment paper to prevent sticking and ensure even baking. It’s a game changer for easy cleanup too!
- Keep an Eye on Baking Times: Ovens can be sneaky! Start checking your cookies at the 10-minute mark. You want them to be just lightly golden around the edges for that perfect soft center.
- Experiment with Sprinkles: Mix and match different colored sprinkles for a vibrant, festive look! You can even use themed sprinkles to match your holiday decor.
- Let Them Cool Completely: Be patient! Allow your cookies to cool completely on a wire rack before packing them into your cookie box. This ensures they won’t get soggy and keeps them fresh longer.
- Get Creative with Decorations: Once cooled, feel free to decorate your cookies with icing, chocolate drizzle, or even edible glitter for an extra festive touch. Let your creativity flow!
- Batch Bake: If you’re planning to share your cookie box with family and friends, consider doubling the recipe. This way, you’ll have plenty for everyone and maybe even some for yourself!
With these tips in your back pocket, you’re all set to create a stunning Christmas cookie box that’ll impress everyone! Happy baking!
Variations
One of the best things about your Christmas cookie box is how versatile it can be! You can easily mix things up to create a variety of flavors and styles that keep everyone excited. Here are some fun ideas to customize your cookie experience:
- Flavor Infusions: Try adding different extracts to your dough! Almond extract can give your cookies a lovely twist, or you could use peppermint extract for a fresh, holiday vibe.
- Nuts Galore: Chop up some walnuts, pecans, or almonds and fold them into the dough for added crunch and flavor. They add a fantastic texture that compliments the sweetness beautifully!
- Chocolate Chip Delight: Who doesn’t love chocolate? Toss in some semi-sweet or white chocolate chips to the dough for a rich, decadent treat. You could even do a mix of both for a fun surprise!
- Spice It Up: For a cozy twist, add some ground cinnamon or nutmeg to the dough. It’ll evoke that warm holiday feeling and make your cookies taste like they just came out of a winter wonderland.
- Festive Sprinkles: Change up the sprinkles! Use holiday-themed sprinkles like snowflakes or Christmas trees for a cheerful look. You could also experiment with colored sugar for a sparkling effect.
- Glazed Goodness: Once your cookies are cooled, drizzle them with a simple icing made from powdered sugar and milk. You can even tint the icing with food coloring for a vibrant, artistic touch.
- Layered Cookies: For a fun presentation, consider making layered cookies by rolling out different colored doughs and cutting them together. It’s a great way to make visually stunning treats!
With these variations, your Christmas cookie box will be a delightful surprise for everyone who receives it! Get creative and have fun with the flavors—after all, that’s what the holidays are all about!
Serving Suggestions
When it comes to enjoying the cookies from your Christmas cookie box, the possibilities are endless! I love to serve these festive treats alongside a steaming cup of hot cocoa. Just imagine cozying up with a warm mug topped with whipped cream and a sprinkle of cocoa, and indulging in a sweet cookie—it’s pure bliss!
If you’re hosting a holiday gathering, consider setting up a little cookie station with various drinks. Pair your cookies with freshly brewed coffee or even a delightful spiced tea. The rich flavors of the cookies complement the warmth of the beverages beautifully, creating the perfect balance.
For a fun twist, why not make a cookie platter? Arrange a selection of cookies from your box, and add some festive fruits like pomegranate seeds or orange slices for a pop of color. It not only looks stunning but also adds a fresh element to the dessert table!
Another idea I adore is to use these cookies as a topping for a scoop of vanilla ice cream. Crumble the cookies over the ice cream for a deliciously sweet and crunchy dessert that’s sure to impress your guests. It’s the ultimate holiday treat!
However you choose to serve them, these cookies are sure to bring joy and sweetness to your holiday celebrations. Enjoy every bite and the smiles they bring!
Storage & Reheating Instructions
Now that your Christmas cookie box is filled with those delightful treats, let’s talk about how to keep them fresh and tasty!
To store your leftover cookies, simply place them in an airtight container. This will help keep them soft and prevent them from drying out. I like to separate layers of cookies with parchment paper to avoid any sticking. They’ll stay fresh at room temperature for about a week, which is perfect for enjoying a sweet bite every day!
If you want to keep them longer, you can freeze your cookies! Just make sure they’re completely cooled, then wrap each cookie individually in plastic wrap and place them in a freezer-safe bag or container. They can last up to three months in the freezer. When you’re ready to enjoy them, just take out the desired amount and let them thaw at room temperature for a bit.
Now, if you like your cookies warm (and who doesn’t?), you can easily reheat them! Preheat your oven to 300°F (150°C) and place the cookies on a baking sheet for about 5-7 minutes. This will help revive that fresh-baked taste and make them irresistibly soft. Just keep an eye on them to make sure they don’t overbake!
With these storage tips, your Christmas cookie box will be a treasure trove of sweet memories throughout the holiday season. Enjoy every last crumb!
Nutritional Information
As you dive into your delicious Christmas cookie box, it’s nice to have an idea of what’s in those sweet treats! Here’s the estimated nutritional information per cookie:
- Calories: 150
- Fat: 8g
- Saturated Fat: 5g
- Trans Fat: 0g
- Cholesterol: 20mg
- Sodium: 50mg
- Carbohydrates: 18g
- Fiber: 0g
- Sugar: 10g
- Protein: 2g
Please keep in mind that these figures are estimates and can vary based on the specific ingredients you use. But hey, when it comes to holiday cookies, it’s all about enjoying those moments and sweet flavors, right? Happy indulging!
FAQ Section
Got some questions about your Christmas cookie box? No worries, I’ve got you covered! Here are some common queries I often hear:
Can I freeze these cookies?
Absolutely! These cookies freeze beautifully. Just make sure they’re completely cooled, then wrap each cookie individually in plastic wrap and place them in a freezer-safe bag. They can last up to three months in the freezer. When you’re ready for a sweet treat, simply thaw them at room temperature!
How long do they stay fresh?
If stored in an airtight container at room temperature, your cookies will stay fresh for about a week. Just be sure to separate layers with parchment paper to avoid sticking. They’re perfect for enjoying a little holiday sweetness each day!
Can I use gluten-free flour?
Yes, you can! You can substitute all-purpose flour with a gluten-free flour blend. Just make sure to choose one that measures cup-for-cup like regular flour for the best results. Your cookies will still be delicious, and everyone can indulge!
What decorations can I use for my Christmas cookie box?
Get creative! You can use colorful sprinkles, edible glitter, or even drizzle some icing on top. The sky’s the limit! You might even consider adding themed decorations like candy canes or mini holiday ornaments for an extra festive touch. It’s all about making your cookie box as cheerful as possible!
I hope this helps answer your questions! Happy baking and enjoy creating your Christmas cookie box!