
Oh, the magic of the holiday season! One of my favorite traditions is whipping up a batch of delightful Christmas candy that fills the house with warmth and cheer. This festive treat is not just a sweet indulgence; it’s a celebration of flavors that dances on your tongue! Imagine the crunch of crushed candy canes mingling with the sweet, peppermint-infused goodness. It’s the perfect way to spread holiday joy, whether you’re making it for family gatherings or as a thoughtful gift for friends. Trust me, once you experience the satisfaction of creating your own Christmas candy, you’ll never want to go back to store-bought. It’s simple, fun, and oh-so-rewarding—let’s dive into this scrumptious recipe together!
Ingredients List
- 2 cups sugar
- 1 cup corn syrup
- 1/2 cup water
- 1 teaspoon peppermint extract
- Red and green food coloring
- 1 cup crushed candy canes
How to Prepare Christmas Candy
Making your own Christmas candy is a delightful process, and I promise it’s easier than you might think! Just follow these steps, and you’ll have a festive treat that’s sure to impress.
Step-by-Step Instructions
- Start by gathering all your ingredients—trust me, it makes everything so much smoother! In a medium saucepan, combine 2 cups of sugar, 1 cup of corn syrup, and 1/2 cup of water. Stir gently until the sugar begins to dissolve.
- Now, turn the heat to medium and bring the mixture to a boil. Don’t stir it once it starts boiling, as this can affect the texture of your candy. Just keep an eye on it! You’ll want to watch for the bubbles to get really big and lively.
- Continue cooking until the mixture reaches 300°F (that’s the hard crack stage). This is where the magic happens, so a candy thermometer is super helpful here. It usually takes about 10 minutes, but keep checking because every stove is a bit different!
- Once you hit that perfect temperature, remove the saucepan from the heat. Be careful, it’s hot! Now, add in 1 teaspoon of peppermint extract and a few drops of red and green food coloring. The colors will swirl beautifully—what a festive sight!
- Next, pour the mixture onto a greased baking sheet. Don’t worry about being too precise; just let it spread out naturally. It should be about 1/4 inch thick.
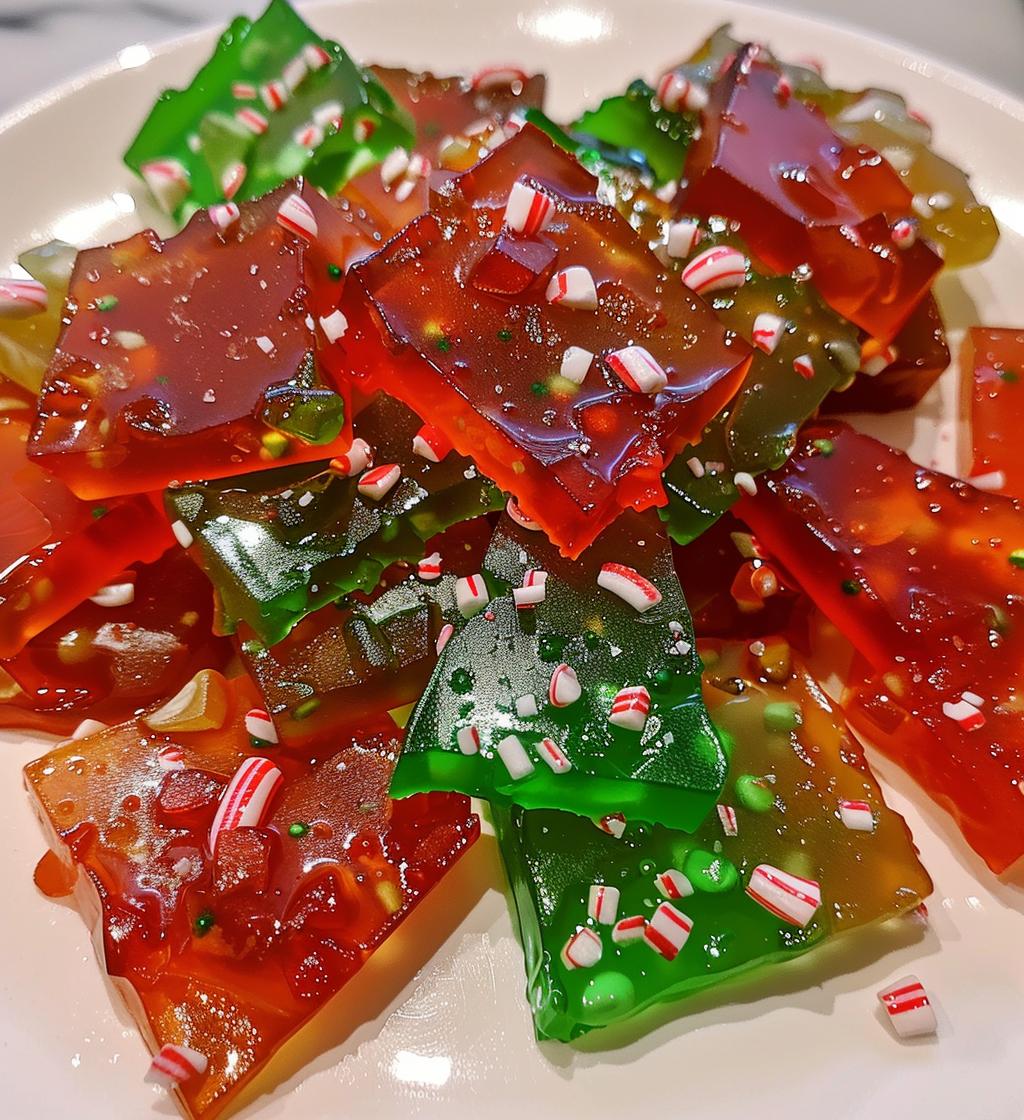
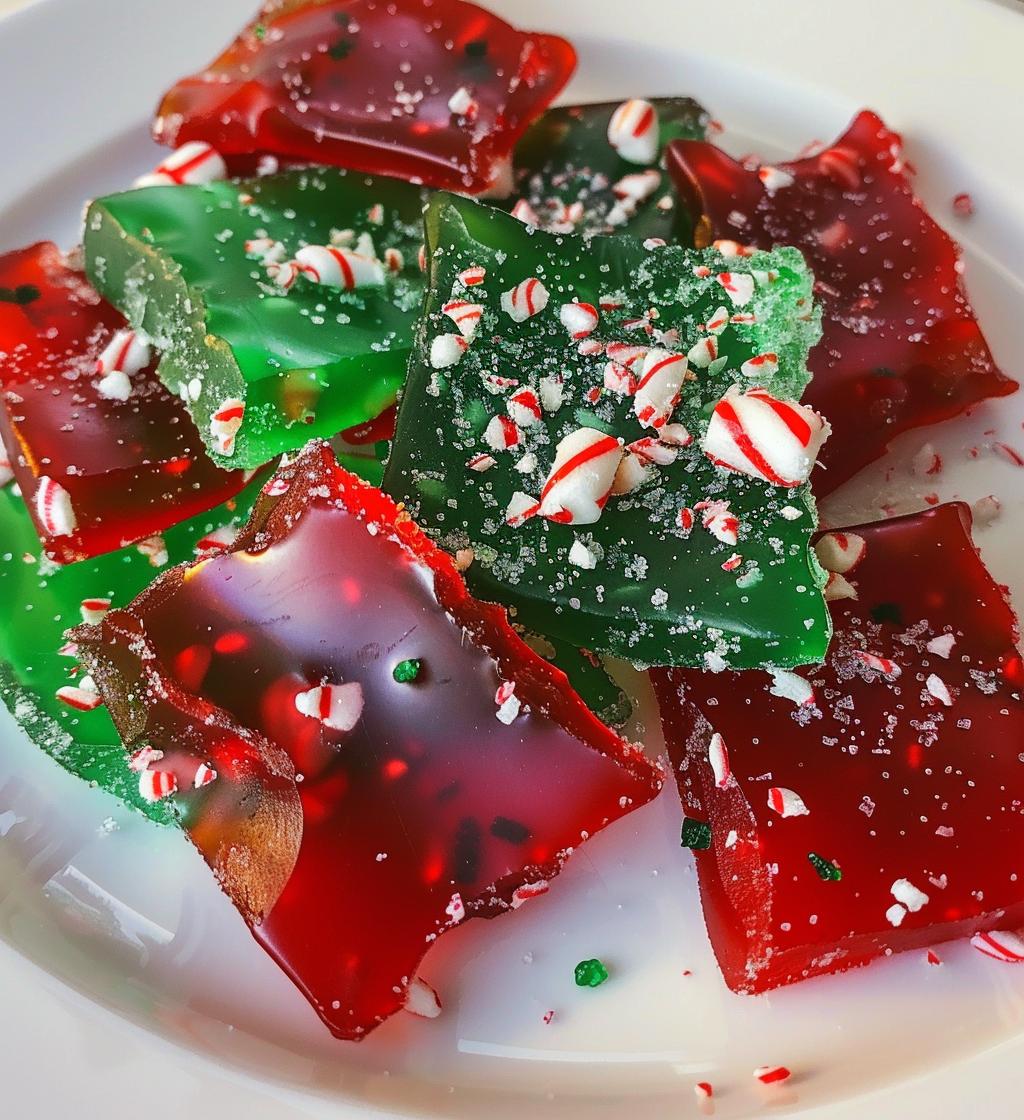
- While it’s still warm, generously sprinkle 1 cup of crushed candy canes on top. Press them down gently so they adhere to the candy.
- Let the candy cool completely at room temperature. Once it’s set, break it into pieces—this is the best part! You’ll love the satisfying crunch as you break it apart.
And there you have it! Your very own Christmas candy, ready to share (or keep all to yourself—no judgment here!).
Why You’ll Love This Recipe
- Quick and easy to make—perfect for busy holiday schedules!
- Festively colorful and visually stunning for your holiday table.
- Deliciously sweet with a refreshing peppermint kick.
- Customizable with different colors and flavors to suit your taste.
- A delightful gift that brings smiles to friends and family alike.
- Perfect for holiday parties, cookie exchanges, or just a sweet treat at home.
Tips for Success
To make your Christmas candy truly shine, here are some of my top tips! First, always use a candy thermometer for the best results—you want to hit that hard crack stage precisely. If you don’t have one, keep a close eye on the bubbling mixture. Also, be careful when adding the peppermint extract; the steam can be intense! If you want a more vibrant color, add a few extra drops of food coloring when mixing in the peppermint. And don’t forget, letting the candy cool completely before breaking it is key to achieving that perfect crunch. Happy candy-making!
Serving Suggestions
When it comes to sharing your delightful Christmas candy, the possibilities are endless! You can package it in cute, festive bags tied with ribbon for a charming homemade gift—perfect for teachers or neighbors. Alternatively, serve it on a beautiful platter at your holiday gatherings; it adds a pop of color to any dessert table! For extra fun, mix pieces into hot cocoa or sprinkle them over ice cream for a sweet crunch. No matter how you choose to present it, this candy is bound to spread holiday cheer and bring smiles all around!
Storage & Reheating Instructions
To keep your Christmas candy fresh and delicious, store it in an airtight container at room temperature. This way, it’ll stay crunchy and flavorful for up to two weeks—if it lasts that long! Just make sure to separate layers with parchment paper to prevent sticking. And don’t worry about reheating; this candy is best enjoyed as is, straight from the container. So, go ahead and indulge in that festive crunch whenever the mood strikes you!
Nutritional Information
Keep in mind that nutritional values can vary based on the specific ingredients and brands you use, so these numbers are just estimates. Typically, each piece of this Christmas candy contains about 100 calories, 0g fat, 0g protein, and 25g carbohydrates, with 20g of sugar. Enjoy responsibly!
FAQ Section
Can I use different flavors instead of peppermint? Absolutely! You can experiment with other extracts like almond, vanilla, or even orange for a unique twist on your Christmas candy. Just remember to keep the measurements the same.
What if my candy doesn’t harden? If your candy doesn’t reach the hard crack stage (300°F), it may not set properly. Make sure you use a candy thermometer and keep an eye on the temperature. If this happens, you can reheat it gently and try again!
How long can I store the Christmas candy? When stored in an airtight container at room temperature, your Christmas candy will stay fresh for about two weeks. Just be sure to separate layers with parchment paper to keep them from sticking together.
Can I add nuts or other toppings? Yes! Feel free to sprinkle chopped nuts or even drizzles of chocolate on top before the candy sets for added flavor and texture.
Is this recipe suitable for gifting? Definitely! Pack it in cute containers or bags, and it makes a delightful, homemade gift that’s sure to impress friends and family during the holiday season.