
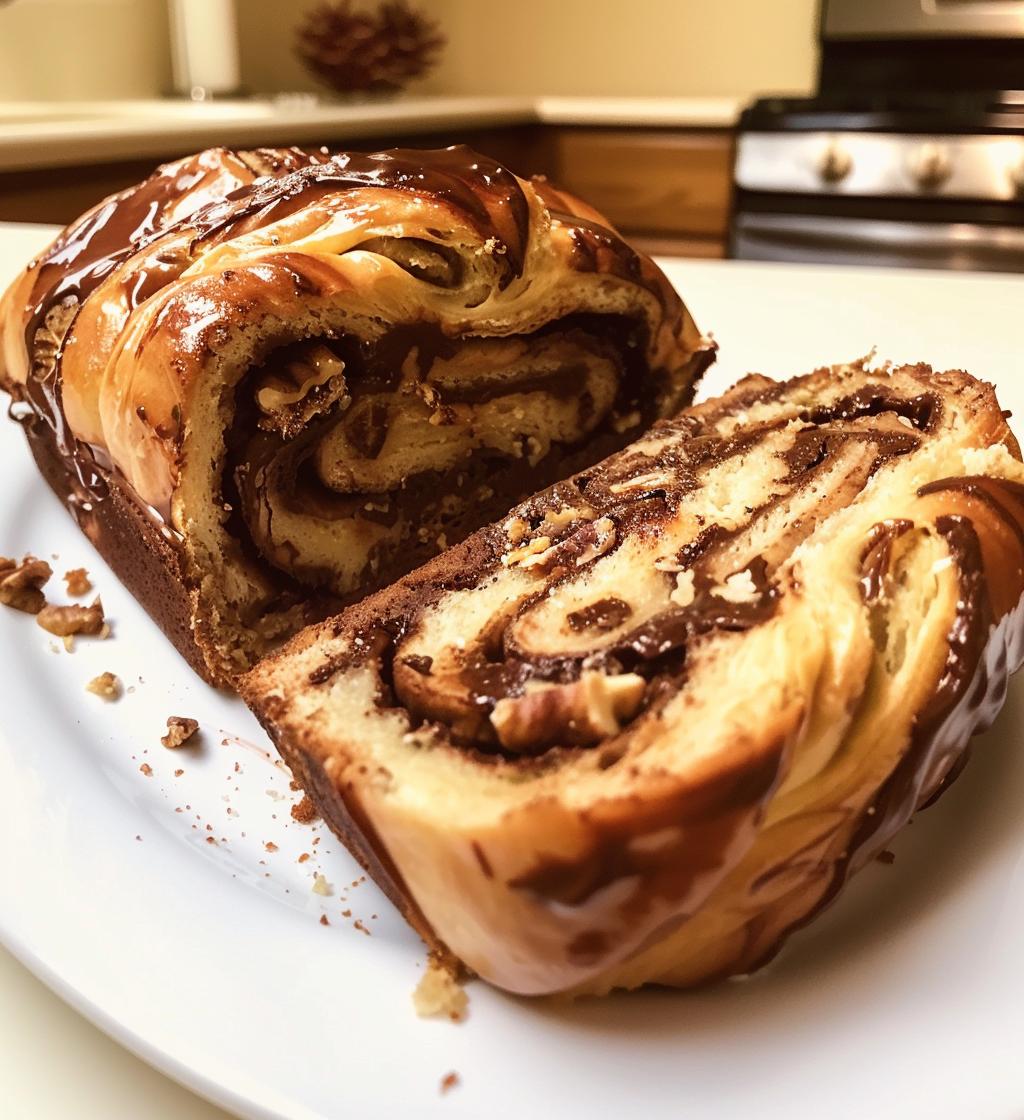
Ah, Christmas babka! Just saying it brings back the sweetest memories. This festive, sweet bread is not just a treat; it’s a celebration of cozy family gatherings and holiday cheer. Picture this: the aroma of warm, buttery dough swirling through the house as it bakes, inviting everyone to gather in the kitchen. It’s like a hug in bread form! My family has a tradition of making babka every Christmas, and I can’t tell you how special it feels to pass this recipe down. Each bite is a delightful dance of rich chocolate and crunchy nuts, the texture perfectly soft yet slightly chewy. Trust me, once you slice into this gorgeous loaf and see those beautiful swirls, you’ll know it’s the highlight of your holiday table. So, let’s roll up our sleeves and get ready to make some magic happen in the kitchen!
Ingredients List
- 4 cups all-purpose flour
- 1 cup warm milk (not hot, just warm enough to activate the yeast)
- 1/2 cup granulated sugar
- 1/2 cup unsalted butter, melted
- 2 large eggs
- 1 packet (2 1/4 teaspoons) active dry yeast
- 1/2 teaspoon salt
- 1 cup chocolate chips (high-quality for the best flavor)
- 1/2 cup chopped nuts (walnuts or pecans, finely chopped)
How to Prepare Christmas Babka
Alright, let’s get down to the fun part – making this scrumptious Christmas babka! I promise, it’s easier than it looks, and the end result is absolutely worth every step! So, grab your apron, and let’s dive in!
Step 1: Activate the Yeast
First things first, we need to wake up that yeast! In a bowl, combine your warm milk and the packet of active dry yeast. Make sure the milk is warm, not hot – you want it to be cozy enough to give the yeast a little nudge without scalding it. Let it sit for about 5 minutes until it’s frothy and bubbly. This means your yeast is alive and ready to work its magic!
Step 2: Prepare the Dough
In a separate large bowl, mix together the flour, sugar, and salt. This is where the foundation of our babka begins! Once those dry ingredients are well combined, create a little well in the center. Pour in the melted butter, the two eggs, and your bubbly yeast mixture. Now, it’s time to get your hands in there! Knead the dough until it’s smooth and elastic – this usually takes about 8-10 minutes. If it’s too sticky, don’t hesitate to sprinkle a little extra flour. You want it to feel soft and manageable!
Step 3: First Rise
Once your dough is kneaded to perfection, it’s time for it to rise! Place the dough in a lightly greased bowl and cover it with a damp cloth or plastic wrap. Set it in a warm place and let it rise for about 1 hour, or until it has doubled in size. This step is crucial as it develops the texture and flavor of your babka. Just imagine the delightful aroma that will start to fill your kitchen!
Step 4: Shape the Babka
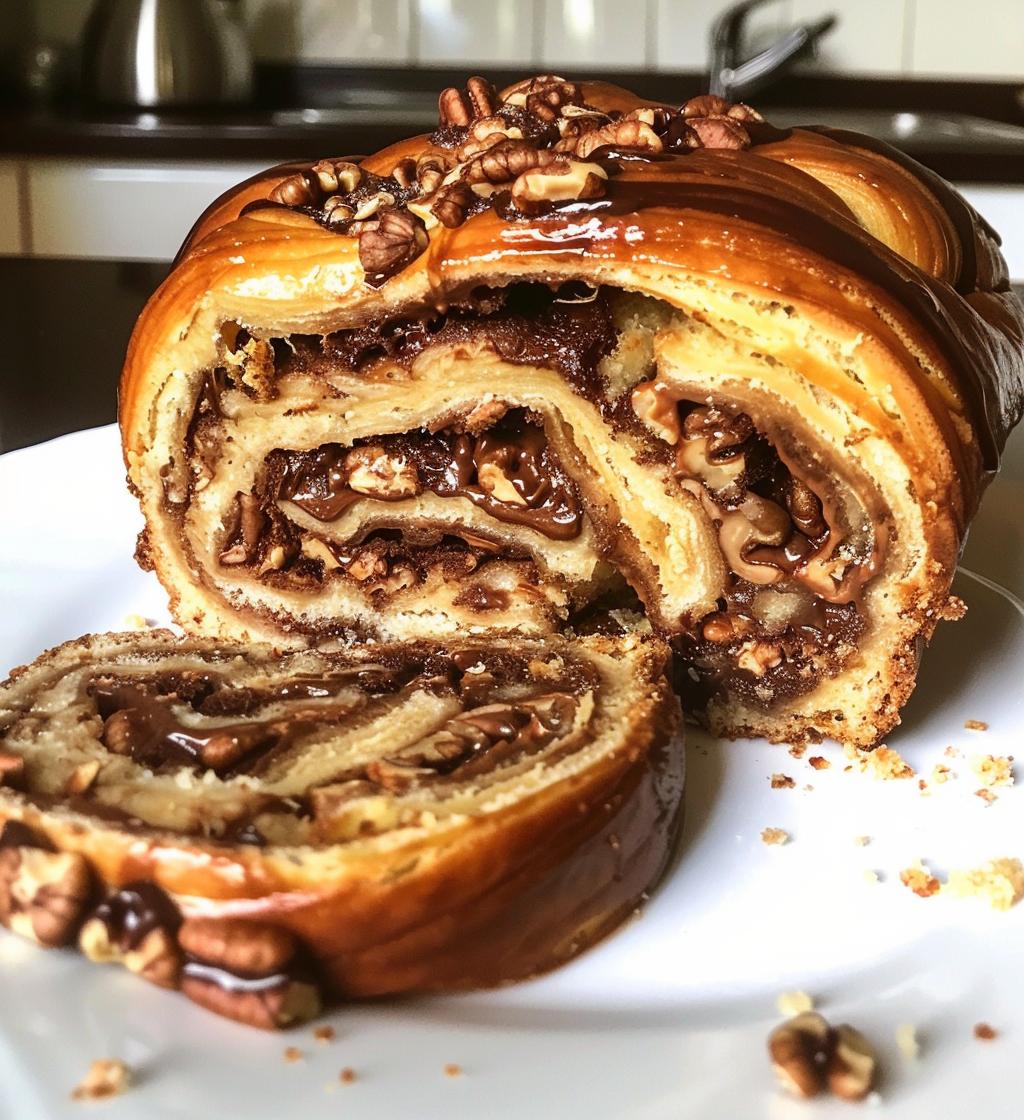
After the dough has risen, punch it down gently to release the air. Now, roll it out on a floured surface into a large rectangle – about ¼ inch thick. This is where the magic happens! Sprinkle the chocolate chips and chopped nuts evenly over the dough. Now, roll the dough tightly from one long end to the other, creating a beautiful log. Once rolled, place it in a greased loaf pan. This is going to be one gorgeous loaf!
Step 5: Second Rise
Cover your loaf pan with a cloth and let it rise again for another 30 minutes. This second rise is so important for that fluffy texture we all love. It’ll puff up beautifully, so don’t rush it! Just relax and maybe sip on some hot cocoa while you wait.
Step 6: Baking
Now it’s time for the oven to work its magic! Preheat your oven to 350°F (175°C). Bake your babka for 30-35 minutes, or until it’s golden brown and your kitchen is filled with an irresistible aroma. If you tap on the loaf and it sounds hollow, it’s ready! Just be careful not to burn yourself; it’ll be super hot!
Step 7: Cooling and Slicing
Once it’s out of the oven, let your beautiful babka cool in the pan for about 10 minutes. Then, carefully transfer it to a wire rack to cool completely. I know it’s tempting, but try to resist slicing it while it’s still warm! Cooling is key for getting those perfect slices – you want the texture to be just right. Once you do slice into it, you’ll be greeted with those delicious swirls of chocolate and nuts that’ll make your heart sing!
Nutritional Information
Now, let’s chat about the nutritional side of things! Each slice of this delightful Christmas babka is a sweet indulgence that you can enjoy without too much guilt. Here’s a breakdown of the estimated nutritional values per slice:
- Calories: 250
- Fat: 10g
- Saturated Fat: 5g
- Unsaturated Fat: 3g
- Trans Fat: 0g
- Sodium: 150mg
- Sugar: 10g
- Carbohydrates: 35g
- Fiber: 2g
- Protein: 5g
- Cholesterol: 40mg
Keep in mind that these values are estimates and can vary depending on the specific ingredients you use. But hey, it’s Christmas, and a little treat here and there is what the season is all about, right? Enjoy every delicious bite!
Tips for Success
Now that you’re ready to tackle this festive Christmas babka, I want to share some of my favorite tips to ensure your loaf turns out perfectly every time! These little nuggets of wisdom will help you achieve that dreamy, swirly goodness we all crave.
- Use Quality Ingredients: Don’t skimp on the chocolate or nuts! High-quality chocolate chips and fresh nuts make a huge difference in flavor. Trust me, your taste buds will thank you!
- Temperature Matters: When activating the yeast, make sure the milk is just warm, like a cozy bath. If it’s too hot, you’ll kill the yeast, and that’s a big no-no!
- Kneading Technique: Knead the dough until it’s smooth and elastic, but don’t overdo it. You want it to feel soft and slightly tacky, but not sticking to your hands. If it feels too sticky, sprinkle a little extra flour as needed.
- Patience is Key: Allow the dough to rise in a warm environment. If your kitchen is a bit chilly, you can turn on your oven for a minute, then turn it off and let the dough rise in there. Just make sure it’s not too hot!
- Rolling Evenly: When rolling out the dough, try to keep it even in thickness. This helps the babka bake uniformly, giving you those lovely swirls throughout.
- Don’t Rush the Rising: Both rising steps are crucial for that fluffy texture. If you’re in a hurry, just take a deep breath and let it rise – the wait is worth it!
- Cool Before Slicing: I know it’s hard to resist, but giving your babka time to cool completely before slicing will ensure those beautiful layers stay intact. Warm babka can be a little gooey when cut.
- Experiment with Flavors: Once you’ve mastered the classic version, feel free to play around with fillings! Try adding cinnamon, orange zest, or even a nut butter spread for a fun twist!
With these tips in your back pocket, you’re all set to create a stunning Christmas babka that’ll impress everyone at your holiday gatherings. Happy baking!
Why You’ll Love This Recipe
- It’s a festive centerpiece that brings warmth and joy to your holiday table.
- Deliciously rich with a perfect balance of chocolate and crunchy nuts.
- The swirls make for a stunning presentation that will wow your guests.
- Perfect for sharing with family and friends during holiday gatherings.
- Every bite is soft, fluffy, and incredibly satisfying—truly a slice of heaven!
- It fills your kitchen with the most mouthwatering aroma—just heavenly!
- Great for gifting! Wrap it up and spread the holiday cheer with loved ones.
- It’s a recipe that can easily become a cherished family tradition.
- Versatile enough to enjoy for breakfast, dessert, or a sweet afternoon snack.
Storage & Reheating Instructions
Once you’ve baked your scrumptious Christmas babka, you’ll want to make sure it stays fresh and delicious for as long as possible. Here’s how to store your leftovers and keep that delightful taste intact!
First off, let your babka cool completely on a wire rack. This is super important because if you store it while it’s still warm, it can create condensation and make it soggy. After it’s cooled, wrap it tightly in plastic wrap or place it in an airtight container. It should stay fresh at room temperature for about 2-3 days. Just be sure to keep it away from direct sunlight or heat!
If you want to keep it for a longer time, you can freeze the babka. Slice it first for easy serving later! Wrap each slice individually in plastic wrap and then put them in a freezer-safe bag or container. This way, you can pull out just what you need without defrosting the whole loaf. It’ll stay good in the freezer for up to 2 months.
When you’re ready to enjoy a slice, just take it out of the freezer and let it thaw in the fridge overnight. If you prefer it warm, you can pop a slice in the microwave for about 15-20 seconds, or you can even reheat it in a toaster oven at a low temperature until it’s warmed through. This will help revive that glorious texture and flavor. Trust me, the aroma will have you feeling festive all over again!
So, whether you’re enjoying it fresh or savoring those frozen slices, your Christmas babka will be a delightful treat that keeps the holiday spirit alive. Happy munching!
FAQ Section
Can I freeze Christmas babka?
Absolutely! Freezing is a great way to preserve your delicious babka. Just slice it first, wrap each slice tightly in plastic wrap, and store them in a freezer-safe bag or container. It’ll stay fresh for up to 2 months. When you’re ready to enjoy a slice, you can thaw it in the fridge overnight or pop it in the microwave for a quick warm-up!
How should I store leftover babka?
After your babka has cooled completely, wrap it tightly in plastic wrap or place it in an airtight container. It’ll stay good at room temperature for about 2-3 days. Just keep it away from direct sunlight or heat to maintain its freshness!
What if I don’t have nuts? Can I leave them out?
Of course! If you’re not a fan of nuts or don’t have any on hand, feel free to skip them. You can also substitute with other add-ins like dried fruits or even extra chocolate chips for a double chocolate treat!
Can I use different types of chocolate?
Definitely! While I love using chocolate chips, you can get creative with your favorite types of chocolate. Dark, milk, or even white chocolate would all work beautifully in this recipe. Just make sure to chop it into small pieces if you’re using a chocolate bar!
What if my dough doesn’t rise?
If your dough doesn’t rise, it might be due to the yeast being inactive, possibly from being exposed to too hot milk. Make sure your milk is warm but not scalding. If it’s too cold, your yeast won’t activate properly. If your dough doesn’t rise, don’t worry too much; you can still bake it, but the texture might be denser.
Can I add spices or flavorings to my babka?
Absolutely! Feel free to get creative with spices! Adding a teaspoon of cinnamon or a splash of vanilla extract will give your babka an extra depth of flavor. You could also try incorporating orange zest for a festive twist!
How can I tell when my babka is done baking?
Your babka is done when it’s golden brown and sounds hollow when tapped on the bottom. It should also spring back slightly when pressed. If you’re unsure, you can always use a toothpick to check; it should come out clean from the center.
Can I make this babka ahead of time?
Yes, you can prepare the dough ahead of time! After the first rise, you can refrigerate it overnight. Just make sure to bring it back to room temperature before shaping and proceeding with the second rise. It’s a great way to have fresh babka ready for holiday gatherings!