

Oh my goodness, let me tell you about buttermilk waffles! These beauties are like clouds on your plate—fluffy, light, and oh-so-delicious! I remember the first time I tried them at a cozy little diner; I was instantly hooked! The crispy edges and soft, pillowy centers, drizzled with syrup… it was pure breakfast magic. What I love about this recipe is how simple it is to whip up a batch at home. The buttermilk adds a subtle tang that elevates the flavor and keeps the texture just right. Trust me, once you try these homemade buttermilk waffles, you’ll never want to go back to anything else! They’re perfect for lazy Sunday mornings or even a special brunch with friends. Grab your waffle iron, and let’s get cooking!
Ingredients for Buttermilk Waffles
- 2 cups all-purpose flour
- 2 tablespoons sugar
- 1 tablespoon baking powder
- 1/2 teaspoon baking soda
- 1/2 teaspoon salt
- 2 large eggs
- 1 3/4 cups buttermilk
- 1/2 cup melted butter
- 1 teaspoon vanilla extract
How to Prepare Buttermilk Waffles
Alright, let’s get those waffles cooking! This part is super easy, and I promise you’ll feel like a pro in no time. First things first—preheat your waffle iron according to the manufacturer’s instructions. This is key to achieving that crispy exterior we all love!
Step-by-Step Instructions
- In a large bowl, grab your flour, sugar, baking powder, baking soda, and salt. Give it a good whisk to combine all those dry ingredients.
- Now, in another bowl, whisk together the eggs, buttermilk, melted butter, and vanilla extract until it’s all smooth and beautiful. This is where the magic begins!
- Carefully pour the wet mixture into the dry ingredients. Here’s the trick: mix them together until just combined. You want a few lumps—don’t overdo it! This keeps the waffles nice and fluffy.
- Once your batter is ready, it’s time to pour it into that preheated waffle iron. Aim for about 1/2 to 3/4 cup of batter, but this can vary based on your iron’s size.
- Close the lid and let those waffles cook until they’re golden brown and crispy. This usually takes about 4 to 6 minutes, but keep an eye on them! Every waffle maker is a little different.
- When they’re done, carefully remove the waffles and serve them warm with your favorite toppings. Yum!
And just like that, you’ve got a stack of homemade buttermilk waffles that are ready to impress! Don’t forget to savor that first bite—it’s a game changer!
Why You’ll Love This Recipe
- Quick and easy to whip up—perfect for busy mornings!
- Incredibly fluffy texture that melts in your mouth.
- Versatile with toppings—go sweet with syrup, fresh fruit, or whipped cream, or get creative with nut butter and chocolate chips!
- Ideal for breakfast, brunch, or even a breakfast-for-dinner treat.
- Can easily be doubled or halved for any size gathering.
- Leftovers can be stored and reheated for a quick snack or meal later on.
- Made with simple ingredients that you likely already have in your pantry!
Tips for Success
Alright, let’s make sure your buttermilk waffles turn out absolutely perfect every time! First off, don’t rush the preheating of your waffle iron—it’s crucial for getting that ideal crispy exterior. If you find your waffles aren’t as crispy as you’d like, try increasing the cooking time just a bit. Every waffle maker is a little different, so keep an eye on them until you find that sweet spot!
If you’re feeling adventurous, you can easily switch things up with ingredient substitutions. For a healthier twist, swap out half of the all-purpose flour for whole wheat flour or even oat flour. You can also replace the buttermilk with a mixture of regular milk and a splash of vinegar or lemon juice if you’re in a pinch. It won’t be quite the same, but it’ll still work!
And let’s talk toppings! While syrup is classic, consider adding fresh berries, sliced bananas, or even a dollop of Greek yogurt for a fun twist. You could also fold in chocolate chips or nuts into the batter for a delightful surprise. Whatever you choose, just remember to enjoy the process—it’s all about making it your own!
Nutritional Information
Now, let’s talk numbers! Here’s the estimated nutritional breakdown for one delicious buttermilk waffle:
- Calories: 200
- Fat: 10g
- Saturated Fat: 5g
- Unsaturated Fat: 3g
- Trans Fat: 0g
- Cholesterol: 60mg
- Sodium: 300mg
- Carbohydrates: 26g
- Fiber: 1g
- Sugar: 4g
- Protein: 4g
Keep in mind that these values are estimates and can vary based on the specific ingredients you use or any modifications you make to the recipe. If you decide to add toppings like syrup or fruit, don’t forget to factor those into your total as well. Enjoy those waffles guilt-free—they’re a delightful treat to start your day!
FAQ About Buttermilk Waffles
Got questions about making the best buttermilk waffles? Don’t worry, I’ve got you covered! Here are some of the most common queries I get, along with my handy tips.
How do I store leftover buttermilk waffles?
To store any leftover waffles, simply place them in an airtight container in the fridge. They’ll stay fresh for about 3 days. If you want to keep them longer, you can freeze them! Just wrap each waffle in plastic wrap and pop them into a freezer bag. They’ll last for up to 2 months. When you’re ready to enjoy, just reheat them in the toaster or oven.
How can I make my waffles crispy?
If you’re aiming for that perfect crispy texture, make sure your waffle iron is fully preheated before pouring in the batter. You can also try cooking them a bit longer if you like them extra crispy—just keep an eye on them so they don’t burn! Another tip is to let the waffles rest for a minute or two on a cooling rack before serving, which helps maintain that delightful crunch.
What are the best toppings for buttermilk waffles?
The topping possibilities are endless! Classic maple syrup is always a hit, but don’t stop there! Fresh berries, whipped cream, or sliced bananas can add a lovely twist. If you’re feeling adventurous, try drizzling some chocolate sauce or adding a dollop of peanut butter for a nutty kick. You could even sprinkle some nuts or granola on top for added texture. Just have fun with it!
Can I make the batter ahead of time?
Absolutely! You can prepare the batter the night before and store it in the fridge. Just give it a good stir before pouring it into the waffle iron the next morning. Keep in mind that the batter may thicken a bit overnight, so you might need to add a splash of milk to get it to the right consistency.
What if I don’t have buttermilk?
No buttermilk? No problem! You can easily substitute it by mixing 1 cup of regular milk with 1 tablespoon of vinegar or lemon juice. Let it sit for about 5-10 minutes until it thickens slightly—voilà! You’ve got a great buttermilk substitute that’ll work just fine in your waffles.
Serving Suggestions
Now that you’ve whipped up a delicious stack of buttermilk waffles, let’s talk about how to elevate that breakfast experience! You’ve got so many options to make your waffles even more scrumptious.
First up, you can’t go wrong with classic maple syrup—it’s a timeless pairing that never disappoints. But if you want to get a little adventurous, try drizzling some warm berry compote over the top. The sweet and tangy flavors will add a delightful twist!
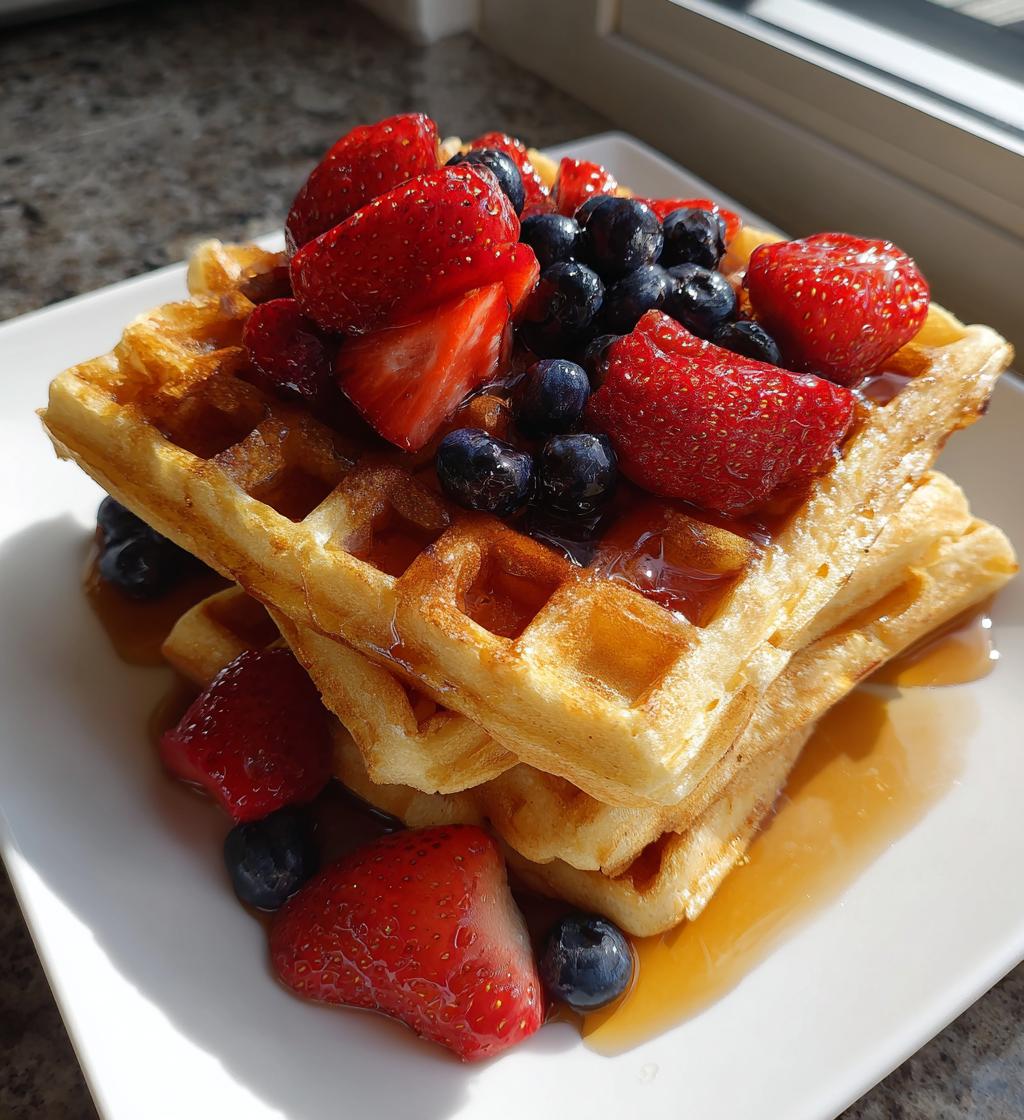
If you’re in the mood for something extra indulgent, consider a dollop of whipped cream. You can even mix in a bit of vanilla or a sprinkle of cinnamon for that added flair. And for a refreshing touch, fresh fruit is always a winner! Think sliced strawberries, blueberries, or even bananas—these will brighten up your plate and add a pop of color.
Feeling creative? How about adding a scoop of yogurt or cottage cheese for some extra protein? You could even throw in some granola for a bit of crunch. And let’s not forget about the option of nut butter—spreading some almond or peanut butter on top can give your waffles a nutty richness that’s simply irresistible!
So go ahead, mix and match your favorite toppings and let your buttermilk waffles shine. Enjoy, and don’t forget to share your creations with friends and family—they’ll be begging for more!
Storage & Reheating Instructions
So, you’ve made a delicious batch of buttermilk waffles, and now you’re wondering how to store those leftovers? No worries, I’ve got some easy tips for you! First off, let your waffles cool completely at room temperature. This helps prevent them from getting soggy in storage.
Once they’ve cooled, stack them up in an airtight container, placing a piece of parchment paper between each waffle to keep them from sticking together. You can keep them in the fridge for about 3 days, but if you want to enjoy them longer, freezing is the way to go! Just wrap each waffle individually in plastic wrap and then place them in a freezer bag. They’ll last for up to 2 months in the freezer.
When you’re ready to enjoy your waffles again, reheating is super simple. For freshly frozen waffles, take them out and let them thaw in the fridge overnight, or you can pop them straight into the toaster or oven from the freezer. If using a toaster, just toast until heated through and crispy—usually about 3-5 minutes. In the oven, preheat to 350°F (175°C) and bake for about 10-15 minutes. They should come out warm and ready to devour!
And there you have it—simple storage and reheating tips to keep those buttermilk waffles as delightful as the day you made them. Enjoy every bite!
Print
Buttermilk Waffles: 7 Secrets for Perfectly Fluffy Joy
- Prep Time: 10 minutes
- Cook Time: 15 minutes
- Total Time: 25 minutes
- Yield: 4 servings 1x
- Category: Breakfast
- Method: Waffle Iron
- Cuisine: American
- Diet: Vegetarian
Description
Delicious and fluffy buttermilk waffles perfect for breakfast.
Ingredients
- 2 cups all-purpose flour
- 2 tablespoons sugar
- 1 tablespoon baking powder
- 1/2 teaspoon baking soda
- 1/2 teaspoon salt
- 2 large eggs
- 1 3/4 cups buttermilk
- 1/2 cup melted butter
- 1 teaspoon vanilla extract
Instructions
- Preheat your waffle iron.
- In a large bowl, mix flour, sugar, baking powder, baking soda, and salt.
- In another bowl, whisk eggs, buttermilk, melted butter, and vanilla.
- Combine wet and dry ingredients until just mixed.
- Pour batter into the preheated waffle iron.
- Cook until golden brown and crispy.
- Serve with syrup or toppings of your choice.
Notes
- For crispier waffles, increase cooking time.
- You can add chocolate chips or fruit to the batter.
- Store leftovers in the fridge and reheat in the toaster.
Nutrition
- Serving Size: 1 waffle
- Calories: 200
- Sugar: 4g
- Sodium: 300mg
- Fat: 10g
- Saturated Fat: 5g
- Unsaturated Fat: 3g
- Trans Fat: 0g
- Carbohydrates: 26g
- Fiber: 1g
- Protein: 4g
- Cholesterol: 60mg
Keywords: buttermilk waffles, breakfast, easy recipe