
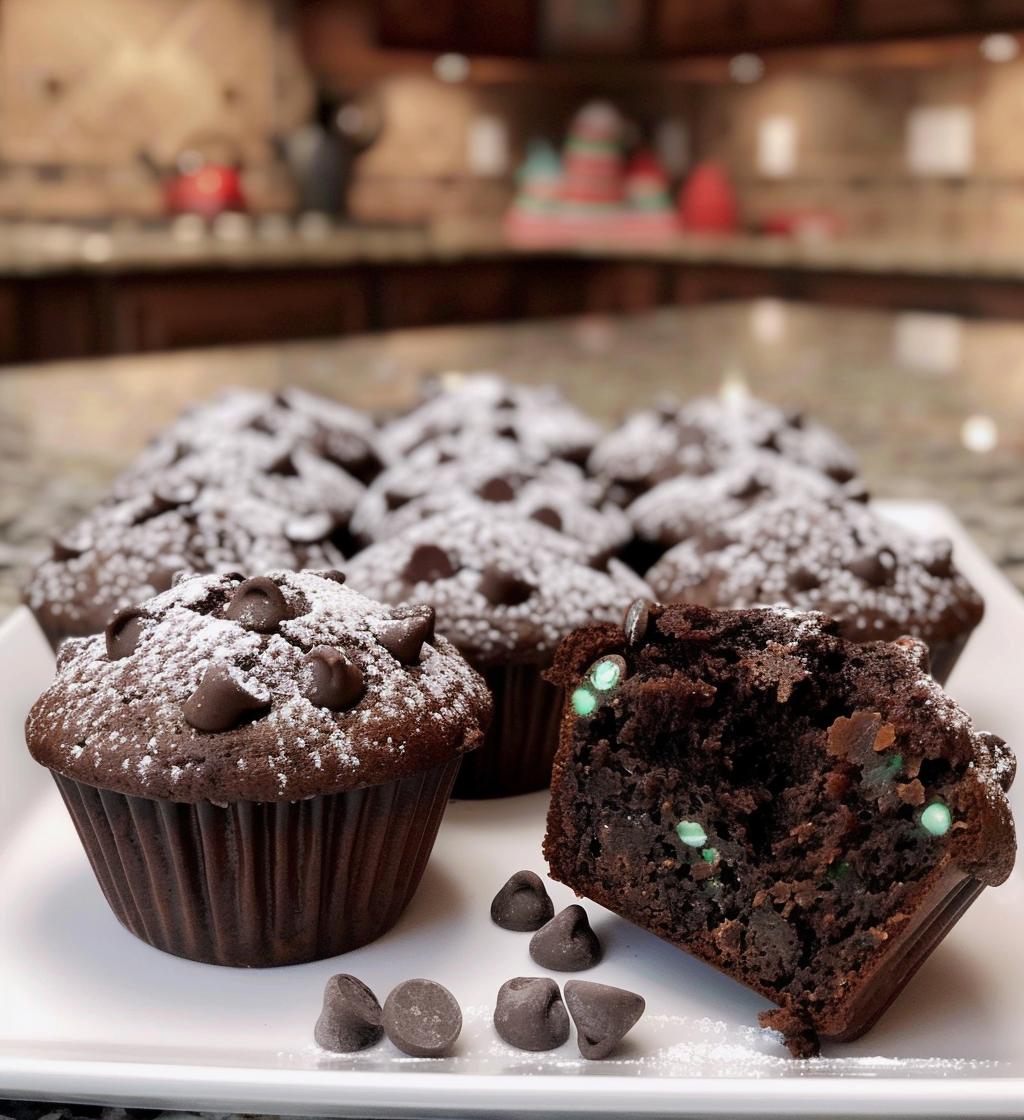
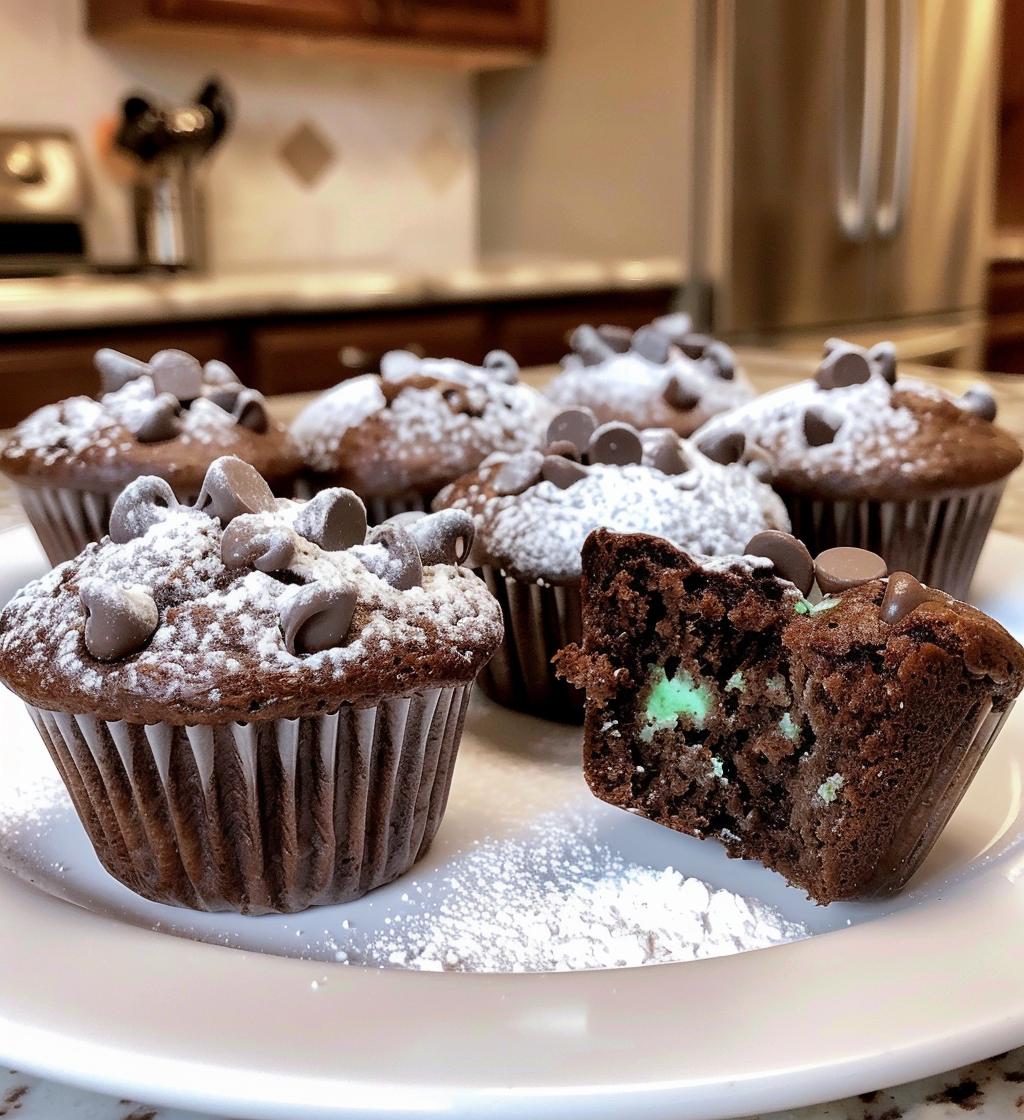
Oh, let me tell you about the absolute joy of baking chocolate peppermint muffins! Imagine biting into a soft, fluffy muffin that’s bursting with rich chocolate flavor, perfectly complemented by a refreshing hint of peppermint. It’s like a cozy hug in muffin form! Trust me, these delightful treats are not just for the holiday season; they’re perfect for those chilly mornings when you want something warm and indulgent to kickstart your day. I love whipping up a batch of these for family get-togethers or even just for myself—because who doesn’t deserve a little treat now and then? The combination of chocolate and peppermint is simply magical, and you’ll find yourself reaching for one (or two!) every time. So, let’s dive in and make the best chocolate peppermint muffins you’ll ever taste!
Ingredients for Chocolate Peppermint Muffins
Before we jump into baking, let’s gather our ingredients! This is where the magic happens, and I want to make sure you have everything you need for these delightful chocolate peppermint muffins. Here’s what you’ll need:
- 1 cup all-purpose flour: This is the base of our muffins, giving them structure and a lovely texture.
- 1/2 cup unsweetened cocoa powder: This is what brings that deep chocolate flavor to life. Make sure it’s unsweetened for the perfect balance!
- 1 cup granulated sugar: Sweetness is key here, and the sugar helps keep the muffins moist and delicious.
- 1/2 teaspoon baking powder: This helps our muffins rise and become fluffy. Don’t skip this one!
- 1/2 teaspoon baking soda: Paired with the cocoa, it gives our muffins that extra lift and lightness.
- 1/4 teaspoon salt: Just a pinch enhances all the flavors and balances the sweetness.
- 1/2 cup unsalted butter, melted: Butter adds richness and a lovely flavor. Make sure it’s melted for a smooth batter!
- 2 large eggs: They’re crucial for binding everything together and adding moisture.
- 1 teaspoon pure vanilla extract: This adds warmth and depth to our muffins—trust me, it makes a difference!
- 1/2 teaspoon peppermint extract: This is where the magic happens! Adjust this to your taste for that refreshing minty kick.
- 1/2 cup semi-sweet chocolate chips: Because more chocolate is always a good idea! These little gems melt into the muffins and create pockets of gooey goodness.
Now that we have our ingredients ready, we’re all set to create something truly delicious. Let’s get baking!
How to Prepare Chocolate Peppermint Muffins
Alright, let’s get into the fun part—making these scrumptious chocolate peppermint muffins! I promise, it’s easier than you might think, and the end result is so worth it. Just follow these simple steps, and you’ll be enjoying warm, fluffy muffins in no time!
Preheat the Oven
First things first, you’ll want to preheat your oven to 350°F (175°C). This step is super important because it ensures that your muffins bake evenly, giving them that perfect texture we all love. So, go ahead and turn that oven on while we get everything else ready!
Mix the Dry Ingredients
In a large bowl, combine your all-purpose flour, cocoa powder, granulated sugar, baking powder, baking soda, and salt. Give it a good whisk until everything is well mixed. I like to do this to really aerate the flour and cocoa—trust me, it makes a difference in the fluffiness of your muffins!
Combine the Wet Ingredients
Now, let’s move on to the wet ingredients! In a separate bowl, mix together the melted butter, eggs, pure vanilla extract, and peppermint extract until everything is blended nicely. Make sure your butter isn’t too hot; you want it melted but not cooking the eggs!
Combine Wet and Dry Mixtures
Next, pour the wet ingredients into the dry ingredients. Now here’s a little tip: stir it gently until just combined. You don’t want to overmix—trust me, that can lead to tough muffins, and nobody wants that! It’s okay if there are a few lumps left; they’ll bake out.
Fold in Chocolate Chips
Now for the best part—gently fold in those luscious chocolate chips! I like to use a spatula for this step, just to make sure I’m not breaking any of those lovely chips. You want them to stay whole so you get those gooey pockets of chocolate in every bite!
Fill Muffin Tins
Time to fill the muffin tins! Grab your muffin pan and line it with paper liners or grease it lightly. Fill each cup about 2/3 full with the batter. This helps them rise beautifully without overflowing. Plus, it makes for a nice, rounded top!
Bake and Cool
Pop those muffins in the preheated oven and bake for 18-20 minutes, or until a toothpick inserted into the center comes out clean. Once they’re done, let them cool in the pan for a few minutes before transferring them to a wire rack. This cooling step is crucial, as it helps them set up perfectly. And trust me, the smell wafting through your kitchen is going to be irresistible!
Nutritional Information for Chocolate Peppermint Muffins
Now, let’s talk about the nutrition of these delightful chocolate peppermint muffins! While they’re definitely a treat, it’s always good to know what you’re indulging in. Here’s a breakdown of the typical nutritional values per muffin:
- Calories: 200
- Sugar: 15g
- Fat: 8g
- Saturated Fat: 5g
- Unsaturated Fat: 3g
- Trans Fat: 0g
- Carbohydrates: 30g
- Fiber: 2g
- Protein: 3g
- Cholesterol: 30mg
- Sodium: 150mg
Keep in mind, these values are estimates and can vary based on the specific ingredients you use. But hey, a little indulgence every now and then is part of the fun, right? Enjoy every bite of these delicious muffins, knowing they’re made with love and care!
FAQ about Chocolate Peppermint Muffins
I know you might have some burning questions about these delightful chocolate peppermint muffins, so let’s tackle them! I want to make sure you have all the info you need to bake with confidence. Here are some common questions I get:
Can I use different types of chocolate?
Absolutely! While I love semi-sweet chocolate chips for that perfect balance of sweetness, you can totally experiment with dark chocolate or even white chocolate chips if you want a twist. Just keep in mind that different chocolates will change the overall flavor a bit, but that’s part of the fun!
How do I store leftovers?
To keep your muffins fresh, store them in an airtight container at room temperature for up to 3 days. If you want to keep them longer, just pop them in the freezer! They can be frozen for up to 3 months. Just make sure to wrap them tightly in plastic wrap or foil before freezing.
Can I make these muffins without eggs?
Yes, you can! If you’re looking for an egg-free option, I recommend substituting each egg with 1/4 cup of unsweetened applesauce or a flaxseed meal mixture (1 tablespoon of flaxseed meal mixed with 3 tablespoons of water, let it sit for a few minutes until it thickens). This will keep your muffins moist and delicious!
Can I add other flavors or mix-ins?
For sure! Feel free to get creative. You can add chopped nuts, like walnuts or pecans, or even throw in some peppermint candy pieces for an extra crunch. Just remember to adjust the amount of chocolate chips if you’re adding more mix-ins, so you don’t overcrowd the batter.
What should I do if my muffins don’t rise?
Oh no, that’s a bummer! If your muffins don’t rise as expected, it could be due to expired baking powder or baking soda. Always check the dates on your leavening agents! Also, make sure you’re not overmixing the batter, as this can lead to dense muffins. Gentle mixing is key!
Hopefully, these answers help clear up any questions you might have. If you think of anything else, don’t hesitate to ask! Happy baking!
Why You’ll Love Chocolate Peppermint Muffins
Let me tell you why these chocolate peppermint muffins are going to become your new favorite! First off, they’re super quick to make—perfect for those moments when you need a sweet treat in a hurry. Just gather your ingredients, and in about 35 minutes, you’ll have mouthwatering muffins ready to devour!
They’re also absolutely perfect for holiday gatherings. Imagine bringing a batch of these to a party or a cozy get-together—they’re sure to impress! The rich chocolate flavor paired with that refreshing peppermint twist creates a festive vibe that everyone will love. Trust me, they’ll disappear faster than you can say, “Who wants seconds?”
And guess what? These muffins are incredibly easy to customize! If you’re feeling adventurous, you can swap in different types of chocolate chips, add nuts for some crunch, or even sneak in some festive sprinkles on top for a fun touch. The possibilities are endless, and that’s what makes baking so exciting!
So whether you’re treating yourself on a chilly morning or sharing them with friends and family, these chocolate peppermint muffins are bound to bring joy and a little bit of magic to your day. You’re going to love them—I just know it!
Tips for Success with Chocolate Peppermint Muffins
Alright, let’s make sure your chocolate peppermint muffins turn out absolutely perfect! I’ve got some pro tips to help you achieve muffin greatness, so grab a pen and take notes!
First things first, make sure all your ingredients are at room temperature. This is a game changer! When everything is at the same temperature, it helps create a smoother batter that combines more easily, leading to those fluffy, tender muffins we all crave.
Also, don’t skimp on the peppermint extract. But here’s the catch: start with the recommended amount and taste the batter before you bake. Everyone’s preference for peppermint can vary, so if you like it a little more minty fresh, feel free to add a tiny bit more. Just remember, a little goes a long way!
Another tip is to measure your flour correctly. Spoon it into your measuring cup and level it off with a knife rather than packing it in. This keeps your muffins from becoming too dense. We want them light and fluffy, right?
When it comes to mixing, resist the urge to overmix! Mixing until just combined is the secret to tender muffins. If you see a few lumps, it’s totally okay—those will bake out. Overmixing can lead to tough muffins, and nobody wants that!
And finally, keep an eye on your baking time. Every oven is different, so start checking your muffins a couple of minutes early. You want that toothpick to come out clean but not overbake them! Once they’re out, let them cool a bit in the pan before transferring them to a wire rack; it helps them set just right.
With these tips in your back pocket, you’re all set for muffin success! Happy baking, and I can’t wait for you to taste these delicious treats!
Storage & Reheating Instructions for Chocolate Peppermint Muffins
Now that you’ve baked up a delicious batch of chocolate peppermint muffins, let’s talk about how to keep them fresh and tasty! Proper storage is key to enjoying these treats for days to come.
To store your muffins, simply place them in an airtight container at room temperature. They’ll stay fresh for about 3 days—if they last that long! If you want to keep them for a longer time, you can freeze them. Just wrap each muffin tightly in plastic wrap or foil, then pop them into a freezer-safe bag or container. They can be frozen for up to 3 months. That way, when a muffin craving strikes, you’ll have some ready to go!
When you’re ready to enjoy your frozen muffins, just take them out and let them thaw at room temperature for a couple of hours, or pop them in the microwave for about 15-20 seconds to warm them up. If you prefer, you can also reheat them in the oven at 350°F (175°C) for about 5-10 minutes. This will give them that freshly baked taste and make your kitchen smell heavenly once again!
So, whether you’re savoring them fresh or reheating from frozen, these chocolate peppermint muffins are sure to bring a smile to your face every time. Enjoy every scrumptious bite!