
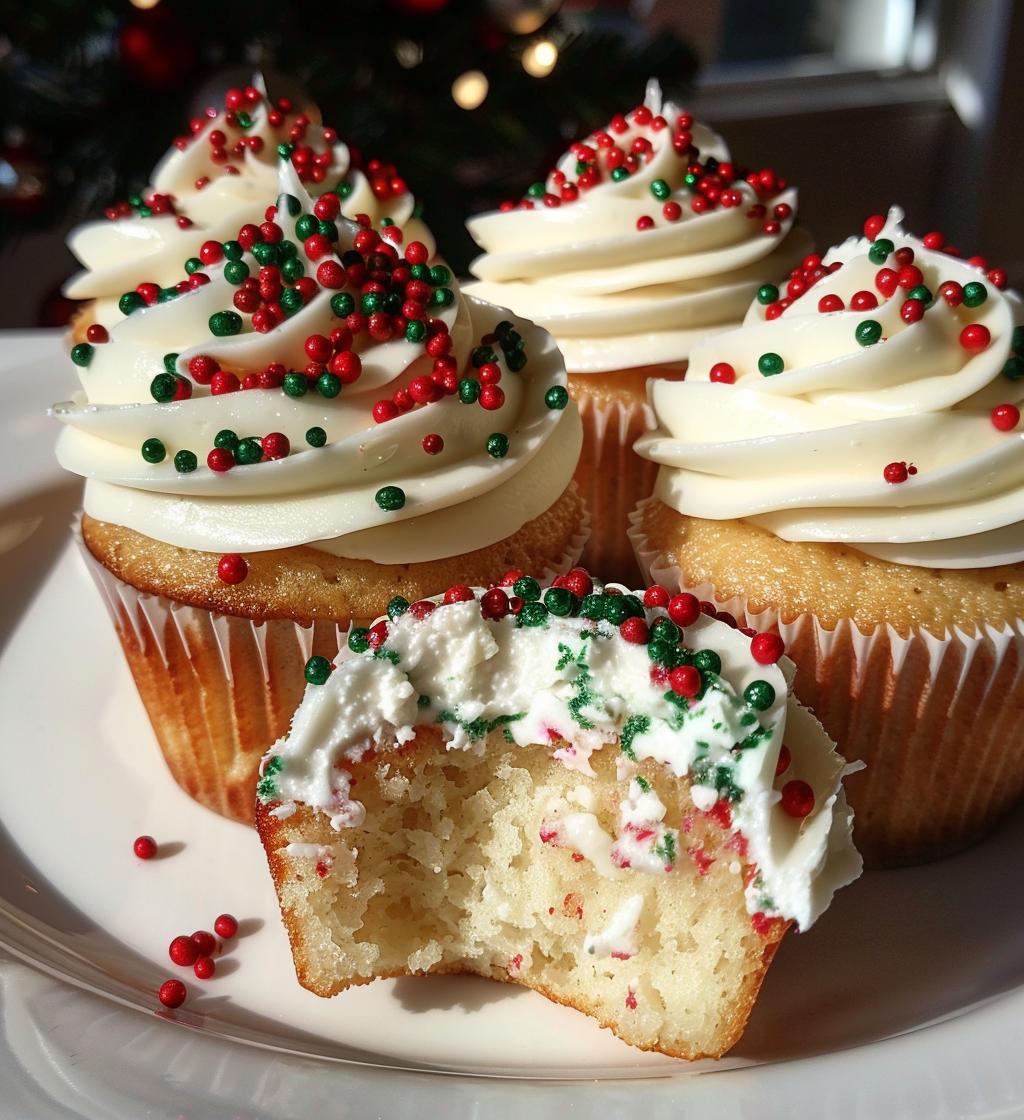
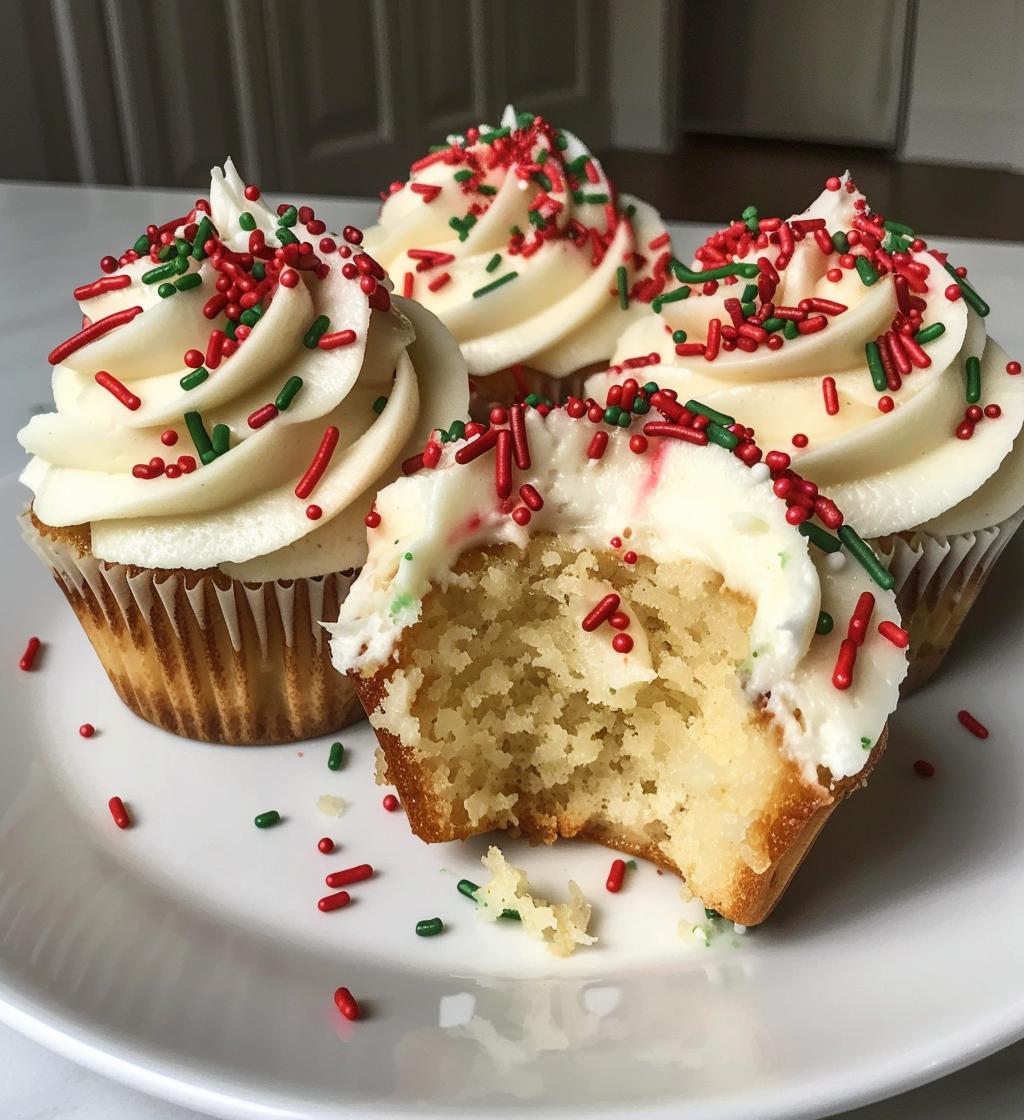
Ah, there’s just something magical about Christmas baking, isn’t there? The smell of spices wafting through the house, the twinkling lights, and of course, the excitement of decorating those festive treats! I can still remember my first time making Christmas cupcakes with my mom. We would spend hours in the kitchen, giggling as we slathered on the icing and sprinkled on the red and green jewels. It became a cherished tradition that I look forward to every year. These Christmas cupcakes are not just delicious; they’re a canvas for creativity, perfect for sharing with family and friends. Trust me, when you pull these beauties from the oven, your heart will be as warm as the cozy holiday spirit around you. Let’s dive into this delightful recipe that’s sure to bring joy to your holiday celebrations!
Ingredients List
Gather these simple yet essential ingredients to create your delightful Christmas cupcakes! Each one plays a vital role in achieving that perfect festive flavor and texture.
- 1 1/2 cups all-purpose flour: This is the backbone of your cupcakes, giving them structure and fluffiness.
- 1 cup sugar: Sweetness is key! This will make your cupcakes deliciously sweet and perfectly balanced.
- 1/2 cup unsalted butter, softened: Make sure it’s softened to room temperature for easy creaming with the sugar, creating that dreamy, rich base.
- 2 large eggs: They add moisture and help bind everything together. Large is important here for the right texture!
- 1/2 cup milk: This keeps the batter moist and contributes to that lovely tender crumb.
- 1 tsp vanilla extract: A splash of vanilla adds warmth and enhances the overall flavor of your cupcakes.
- 1/2 tsp baking powder: This helps your cupcakes rise beautifully, making them light and airy.
- 1/2 tsp baking soda: It gives an extra lift and helps balance the acidity of the batter.
- 1/4 tsp salt: Just a pinch to enhance all those sweet flavors; it’s an essential part of the mix!
- Red and green sprinkles for decoration: These are the fun finishing touch! They add that festive flair that makes your Christmas cupcakes truly special.
How to Prepare Christmas Cupcakes
Now that you’ve got all your ingredients lined up, let’s get those festive Christmas cupcakes baking! I promise you, following these steps will lead to a batch of cupcakes that not only look spectacular but taste heavenly too. Ready? Let’s get started!
Step-by-Step Instructions
- Preheat the oven: First things first, preheat your oven to 350°F (175°C). This is crucial for getting that perfect rise and texture, so don’t skip it!
- Mix the dry ingredients: In a medium bowl, whisk together the flour, baking powder, baking soda, and salt until well combined. This ensures even distribution of the leavening agents.
- Cream the butter and sugar: In a large mixing bowl, cream the softened butter and sugar together until it’s light and fluffy. This should take about 2-3 minutes. You’ll know it’s ready when it looks pale and airy—trust me, this step adds so much flavor!
- Add the eggs: Beat in the eggs one at a time, mixing well after each addition. This helps incorporate air into the batter, which is essential for fluffiness.
- Incorporate the vanilla: Stir in that delicious vanilla extract until it’s fully combined. It’s the little things that make a big difference!
- Combine wet and dry ingredients: Gradually add your dry ingredient mixture to the wet ingredients, alternating with the milk. Start and end with the dry ingredients. This technique helps keep the batter smooth without overmixing—nobody likes tough cupcakes!
- Fill the liners: Line your cupcake pan with liners and fill each one about 2/3 full with the batter. This gives them room to rise without overflowing.
- Bake: Pop those beauties into the preheated oven and bake for 18-20 minutes. You’ll know they’re done when a toothpick inserted into the center comes out clean. It’s always exciting to see them puff up!
- Cool completely: Once baked, remove the cupcakes from the oven and let them cool in the pan for about 5 minutes. Then transfer them to a wire rack to cool completely before decorating. Patience is key here—frosting warm cupcakes can lead to a melty mess!
Why You’ll Love This Recipe
- Quick and easy to make, perfect for those busy holiday schedules!
- Deliciously moist and fluffy, with a light sweetness that everyone loves.
- Festively decorated, making them a delightful addition to any holiday gathering.
- Versatile—feel free to switch up the flavors or icings to suit your taste!
- Fun for the whole family; kids will love helping with the decorating!
- Perfect for gifting or sharing with friends and neighbors during the holiday season.
- They stay fresh for days, so you can enjoy them throughout the festive season.
Tips for Success
To ensure your Christmas cupcakes turn out perfectly every time, here are some tried-and-true tips that I swear by! Trust me, these little nuggets of wisdom will elevate your baking game and help you impress everyone at your holiday gatherings.
- Room Temperature Ingredients: Make sure your butter and eggs are at room temperature before you start. This helps them blend more easily, leading to a smoother batter and fluffier cupcakes.
- Don’t Overmix: When combining your wet and dry ingredients, mix just until combined. Overmixing can lead to dense cupcakes, and nobody wants that! A few lumps are totally okay.
- Check for Doneness: Keep an eye on your cupcakes in the oven. Start checking them a minute or two before the recommended baking time. Every oven is a little different, and you want to catch them at just the right moment!
- Cool Completely: Allow your cupcakes to cool completely before frosting. If you’re in a hurry, you can pop them in the fridge for a bit to speed up the cooling process. This way, your icing won’t melt into a sugary puddle!
- Get Creative with Decorations: Let your imagination run wild with the toppings! Use festive colored icing, edible glitter, or even mini ornaments to give each cupcake a unique spin. It’s all about having fun!
- Store Properly: Keep your cupcakes in an airtight container to maintain their freshness. If you’re making them ahead of time, they’ll stay delicious for several days this way.
- Test a Batch: If you’re planning to serve these cupcakes at a big event, do a test batch first. It’s a great way to iron out any potential hiccups and make adjustments before the big day!
Variations
One of the best things about these Christmas cupcakes is how versatile they are! You can easily switch things up to create a whole new flavor experience or a unique look that fits your holiday theme. Here are some fun variations to try that I absolutely love!
- Chocolate Christmas Cupcakes: Swap out 1/2 cup of the all-purpose flour for cocoa powder to make rich chocolate cupcakes. Top with chocolate frosting and festive sprinkles for a decadent treat!
- Red Velvet Twist: Add 1 tablespoon of red food coloring to the batter for a festive red velvet version. Cream cheese frosting on top is a must for that classic flavor combination!
- Spiced Gingerbread Cupcakes: Mix in a teaspoon of ground ginger, cinnamon, and nutmeg to the batter for a warm, spiced flavor. A simple vanilla or cream cheese frosting will complement these perfectly!
- Coconut Snowball Cupcakes: Fold in shredded coconut into the batter and top with coconut frosting. You can even roll the frosted cupcakes in more coconut for a snowy effect!
- Fruit-Filled Cupcakes: Add a teaspoon of your favorite fruit preserves or jam into the center of each cupcake before baking. Once cooled, top them with a light icing to highlight the fruity surprise!
- Nutty Delight: Mix in chopped walnuts or pecans into the batter for added texture and flavor. A drizzle of caramel sauce on top will take these cupcakes to another level!
- Decorative Themes: Change up the icing colors to match your holiday decor. Think silver and blue for a winter wonderland or gold and red for a classic Christmas look. You can even use stencils to create fun designs with powdered sugar!
Feel free to get creative with these variations! The best part of baking is making it your own, and I can’t wait to see what you come up with. Happy baking!
Nutritional Information Section
When you’re whipping up these delightful Christmas cupcakes, it’s always nice to know what you’re indulging in! Here’s a rough estimate of the nutritional values per cupcake. Keep in mind that these numbers can vary based on the specific ingredients you use and any variations you might add. But they give you a good idea of what to expect!
- Calories: Approximately 200
- Fat: 8g
- Saturated Fat: 5g
- Trans Fat: 0g
- Cholesterol: 30mg
- Sodium: 150mg
- Carbohydrates: 30g
- Fiber: 1g
- Sugar: 15g
- Protein: 2g
These cupcakes are a sweet treat, so enjoy them in moderation as part of your festive celebrations! Happy baking, and may your holiday season be as sweet as these cupcakes!
Storage & Reheating Instructions
Once you’ve made your delightful Christmas cupcakes, you’ll want to ensure they stay fresh and delicious for as long as possible. Here’s how to store any leftovers and keep that festive flavor intact!
- Storing: To store your cupcakes, place them in an airtight container. This will help keep them moist and prevent them from drying out. If you’ve already frosted them, it’s best to place a piece of wax paper between the cupcakes and the lid to avoid smudging the icing.
- Refrigeration: If you’re in a warm climate or if you’ve used cream cheese frosting, pop them in the fridge! They’ll stay fresh for about 5 days. Just remember to bring them back to room temperature before serving for the best taste and texture.
- Freezing: Want to save some for later? These cupcakes freeze beautifully! Wrap each cupcake tightly in plastic wrap and then place them in a freezer-safe container. They can be frozen for up to 2 months. When you’re ready to enjoy them, just thaw them in the refrigerator overnight.
- Reheating: If you prefer your cupcakes warmed up, you can pop them in the microwave for about 10-15 seconds. Just be careful not to overdo it, or you’ll end up with a gooey mess! They’re best enjoyed at room temperature, but a little warmth can make the flavors pop.
With these storage and reheating tips, you can savor your Christmas cupcakes throughout the holiday season. Enjoy every delightful bite!
FAQ Section
Got questions about making the best Christmas cupcakes? Don’t worry, I’ve got you covered! Here are some of the most common questions I hear, along with my answers to help you navigate your holiday baking adventures.
Can I use gluten-free flour?
Absolutely! Just substitute the all-purpose flour with a gluten-free blend. Be sure to check the packaging for any specific guidelines, and you’ll be on your way to delicious gluten-free Christmas cupcakes!
How can I make these cupcakes vegan?
You can swap the eggs for flax eggs (1 tablespoon of flaxseed meal mixed with 2.5 tablespoons of water for each egg) and use non-dairy milk and vegan butter. They’ll still be festive and delightful!
What’s the best way to decorate my cupcakes?
Get creative! Use buttercream frosting in festive colors, or try royal icing for intricate designs. Piping bags can help you create beautiful swirls and patterns, and don’t forget those sprinkles!
Can I make the batter ahead of time?
Sure! You can prepare the batter a day in advance and store it in the refrigerator. Just give it a good mix before filling your cupcake liners and popping them in the oven.
Why did my cupcakes sink in the middle?
Oh no! Sinking can happen if the batter is overmixed or if the oven temperature is too low. Make sure to mix gently and check your oven’s temperature with an oven thermometer for accuracy.
How do I store leftover cupcakes?
Keep your Christmas cupcakes in an airtight container at room temperature for up to 3 days. If you’ve frosted them with cream cheese frosting or live in a warm climate, it’s best to refrigerate them.
Can I freeze these cupcakes?
Yes! They freeze beautifully. Just wrap each cupcake tightly in plastic wrap, and then place them in a freezer-safe container. They’ll be good for up to 2 months. Thaw in the fridge before enjoying!
What flavors work well for Christmas cupcakes?
You can stick to classic vanilla, but why not experiment with peppermint, chocolate, or spice flavors? Adding a hint of cinnamon or nutmeg can really elevate your holiday treats!
Feel free to reach out if you have more questions or need advice! Happy baking, and may your Christmas cupcakes bring joy to your festive celebrations!