
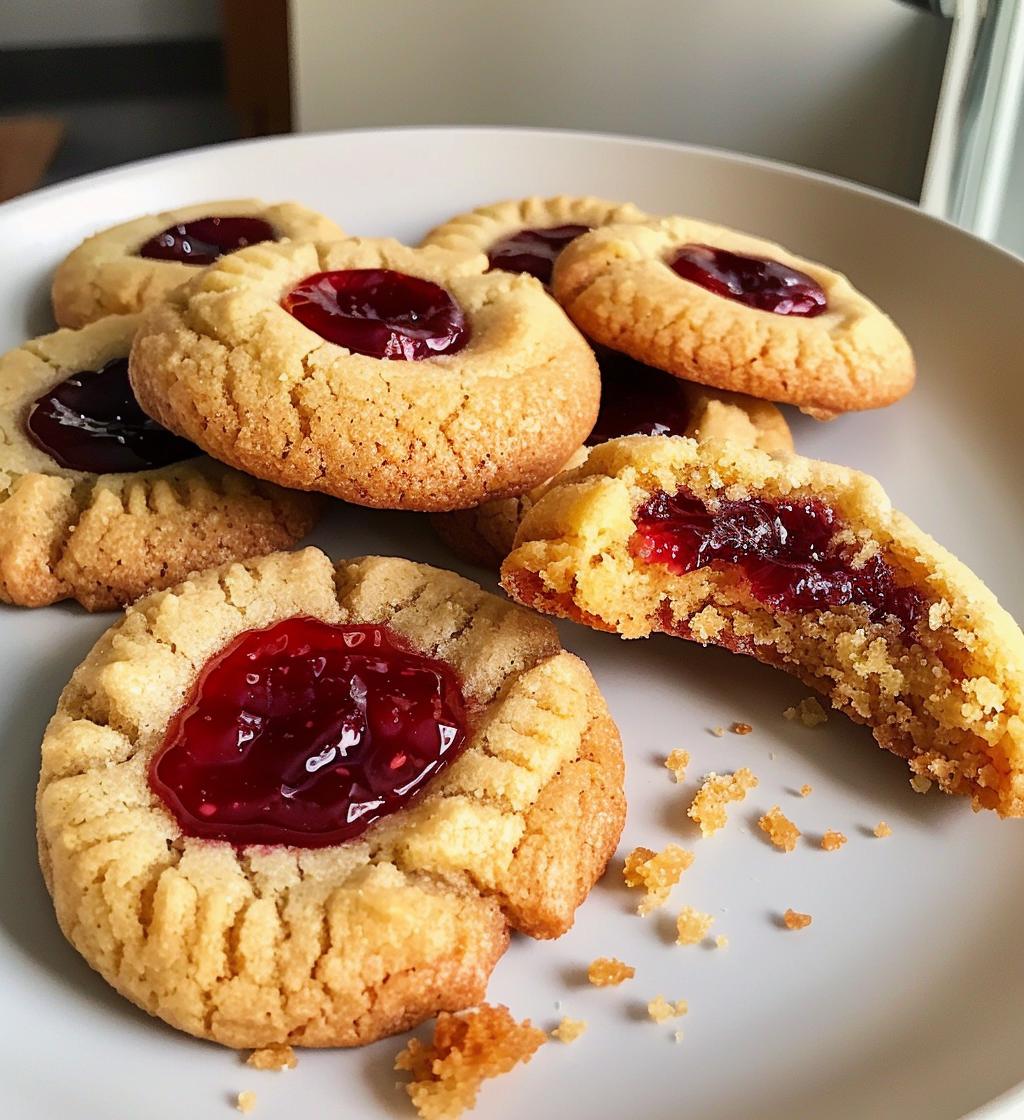
Oh my goodness, let’s talk about thumbprint cookies! These little gems are the epitome of comfort baking, and honestly, they’re one of my all-time favorites. There’s something so satisfying about soft, buttery cookies with sweet, gooey jam nestled right in the middle. I mean, who can resist that? The best part is their versatility—whether you’re a fan of classic raspberry, zesty lemon, or even rich chocolate spread, you can fill them with whatever your heart desires. Making these cookies is like a hug from the oven; they’re perfect for sharing with friends, family, or just indulging on your own. Trust me, once you take that first bite, you’ll be hooked! So, grab your ingredients, and let’s get baking—you won’t regret it!
Ingredients List
- 1 cup unsalted butter, softened
- 1/2 cup granulated sugar
- 1/2 cup packed brown sugar
- 1 teaspoon vanilla extract
- 2 cups all-purpose flour
- 1/2 teaspoon salt
- 1 cup fruit jam of your choice
How to Prepare Thumbprint Cookies
Preheat the Oven
First things first, let’s get that oven preheated! Set it to 350°F (175°C). This is super important because a well-heated oven ensures your cookies bake evenly and come out perfectly golden. While it’s warming up, you can get everything else ready!
Cream the Butter and Sugars
Now, grab a big mixing bowl and toss in that softened butter along with both the granulated and brown sugars. Using a hand mixer or a stand mixer, beat them together until the mixture is light, fluffy, and smooth. This usually takes about 2-3 minutes. Trust me, this step is key for that melt-in-your-mouth texture!
Add Vanilla
Alright, let’s add some flavor! Pour in the vanilla extract and mix it in well. Ah, that vanilla aroma just makes everything better, doesn’t it? Give it another quick mix until it’s all combined, and then we’re ready for the dry ingredients.
Combine Dry Ingredients
Now, it’s time to incorporate the dry ingredients. Gradually add the flour and salt into the butter mixture. I like to do this in two or three additions to avoid a flour explosion! Mix gently until everything is just combined. We don’t want to overmix here, or the cookies might turn out tough. A few flour streaks are okay!
Shape the Dough
Next up, let’s shape our cookie dough! Scoop out small portions of the dough and roll them into balls—about 1 inch in diameter works great. Place them on an ungreased baking sheet, leaving some space between each ball because they’ll spread a little while baking. You’re doing awesome so far!
Create Indents
Now comes the fun part! Using your thumb (or the back of a teaspoon if you prefer), gently press down in the center of each ball to create an indent. This is where the jam will go, so make sure it’s deep enough to hold a good dollop but not all the way through! You got this!
Fill with Jam
Time to get jammy! Spoon your favorite fruit jam into each of those lovely indents. Don’t be shy—fill them generously! The jam will bubble and caramelize a bit while baking, creating that deliciously gooey center we all love. Yum!
Bake the Cookies
Pop the baking sheet into your preheated oven and bake those beauties for 12-15 minutes, or until the edges are just lightly golden. Oh, and the smell wafting through your kitchen will be heavenly! Once they’re done, let the cookies cool on the baking sheet for about 5 minutes before transferring them to a wire rack to cool completely. Patience is key here, but I promise, they’re worth the wait!
Tips for Success
Want to make sure your thumbprint cookies come out absolutely perfect? Here are my top tips to help you achieve cookie greatness!
- Room Temperature Butter: Make sure your butter is softened to room temperature. This helps it cream with the sugars more easily, resulting in that lovely, fluffy texture. If you forget to take it out ahead of time, just microwave it for about 10 seconds—just enough to soften but not melt!
- Don’t Overmix: When you combine the flour and salt with the wet ingredients, mix until just combined. Overmixing can lead to tough cookies, and nobody wants that! A few flour streaks are totally fine.
- Chill the Dough (Optional): If you have time, chilling the dough for about 30 minutes before shaping can help prevent spreading. It also gives you a little extra time to clean up the mess in your kitchen!
- Jam Choices: Feel free to get creative with your jam selections! Try different flavors or even a mix of jams to surprise your taste buds. Just make sure they aren’t too runny, or they might overflow while baking.
- Check for Doneness: Keep an eye on your cookies as they bake. They’re done when the edges are lightly golden. If you’re unsure, it’s better to take them out a minute early; they’ll continue to cook a bit on the baking sheet.
- Cool Properly: Don’t skip the cooling step! Letting them cool on the baking sheet helps them firm up a bit before transferring to a wire rack. This prevents any breakage and ensures they hold their shape beautifully.
With these tips in your back pocket, you’re all set to bake the best thumbprint cookies ever! Happy baking!
Variations on Thumbprint Cookies
Now, let’s get a bit adventurous with our thumbprint cookies, shall we? One of the best things about this recipe is how wonderfully versatile it is! While traditional jam fillings are absolutely delightful, there are so many creative twists you can try. Here are some of my favorite variations that will make your cookies stand out:
- Chocolate Hazelnut Spread: If you’re a chocolate lover (who isn’t?), swap out the jam for a generous dollop of chocolate hazelnut spread. The rich, creamy chocolate pairs perfectly with the buttery cookie base!
- Coconut Cream: Spread a layer of coconut cream in the center and top with toasted coconut flakes. It’s like a tropical vacation in cookie form!
- Peanut Butter or Almond Butter: For a nutty twist, fill the indents with your favorite nut butter. You can even swirl in a bit of jam for a delightful combo!
- Fruit Compote: Make a quick fruit compote by simmering fresh or frozen berries with a bit of sugar until thick. This adds a fresh and tangy bite to your cookies.
- Lemon Curd: For something zesty, lemon curd is a fantastic option. It brings a bright, tart flavor that contrasts beautifully with the sweetness of the cookie.
- Maple Syrup and Walnuts: For a fall-inspired treat, fill the centers with maple syrup and sprinkle chopped walnuts on top. It’s like enjoying a pancake in cookie form!
Feel free to mix and match these ideas or come up with your own combinations! The possibilities are endless, and I promise you’ll have fun experimenting. Just remember to keep it simple, and most importantly, enjoy the process of creating something delicious!
Storage & Reheating Instructions
Once you’ve baked up a batch of these scrumptious thumbprint cookies, you’ll want to make sure they stay fresh and delicious! To store them, simply place the cookies in an airtight container. They’ll keep well at room temperature for about a week. Just make sure they’re completely cool before sealing them up, or you might end up with a bit of condensation and soggy cookies—yikes!
If you find yourself with leftover cookies (which I doubt, but just in case!), you can also pop them in the fridge to extend their shelf life a bit longer. Just remember to let them come back to room temperature before digging in for the best flavor and texture.
Now, if you want to enjoy that freshly baked taste again, reheating is super easy! Preheat your oven to 300°F (150°C) and place the cookies on a baking sheet for about 5-7 minutes. This will warm them up nicely and give them a lovely soft texture again. You can also microwave them for about 10-15 seconds, but be careful not to overdo it, or they might get a little tough!
With these storage and reheating tips, your thumbprint cookies will be just as delightful on day five as they were on day one. Happy snacking!
Nutritional Information
When it comes to thumbprint cookies, it’s always nice to know what you’re indulging in, right? Here’s a quick breakdown of the typical nutritional values per cookie. Keep in mind, these are estimates based on the ingredients I used, so they may vary slightly depending on your specific choices and brands:
- Calories: 120
- Fat: 8g
- Saturated Fat: 5g
- Unsaturated Fat: 3g
- Trans Fat: 0g
- Cholesterol: 30mg
- Sodium: 50mg
- Carbohydrates: 12g
- Fiber: 0g
- Sugar: 10g
- Protein: 1g
These little treats are definitely a delightful indulgence, so enjoy them in moderation! Whether you’re sharing with friends or savoring them solo, they’re worth every calorie!
FAQ Section
Can I use different types of jam?
Absolutely! One of the best things about thumbprint cookies is their versatility. You can use any fruit jam you love—strawberry, raspberry, apricot, or even something unique like fig or cherry! Just make sure the jam isn’t too runny to avoid any overflow during baking. Get creative and have fun with it!
How can I make these cookies gluten-free?
If you need a gluten-free option, you can easily swap out the all-purpose flour for a gluten-free flour blend. Look for one that’s designed for baking; they often contain a mix of rice flour, tapioca starch, and other ingredients that mimic the texture of regular flour. Just remember, the cookies might have a slightly different texture, but they’ll still be delicious!
Can I freeze thumbprint cookies?
Yes, you can definitely freeze them! To freeze, just bake the cookies and let them cool completely. Then, place them in an airtight container or a freezer bag, separating layers with parchment paper to prevent sticking. They can be frozen for up to three months. When you’re ready to enjoy, just thaw them at room temperature!
What if my cookies spread too much while baking?
If your cookies spread too much, it could be due to the butter being too warm or not chilling the dough before baking. If you notice that happening, try chilling your dough for about 30 minutes before shaping and baking next time. This helps the cookies hold their shape better while baking!
Can I make these cookies ahead of time?
Definitely! You can prepare the dough in advance and store it in the refrigerator for up to 3 days. Just make sure to wrap it tightly to prevent it from drying out. When you’re ready to bake, scoop and shape the cookies, fill them with jam, and bake as directed. Fresh cookies in no time!