
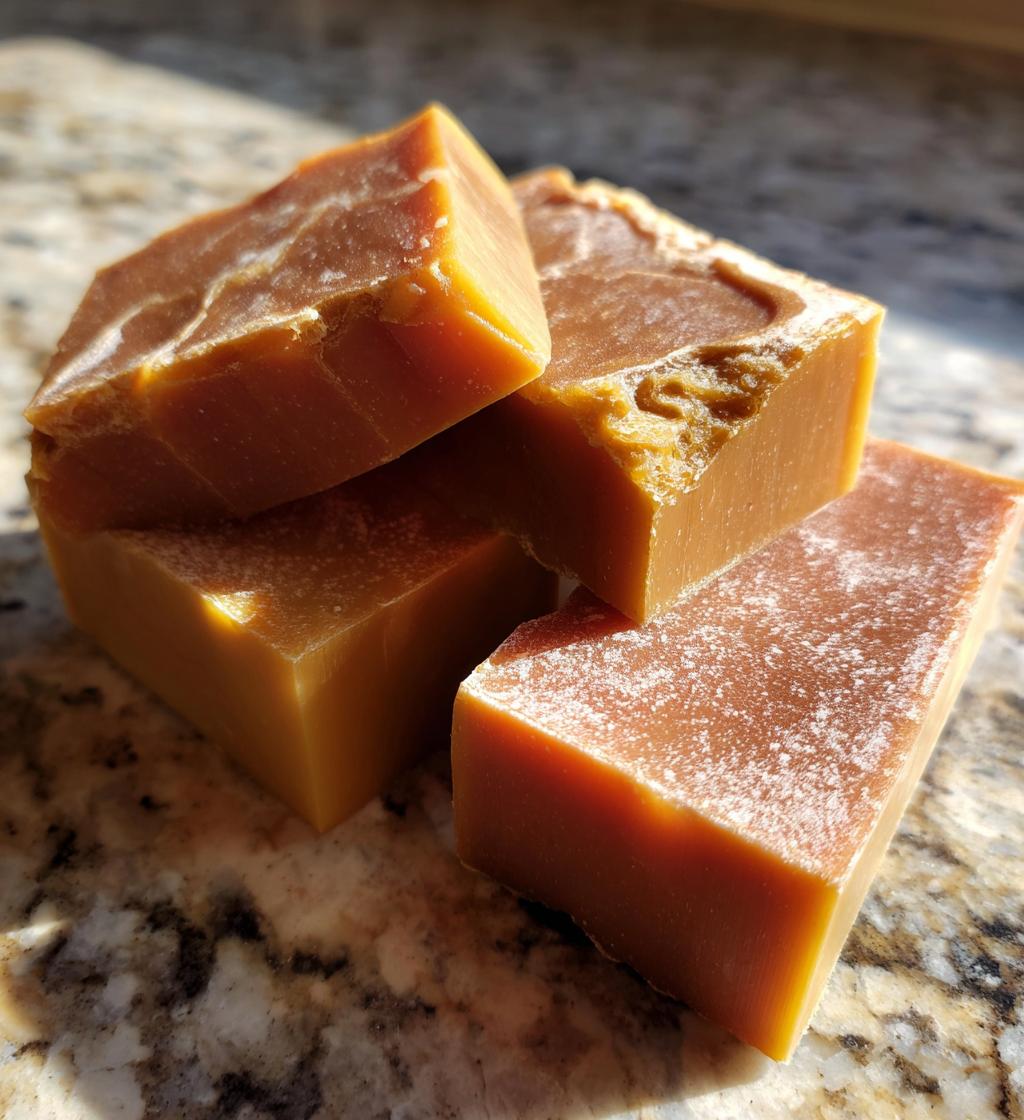
Hey there, friend! I can’t tell you how excited I am to share this homemade shampoo bar DIY soap recipe with you. Seriously, making your own shampoo bars is not just fun; it’s like giving your hair a big, nourishing hug! The beauty of it is in its simplicity. With just a handful of natural ingredients, you can create a product that cleanses and hydrates your hair without all those harsh chemicals you find in store-bought brands. Plus, there’s something so satisfying about crafting your own products, don’t you think? You’ll feel like a true alchemist in your kitchen!
Not to mention, you can customize the scents and properties of your shampoo bars to suit your unique hair needs. Whether you want a refreshing citrus kick or a calming lavender experience, the choice is yours! Trust me, once you see how easy it is to whip up these bars, you’ll never want to go back to commercial shampoos. So, let’s dive into this delightful adventure of DIY hair care!
Ingredients List
Here’s what you’ll need for this amazing homemade shampoo bar DIY soap recipe! Gather these ingredients, and let’s get started:
- 1 cup of coconut oil
- 1 cup of olive oil
- 1 cup of shea butter
- 1/2 cup of lye
- 1 cup of distilled water
- 20 drops of essential oil (optional, but highly recommended for that extra touch!)
Make sure to measure everything accurately—it’s key for getting that perfect consistency. The coconut oil and shea butter will give your hair that lovely moisture, while the olive oil will help with nourishment. And don’t forget the lye; it’s essential for the saponification process, which turns those lovely oils into your shampoo bars! Just remember to handle it with care. You’ve got this!
How to Prepare Instructions
Alright, let’s get into the nitty-gritty of making your homemade shampoo bar DIY soap! It might sound a bit daunting at first, but I promise, once you get the hang of it, you’ll be a pro in no time. Here’s how to do it:
- First things first, safety first! Put on your gloves and goggles because we’re working with lye. It’s super important to protect yourself here.
- In a well-ventilated area, measure and carefully mix the lye with the distilled water. Remember, always add lye to water, never the other way around! This mixture will get hot, so be cautious.
- While that’s cooling, grab a saucepan and heat the coconut oil, olive oil, and shea butter over low heat until everything is melted and combined. Just keep an eye on it, we don’t want it boiling!
- Once your lye mixture has cooled to about 100°F, it’s time to combine the two. Slowly pour the lye mixture into the oils while stirring gently. This is where the magic happens!
- Now, grab your immersion blender (or a regular blender if that’s what you have) and blend everything together until you reach “trace.” This means the mixture should thicken and leave a trail on the surface when you drizzle some from the blender. Exciting, right?
- If you’re adding essential oils (which I highly recommend for that wonderful fragrance!), now’s the time to mix them in. Stir it all together until well combined.
- Next, pour your lovely mixture into a mold. You can use silicone molds or even a lined baking dish—just make sure it’s something easy to remove the bars from later.
- Let your shampoo bars sit undisturbed for 24-48 hours. This is the hard part—waiting! But trust me, it’s so worth it.
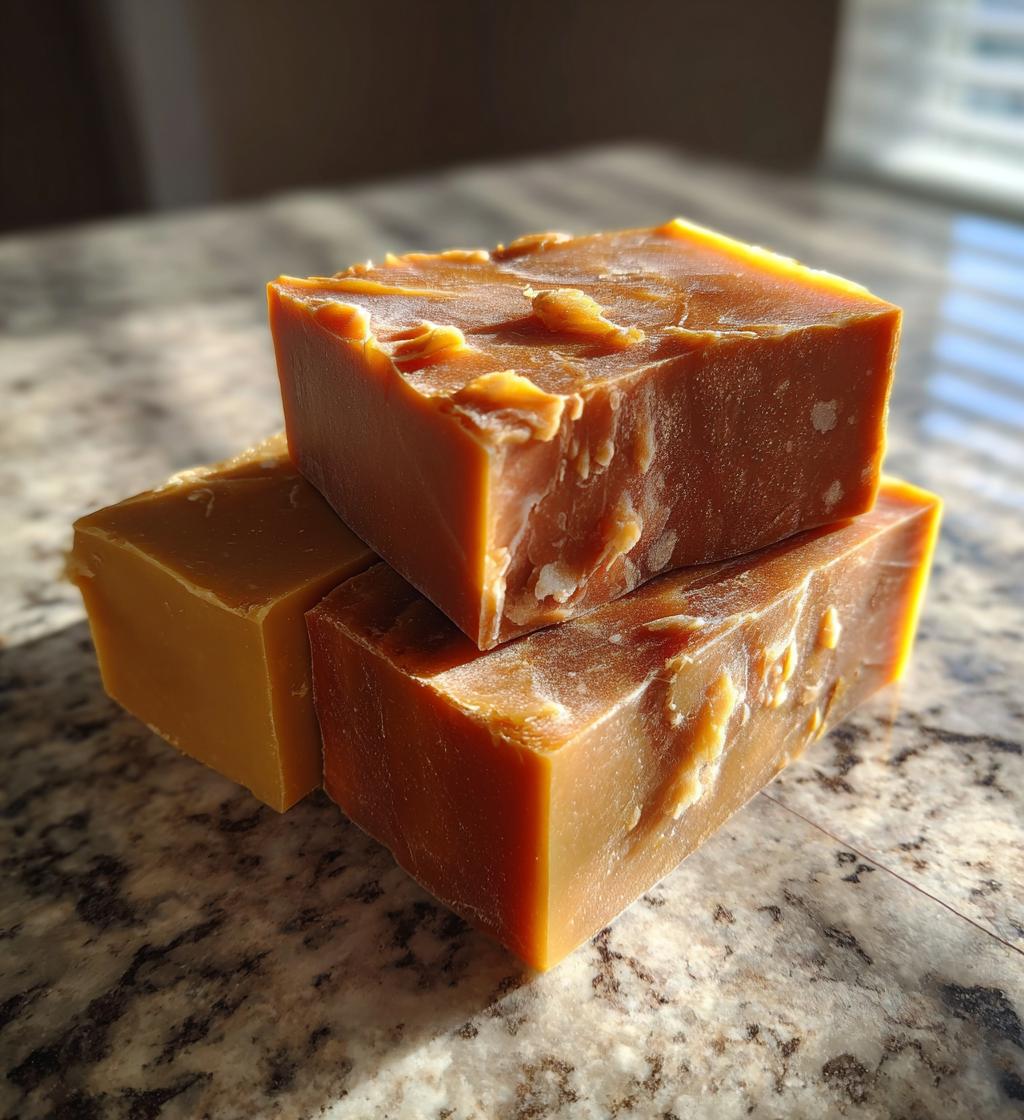
- Once they’ve hardened, remove the bars from the mold and cut them into pieces. You can make them whatever size you like—just remember, a little goes a long way!
- Finally, let the bars cure in a cool, dry place for 4-6 weeks before you use them. This step is crucial because it allows the lye to fully saponify and ensures your bars are safe and awesome for your hair.
And there you have it! Each step is important, so take your time and enjoy the process. You’re going to love the final product!
Nutritional Information Section
Now, let’s chat about the nutritional side of things! Since this homemade shampoo bar DIY soap recipe isn’t something you’ll be eating, it’s a bit tricky to nail down specific nutrition facts like you would for food. However, I can give you an idea of what’s typically found in a bar like this. Here’s an estimated breakdown:
- Calories: 0 (not consumed, just for hair!)
- Fat: 0g
- Protein: 0g
- Carbohydrates: 0g
- Sugar: 0g
- Sodium: 0mg
Since we’re using natural oils and butters, the benefits come more from the nourishing properties for your hair rather than traditional nutritional values. Just remember, these bars are all about giving your hair love and care, not about calories or fat content. It’s all good vibes here!
Why You’ll Love This Recipe
- Eco-friendly: Making your own shampoo bars cuts down on plastic waste from bottles. You’re helping the planet one wash at a time!
- Cost-effective: Once you’ve got your ingredients, you can create multiple bars for a fraction of the price of store-bought shampoo.
- Customizable: You get to choose the essential oils and additives that work best for your hair type. Want a lemony fresh scent or calming lavender? The choice is yours!
- Nourishing: Packed with natural oils and butters, these bars moisturize and nourish your hair, leaving it soft and shiny without the harsh chemicals.
- Simpler than you think: This recipe is straightforward, and once you get into the groove, you’ll find it’s easier than you imagined!
- Fun to make: There’s a certain joy in crafting your own products. You’ll feel accomplished every time you use your homemade shampoo!
- Great for gifting: These shampoo bars make lovely gifts for friends and family. Who wouldn’t love a handmade touch in their hair care routine?
Tips for Success
Alright, my friend! Let’s make sure you nail this homemade shampoo bar DIY soap recipe like a pro. Here are some of my favorite tips to help you along the way:
- Safety first: When working with lye, always wear gloves and goggles. It’s essential to protect yourself, as lye can be caustic. Make sure you’re in a well-ventilated area, too—I usually open a window or turn on a fan just to be safe!
- Precision is key: Use a digital kitchen scale for measuring your ingredients. Accurate measurements are crucial for the saponification process. Trust me, a little extra or less of lye can throw off your entire batch!
- Temperature matters: Wait until your lye mixture cools to about 100°F before combining it with the oils. If it’s too hot, it can affect the consistency and quality of your shampoo bars. A simple kitchen thermometer does wonders here!
- Blend gently: When you’re mixing the lye with the oils, go slow and steady. You want to avoid splashing, and this helps prevent any lye burns. Plus, blending until you reach trace can take a little time, so be patient!
- Check for trace: To achieve that perfect consistency, look for trace—when the mixture thickens and leaves a trail on the surface when you drizzle it. If it’s too runny, keep blending for a bit longer; you want it to hold together!
- Customize wisely: If you’re adding essential oils or other additives, do so gently. Start with a small amount, mix, and then smell. You can always add more, but it’s tough to tone down a strong scent!
- Patience pays off: Don’t rush the curing process! Allow your bars to cure for the full 4-6 weeks. This step is vital for ensuring the lye has saponified completely, making your bars safe and effective.
With these tips in your back pocket, you’re all set to create the most wonderful shampoo bars! It’s all about enjoying the process and having fun. You’ve got this!
Variations
Now that you’ve got the basics down, let’s have some fun with variations on this homemade shampoo bar DIY soap recipe! The beauty of creating your own shampoo bars is the ability to customize them to fit your specific needs and preferences. Here are some delightful ideas to make your bars even more special:
- Essential Oils: Play around with different essential oils! For a refreshing boost, try adding peppermint or eucalyptus. If you prefer something calming, lavender or chamomile works wonders. Just remember, start with a small amount and adjust based on your preference.
- Colorants: Want to add a pop of color? You can use natural colorants like turmeric for a warm yellow hue or spirulina for a lovely green. Just mix a little into your oils before blending with the lye, and watch your bars come to life!
- Additives: For added benefits, consider incorporating ingredients like honey for its moisturizing properties, or aloe vera gel to soothe the scalp. Simply mix these into your oils before combining with the lye.
- Herbal Infusions: Infuse your oils with dried herbs like rosemary or hibiscus beforehand. Just warm the oils with the herbs, let them steep, and strain before using. It gives a lovely natural scent and additional nourishments!
- Exfoliants: If you want a gentle scrub in your shampoo bar, try adding finely ground oats or poppy seeds. These can help exfoliate the scalp while you wash, giving you a refreshing feel!
- Hair Type Specific: Tailor your bars to your hair type! If you have oily hair, you might want to add a few drops of tea tree oil for its clarifying properties. For dry or damaged hair, consider adding a bit of argan oil for extra moisture.
These variations not only make your shampoo bars unique but also tailor them to your hair’s needs. So go ahead, experiment a little, and let your creativity shine! You’ll be amazed at how much fun it is to create your perfect shampoo bar!
Storage & Reheating Instructions
Once your homemade shampoo bars have gone through their curing process, it’s time to talk about how to store them properly so they stay fresh and ready to pamper your hair! Here’s how to keep those beauties in tip-top shape:
- Keep them dry: Store your shampoo bars in a cool, dry place away from direct sunlight. Moisture is not your friend here! A well-ventilated area is ideal to prevent any unwanted softness.
- Use a dish or container: Consider placing your bars on a soap dish with drainage holes or in a breathable container. This helps them dry out between uses and keeps them from turning mushy!
- Avoid plastic wrap: While it might seem convenient, wrapping your bars in plastic can trap moisture and lead to spoilage. Stick to breathable options instead.
- Shelf life: Your shampoo bars should last quite a while—typically around 6 months to a year if stored correctly. Just keep an eye out for any changes in color or scent, and if they look or smell off, it’s best to toss them.
- After curing: Once your bars are fully cured and ready to use, you can simply wet your hair, rub the bar directly on your scalp, and then work it through your hair like you would with any regular shampoo. Rinse thoroughly and enjoy the lovely lather!
So, there you have it! With these storage tips, your homemade shampoo bars will be ready whenever you need them. Enjoy that fresh, clean hair, my friend!
FAQ Section
Hey there! I know you might have some questions about this homemade shampoo bar DIY soap recipe, and I’m here to help! Here are some of the most common inquiries I get, along with my answers:
Can I substitute the lye with something else?
Nope! Lye is essential for the saponification process, which turns the oils into soap. There’s no good substitute for it in this recipe, so make sure you use it safely and correctly.
Is handling lye really safe?
Absolutely, as long as you take the right precautions! Always wear gloves and goggles, and work in a well-ventilated area. Follow the instructions carefully, and you’ll be just fine. Just remember, safety first!
How do I know when the bars are ready to use?
Your shampoo bars need to cure for 4-6 weeks before they’re safe and effective for use. This allows the lye to fully saponify. You can tell they’re ready when they feel hard and have no residual lye smell. Patience is key here, but it’s worth the wait!
Can I use different oils?
Yes, you can! While this recipe uses coconut oil, olive oil, and shea butter, you can experiment with other oils like sweet almond oil or avocado oil. Just keep in mind that different oils have different properties, so they may change the texture and benefits of your bars.
What if I don’t have a mold?
No worries! You can use a lined baking dish or even silicone molds if you have them. Just ensure that whatever you use can be easily removed after the bars harden.
Can I add color to my shampoo bars?
Absolutely! Natural colorants like beet powder or spirulina can add some lovely hues to your bars. Just mix a small amount into your oils before combining them with the lye.
What if my bars are too soft or crumbly?
If your bars are too soft, it might be due to incorrect lye measurements or not allowing enough curing time. If they crumble, it could be from too much lye. The best way to avoid these issues is to measure carefully and stick to the recipe. If you need to, you can always re-batch them!
Got more questions? Don’t hesitate to reach out! I’m here to help you every step of the way on your shampoo bar journey. Enjoy the process, and happy crafting!
Print
Homemade Shampoo Bar DIY Soap Recipe: 7 Secrets Revealed
- Prep Time: 30 minutes
- Cook Time: 0 minutes
- Total Time: 4-6 weeks
- Yield: 5-10 bars 1x
- Category: Hair Care
- Method: Cold Process
- Cuisine: N/A
- Diet: Vegan
Description
This is a simple homemade shampoo bar recipe for a DIY soap that cleanses and nourishes your hair.
Ingredients
- 1 cup of coconut oil
- 1 cup of olive oil
- 1 cup of shea butter
- 1/2 cup of lye
- 1 cup of distilled water
- 20 drops of essential oil (optional)
Instructions
- Measure and mix the lye with distilled water in a well-ventilated area.
- Heat coconut oil, olive oil, and shea butter until melted.
- Allow the lye mixture to cool to about 100°F.
- Combine the lye mixture with the oils and blend until trace.
- Add essential oils if desired and mix well.
- Pour the mixture into a mold and let it sit for 24-48 hours.
- Remove the shampoo bar from the mold and cut into pieces.
- Allow the bars to cure for 4-6 weeks before use.
Notes
- Wear gloves and goggles when handling lye.
- Use a scale for accurate ingredient measurement.
- Customize with your favorite essential oils.
Nutrition
- Serving Size: 1 bar
- Calories: 0
- Sugar: 0g
- Sodium: 0mg
- Fat: 0g
- Saturated Fat: 0g
- Unsaturated Fat: 0g
- Trans Fat: 0g
- Carbohydrates: 0g
- Fiber: 0g
- Protein: 0g
- Cholesterol: 0mg
Keywords: homemade shampoo bar, diy soap recipe, natural hair care