
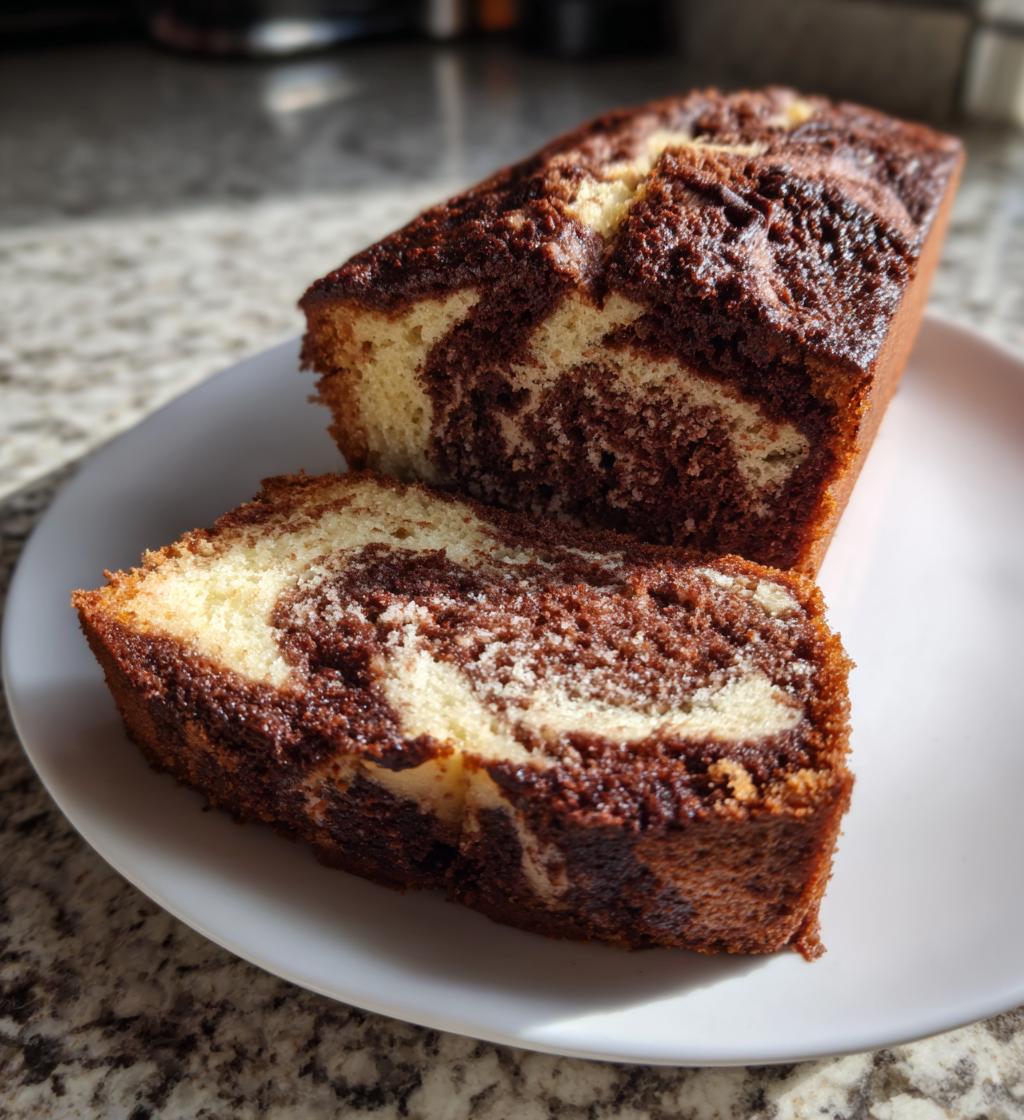
Oh, let me tell you about my *black marble cake*! It’s a delightful blend of rich chocolate and sweet vanilla flavors swirling together in the most beautiful way. Every time I bake this cake, it feels like a little celebration of life! The way the dark cocoa and creamy batter come together creates such a stunning, marbled effect. Trust me, it’s just as pleasing to the eyes as it is to the taste buds!
This cake is incredibly moist and flavorful, making it perfect for any occasion. Whether you’re celebrating a birthday, hosting a get-together, or just treating yourself (because you totally deserve it!), this black marble cake is sure to impress. Plus, it’s surprisingly simple to make! I can’t wait for you to try it and see how quickly it disappears at your table!
Ingredients List
Gathering the right ingredients is the first step toward creating that scrumptious black marble cake! Here’s what you’ll need:
- 1 3/4 cups all-purpose flour – This is the base of your cake, giving it the perfect structure.
- 1 1/2 teaspoons baking powder – This helps the cake rise beautifully, so it’s nice and fluffy!
- 1/2 teaspoon salt – Just a pinch to enhance all those lovely flavors.
- 1/2 cup unsalted butter, softened – Make sure it’s soft so it blends easily with the sugar for that perfect creamy texture.
- 1 cup granulated sugar – This sweetens the cake and helps with that lovely moistness.
- 2 large eggs – They add richness and help bind everything together.
- 1 teaspoon vanilla extract – This is my secret weapon for a wonderful aroma and flavor boost!
- 1/2 cup milk – It keeps the batter smooth and adds moisture to the cake.
- 1/2 cup cocoa powder – The star of the show for that rich chocolatey goodness.
- 1/4 cup hot water – This helps dissolve the cocoa powder and intensifies the chocolate flavor.
Make sure you have everything ready before you start baking. It makes the process so much smoother and more enjoyable! Happy baking!
How to Prepare Black Marble Cake
Now that we’ve got our ingredients ready, let’s dive into the fun part—making this fantastic black marble cake! I promise, following these steps will have you on your way to baking bliss.
Prepping the Batter
First things first, preheat your oven to 350°F (175°C). This is crucial so your cake bakes evenly and perfectly! While that’s heating up, grab a 9-inch round cake pan and grease it with a bit of butter or non-stick spray, then dust it with flour. This will help your cake slide right out when it’s done. Now, in a medium bowl, whisk together your flour, baking powder, and salt until well combined. This step helps to ensure even rising!
Next, in a large mixing bowl, cream your softened butter and granulated sugar together. I like to use an electric mixer for this—it makes the process so much easier and gives the batter that light, fluffy texture we all love! Beat it until it’s pale and fluffy, which usually takes about 3-5 minutes. Then, add in your eggs one at a time, mixing well after each addition. Don’t forget to scrape down the sides of the bowl to make sure everything is well combined. Now, stir in that glorious vanilla extract!
After that, it’s time to bring the dry ingredients into the mix. Gradually add the flour mixture and the milk, alternating between the two, and mix just until combined. We want to avoid overmixing here; a few lumps are totally fine. Your batter should be smooth and creamy!
Creating the Marble Effect
Alright, now for the fun part—creating that stunning marble effect! Divide your batter in half, placing one half in a separate bowl. In the bowl with one half of the batter, mix in the cocoa powder and hot water until it’s well combined. This will give you that rich chocolatey batter that makes the marble cake so special.
Now, here’s the trick: using a spoon, drop alternating spoonfuls of the vanilla and chocolate batters into the center of the prepared cake pan. Don’t worry about being perfect—just aim for a random pattern! Once both batters are in the pan, take a knife and gently swirl through the batters. I like to use a figure-eight motion; this helps create that gorgeous marbled look. Just be careful not to overdo it; we want to see those lovely swirls!
Baking Instructions
Now, it’s time to pop that beauty into the oven! Bake your black marble cake for about 30-35 minutes. You’ll know it’s done when a toothpick inserted into the center comes out clean—or with just a few crumbs attached. It’s super important to keep an eye on it towards the end of the baking time, as every oven can be a bit different.
Once it’s done, remove the cake from the oven and let it cool in the pan for about 10 minutes. After that, carefully run a knife around the edges to loosen it, then flip it out onto a wire rack to cool completely. Trust me, the aroma wafting through your kitchen is going to be heavenly!
Why You’ll Love This Recipe
- Quick and Easy Preparation: With just a handful of simple steps, you can whip up this gorgeous cake in no time!
- Rich, Decadent Flavors: The combination of chocolate and vanilla creates a mouthwatering flavor that’s hard to resist.
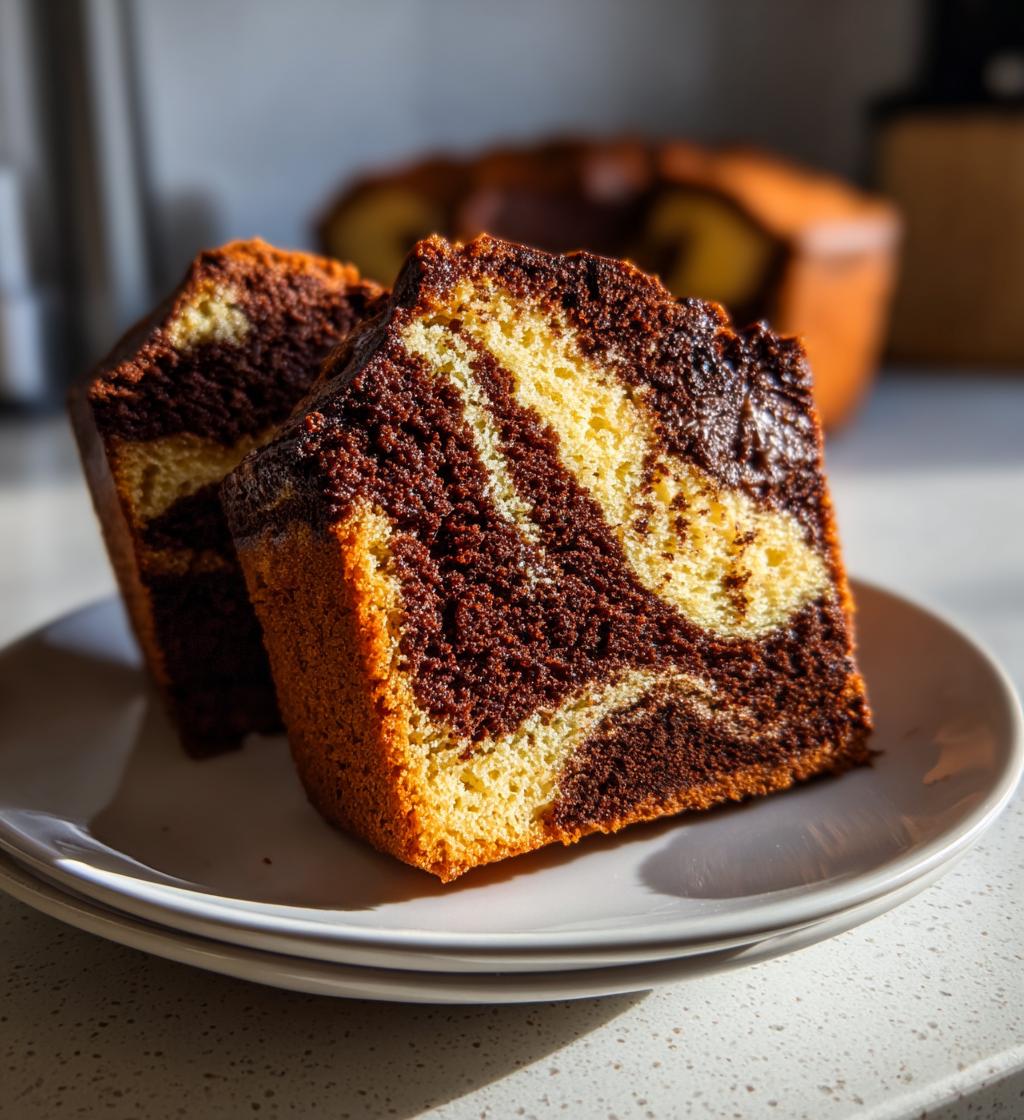
- Stunning Visual Appeal: The marbled effect not only looks impressive but also makes each slice a work of art.
- Perfect for Any Occasion: Whether it’s a birthday, holiday, or just a weekend treat, this cake fits the bill!
- Moist and Tender Texture: Every bite is so soft and moist—you won’t be able to stop at just one slice!
- Customizable: Feel free to add your favorite mix-ins like chocolate chips or nuts for extra flavor!
Nutritional Information
Now, let’s chat about the nutritional info for this delicious black marble cake! Each slice is approximately:
- Calories: 250
- Sugar: 15g
- Sodium: 150mg
- Fat: 10g
- Saturated Fat: 6g
- Unsaturated Fat: 4g
- Trans Fat: 0g
- Carbohydrates: 36g
- Fiber: 1g
- Protein: 3g
- Cholesterol: 40mg
Keep in mind, these values can vary based on the specific ingredients and brands you use. So, if you’re counting calories or tracking macros, it’s best to double-check with your own ingredients. Happy baking and enjoy every slice!
Tips for Success
Now that you’re all set to make this delicious black marble cake, let me share some of my favorite tips to ensure it turns out perfectly every time!
- Use Room Temperature Ingredients: Make sure your butter, eggs, and milk are at room temperature before you start. This helps them mix together more smoothly, resulting in a lighter cake.
- Don’t Overmix: When you combine the wet and dry ingredients, mix just until everything is combined. Overmixing can lead to a dense cake, and nobody wants that!
- Measure Flour Correctly: To avoid a heavy cake, spoon the flour into your measuring cup and level it off with a knife. Pressing the flour down into the cup can lead to too much flour, which can affect the texture.
- Use High-Quality Cocoa Powder: For that deep chocolate flavor, choose a good quality cocoa powder. Trust me, it makes a big difference!
- Swirl with Care: When creating the marble effect, don’t overdo the swirling! You want to maintain those beautiful layers while gently blending them—not create a solid color.
- Check for Doneness: Ovens can vary, so start checking your cake a few minutes before the recommended time. A toothpick inserted into the center should come out clean or with just a few crumbs.
- Let It Cool: Allow your cake to cool in the pan for about 10 minutes before transferring it to a wire rack. This helps prevent it from breaking apart.
- Enhance the Flavor: For an extra layer of deliciousness, consider adding a teaspoon of espresso powder to the chocolate batter. It deepens the chocolate flavor without tasting like coffee!
With these tips in your back pocket, you’re ready to conquer the kitchen! I can’t wait for you to enjoy this beautiful black marble cake! Happy baking!
Variations
If you’re feeling a bit adventurous and want to mix things up with your black marble cake, I’ve got some fabulous ideas for variations! Each one brings its own unique twist to this already delightful dessert. Trust me, you’re going to want to try some of these!
- Chocolate Chip Marble Cake: Fold in a cup of chocolate chips into the vanilla batter for an extra burst of chocolatey goodness in every slice. They’ll melt slightly while baking, creating pockets of gooey chocolate!
- Nutty Delight: Add chopped nuts like walnuts or pecans to the chocolate batter for a lovely crunch. The combination of textures will elevate your cake to a whole new level!
- Mint Chocolate Marble: Swap out the vanilla extract for peppermint extract in the vanilla batter. It’s a refreshing take that’s especially delightful around the holidays!
- Fruit Infusion: Add a cup of your favorite berries—like raspberries or blueberries—into the vanilla batter. It adds a burst of flavor and a pop of color, making each slice even more appealing!
- Spiced Marble Cake: Incorporate a teaspoon of cinnamon or nutmeg into the vanilla batter for a warm, cozy flavor. It’s perfect for those chilly days when you want something comforting!
- Caramel Swirl: Drizzle some caramel sauce between the layers of batters before swirling for a decadent caramel marble effect. It’s sweet, sticky, and utterly irresistible!
- Layered Cake: Instead of marble, bake two separate cakes—one chocolate and one vanilla—and layer them with frosting in between. It’s a showstopper for any celebration!
Feel free to experiment and let your creativity shine! Each variation can take this black marble cake from delicious to downright extraordinary. I can’t wait to hear what you come up with!
Storage & Reheating Instructions
Now that you’ve got this gorgeous black marble cake baked and ready to enjoy, let’s talk about how to keep it fresh and delicious! Proper storage is key to maintaining that scrumptious flavor and moist texture.
To store leftovers, allow the cake to cool completely before wrapping it up. I like to place it in an airtight container or cover it tightly with plastic wrap. This helps keep it moist and prevents it from absorbing any weird odors from your fridge. If you want to keep it even fresher, you can also store it in the freezer! Just slice it first, wrap each slice individually in plastic wrap, and then place the slices in a freezer-safe bag. This way, you can grab a piece whenever the craving strikes!
When it comes to reheating, there are a couple of options. If you’re in a hurry, you can pop a slice in the microwave for about 10-15 seconds—just enough to warm it up without drying it out. If you prefer a more evenly heated slice, you can use the oven. Preheat it to 350°F (175°C), place the slice on a baking sheet, and warm it for about 5-10 minutes. This method brings back that fresh-baked taste, and the aroma will fill your kitchen again!
Whether you’re enjoying it cold or warmed up, this black marble cake is sure to be a treat. Enjoy every last bite!
FAQ Section
Got questions about this delightful black marble cake? Don’t worry, I’ve got you covered! Here are some common inquiries I get, along with my trusty answers:
Can I use different types of flour?
Absolutely! You can try using cake flour for an even lighter texture. Just keep in mind that if you switch to a gluten-free flour, the texture might change a bit. Always check the packaging for any specific instructions!
What can I substitute for eggs?
If you’re looking for an egg alternative, you can use unsweetened applesauce—about 1/4 cup for each egg. It keeps the cake moist and adds a hint of sweetness. Another option is a flaxseed meal mixture; just mix one tablespoon of flaxseed meal with three tablespoons of water and let it sit for a few minutes until it thickens.
Can I make this cake ahead of time?
You bet! This black marble cake stays delicious for a few days when stored properly. You can bake it a day in advance and keep it covered. Just make sure it cools completely before wrapping it up to keep it moist!
What’s the best way to serve this cake?
This cake is divine on its own, but you can elevate it even more! Serve it with a dollop of whipped cream, a scoop of vanilla ice cream, or a drizzle of chocolate ganache on top. It’s also great with fresh berries or a sprinkle of powdered sugar for a lovely finishing touch!
Can I freeze the black marble cake?
Yes! It freezes beautifully. Just wrap individual slices in plastic wrap and store them in a freezer-safe bag. When you’re ready to enjoy, thaw in the fridge overnight or warm it up in the microwave for a cozy treat!
Print
Black Marble Cake: 7 Steps to Irresistible Delight
- Prep Time: 15 minutes
- Cook Time: 35 minutes
- Total Time: 50 minutes
- Yield: 8 servings 1x
- Category: Dessert
- Method: Baking
- Cuisine: American
- Diet: Vegetarian
Description
A rich and moist black marble cake with a delightful blend of chocolate and vanilla flavors.
Ingredients
- 1 3/4 cups all-purpose flour
- 1 1/2 teaspoons baking powder
- 1/2 teaspoon salt
- 1/2 cup unsalted butter, softened
- 1 cup granulated sugar
- 2 large eggs
- 1 teaspoon vanilla extract
- 1/2 cup milk
- 1/2 cup cocoa powder
- 1/4 cup hot water
Instructions
- Preheat your oven to 350°F (175°C).
- Grease and flour a 9-inch round cake pan.
- In a bowl, mix flour, baking powder, and salt.
- In another bowl, cream butter and sugar until light and fluffy.
- Add eggs, one at a time, mixing well after each.
- Stir in vanilla extract.
- Gradually add dry ingredients and milk, alternating them.
- Divide the batter in half. Mix cocoa powder and hot water into one half.
- In the prepared pan, pour spoonfuls of both batters, alternating them.
- Use a knife to swirl the batters together for a marble effect.
- Bake for 30-35 minutes or until a toothpick comes out clean.
- Allow to cool before removing from the pan.
Notes
- Store leftovers in an airtight container.
- Can be served with whipped cream or icing.
- For a richer flavor, add chocolate chips to the batter.
Nutrition
- Serving Size: 1 slice
- Calories: 250
- Sugar: 15g
- Sodium: 150mg
- Fat: 10g
- Saturated Fat: 6g
- Unsaturated Fat: 4g
- Trans Fat: 0g
- Carbohydrates: 36g
- Fiber: 1g
- Protein: 3g
- Cholesterol: 40mg
Keywords: black marble cake, chocolate cake, vanilla cake, dessert recipe